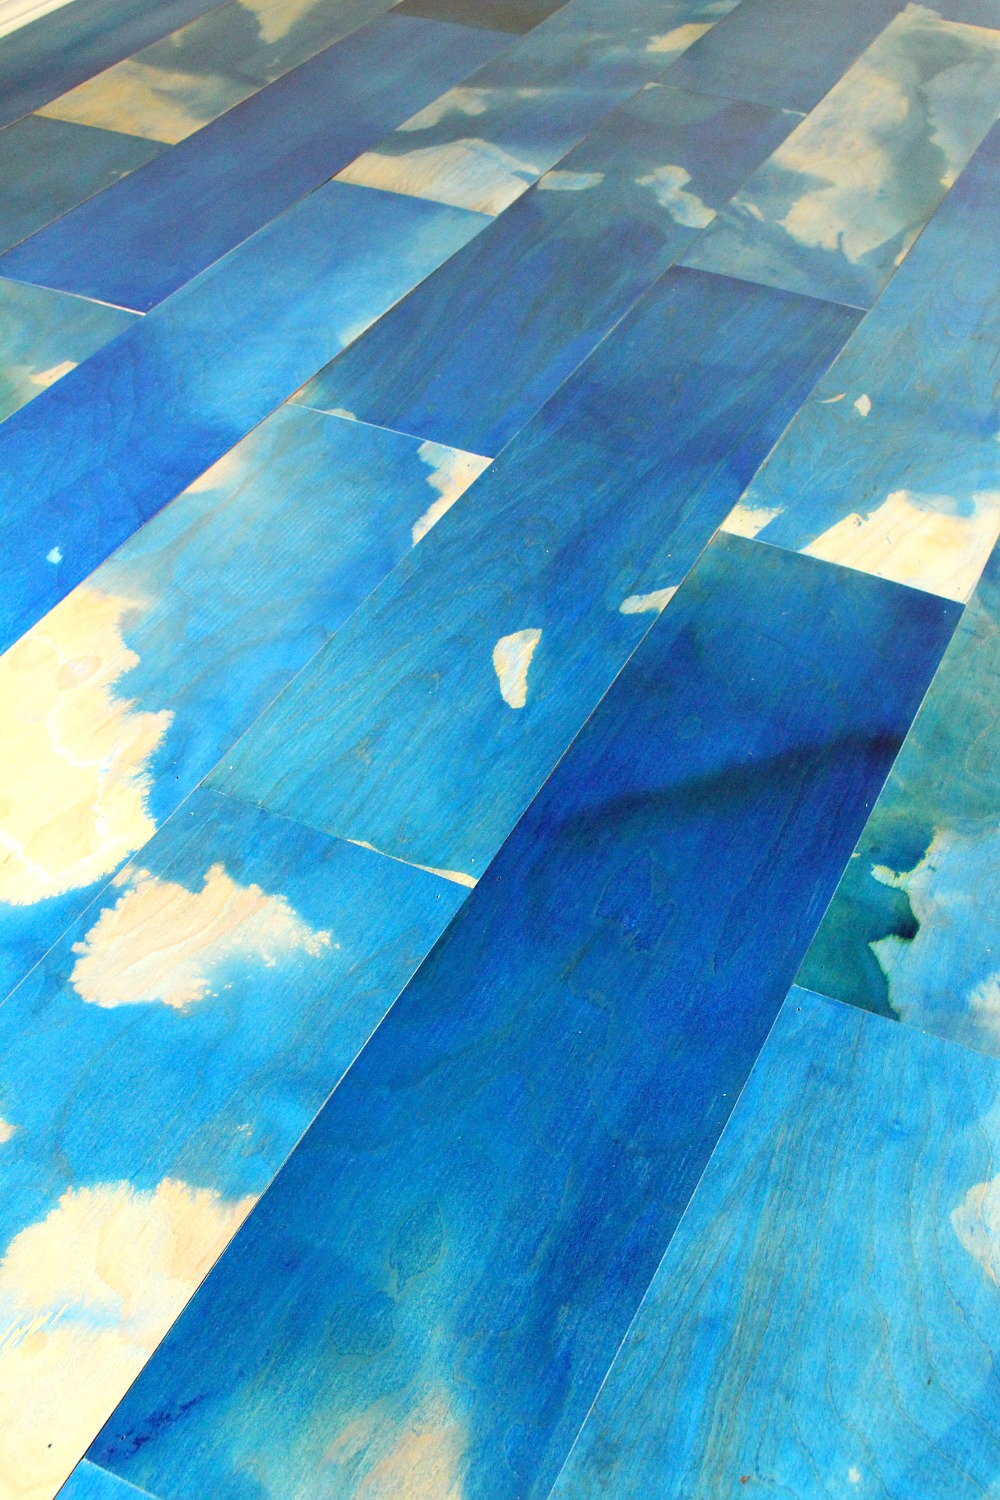
Last week I gave you a sneak peek of the DIY plywood floor for the fish room. I showed you my inspiration and how I created that watercolor/marbled effect with blue wood stain. Today I’m breaking down how Handy Hubby and I turned those plywood sheets into vibrant DIY flooring!
How to Make a DIY Plywood Floor
One quick note: if you’re not planning on doing a watercolor effect like I did, then set aside staining/painting/clear coating until the floor is installed because the planks do need a light sand on the edges once they’re cut and this can mar a finish. As you saw, I did apply my stain first because I wanted to create a large design before cutting up the plywood.
Supplies for a DIY Plywood Floor:
- Good One Side Plywood (we used 1/4″ Maple)
- LePage PL Premium Construction Adhesive
- Caulking Gun
- Air Nailer + Nails (size depends on floor thickness)
- Compressor
- Chalk Snap Line
- Table Saw
- Mitre Saw
- Jig Saw
- Sand Paper
- Finitec 3000 Water Based Polyurethane Hardwood Floor Finish (Semi-gloss)
Cutting the Plywood Floor Planks:
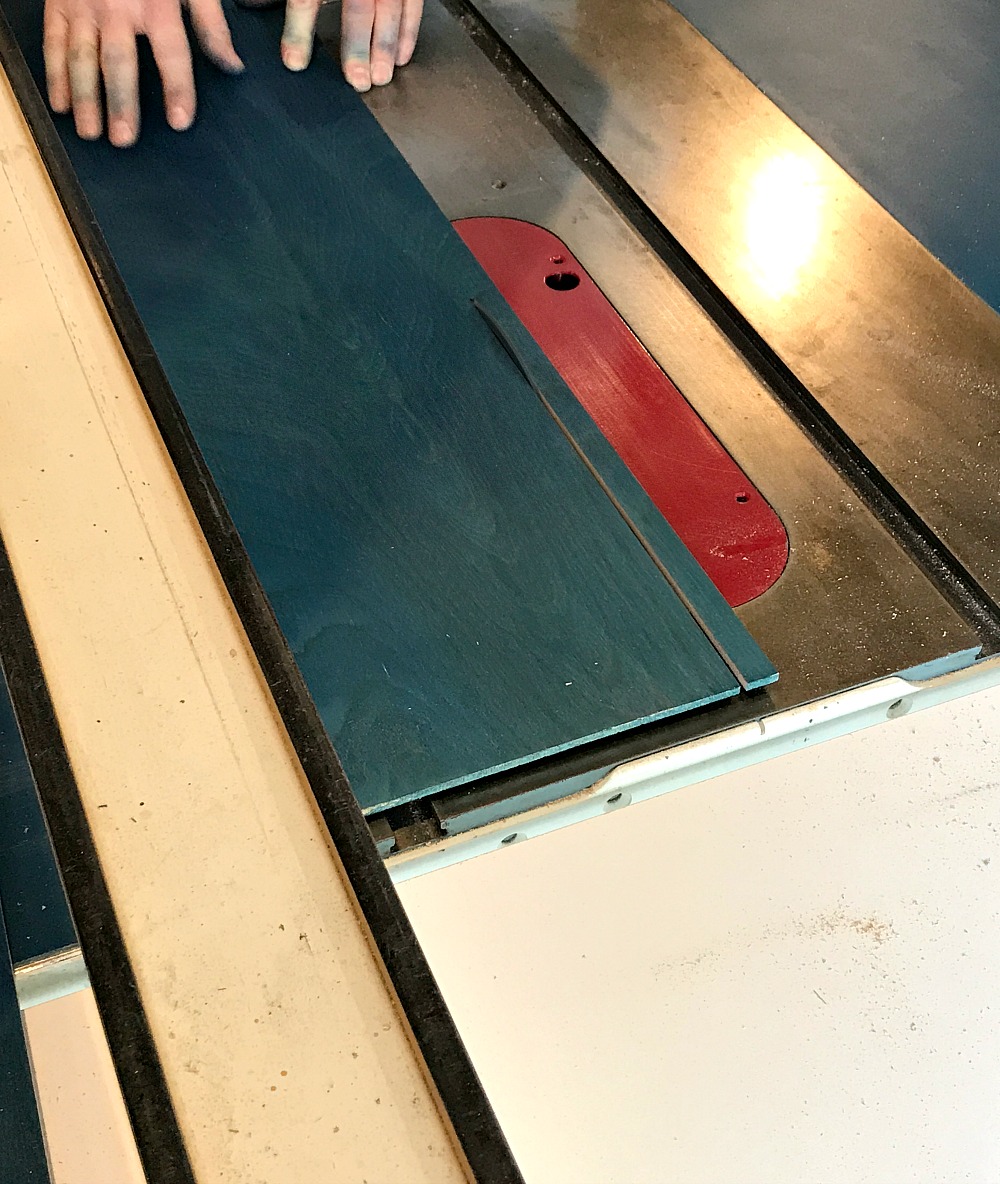
Did I mention that we finally have a table saw? I’ve long bemoaned our lack of a table saw and after years of using his, my woodworker father-in-law hooked us up with a great previously-loved one for an amazing price (an older version of this, for only $300)! With our new-to-us table saw, we ripped the plywood boards into approximately 7.25″ wide strips. The length and size is really up to you. Too wide and the planks might cup, too narrow and it will be tons of extra work.
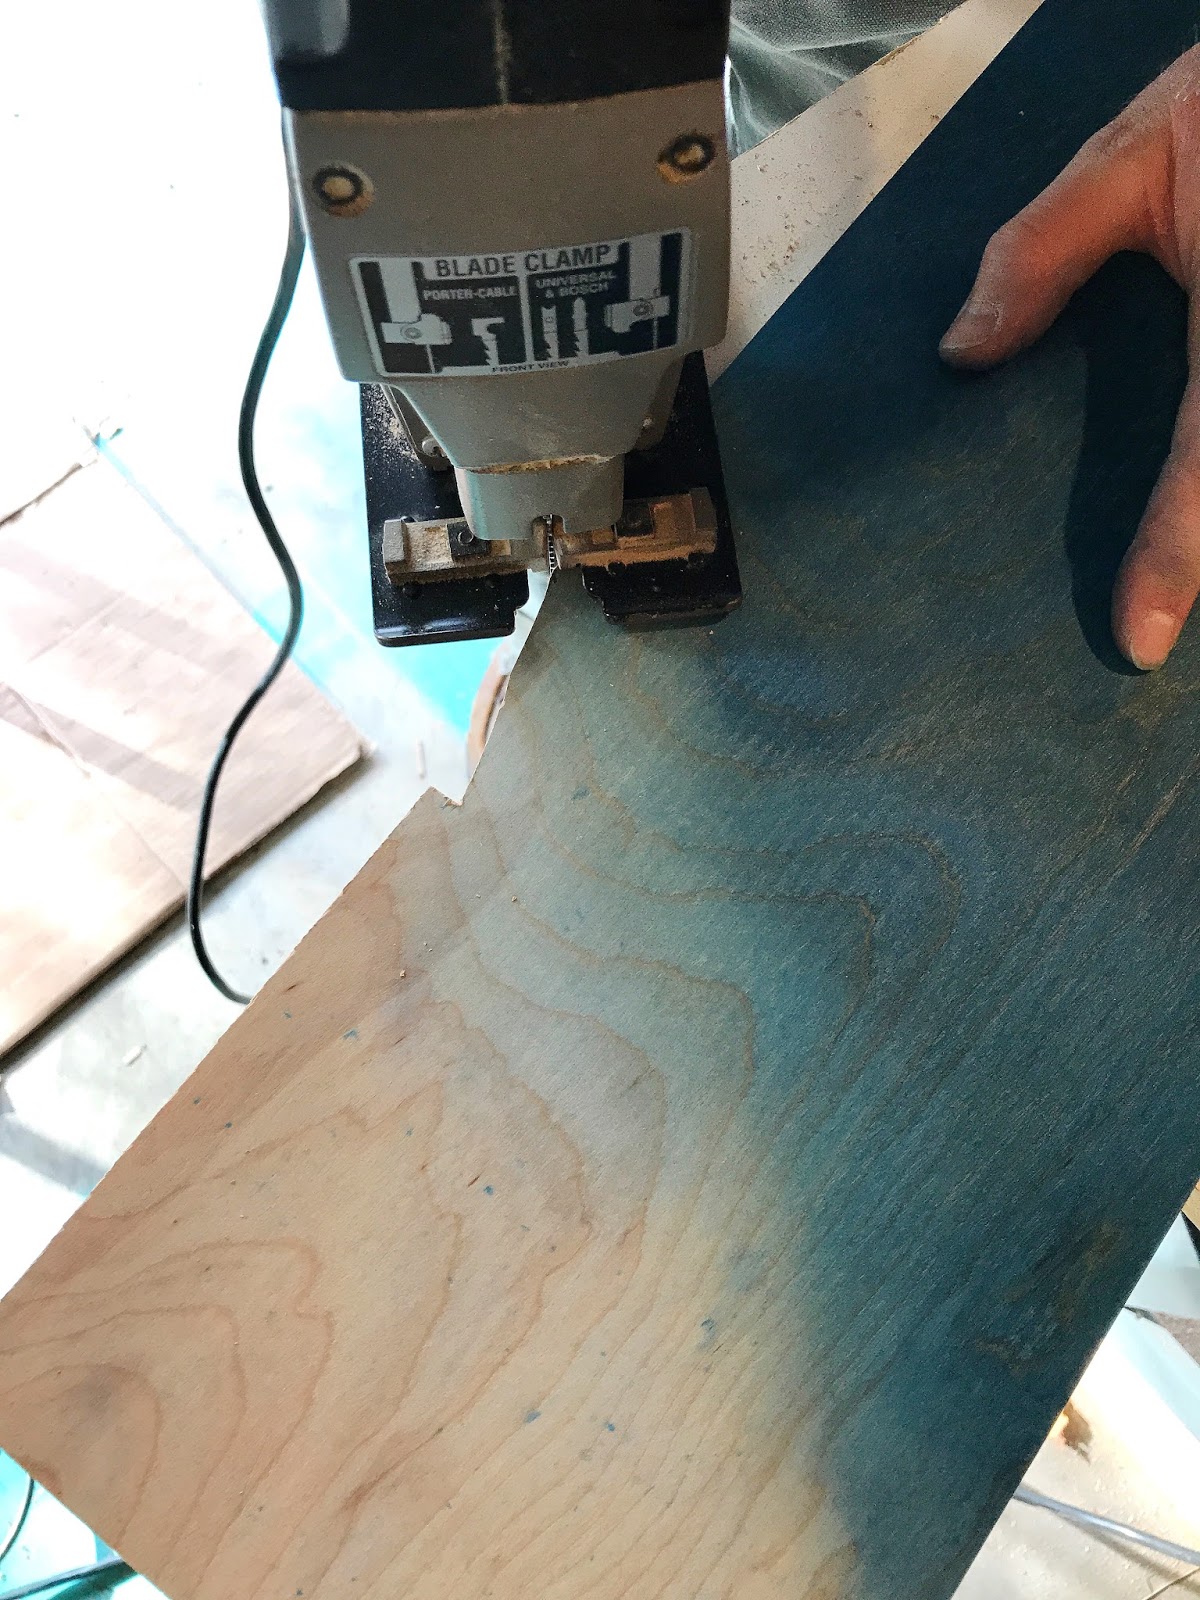
I don’t have many photos because it took both of us to maneuver these sheets, but I think this step is pretty straightforward. My two tips: cut the plywood sheets with the good side up, so most of the tear out will be on the bottom, and make sure to be really careful about cutting the boards with straight edges because any curve in the cuts will turn into gaps on install.

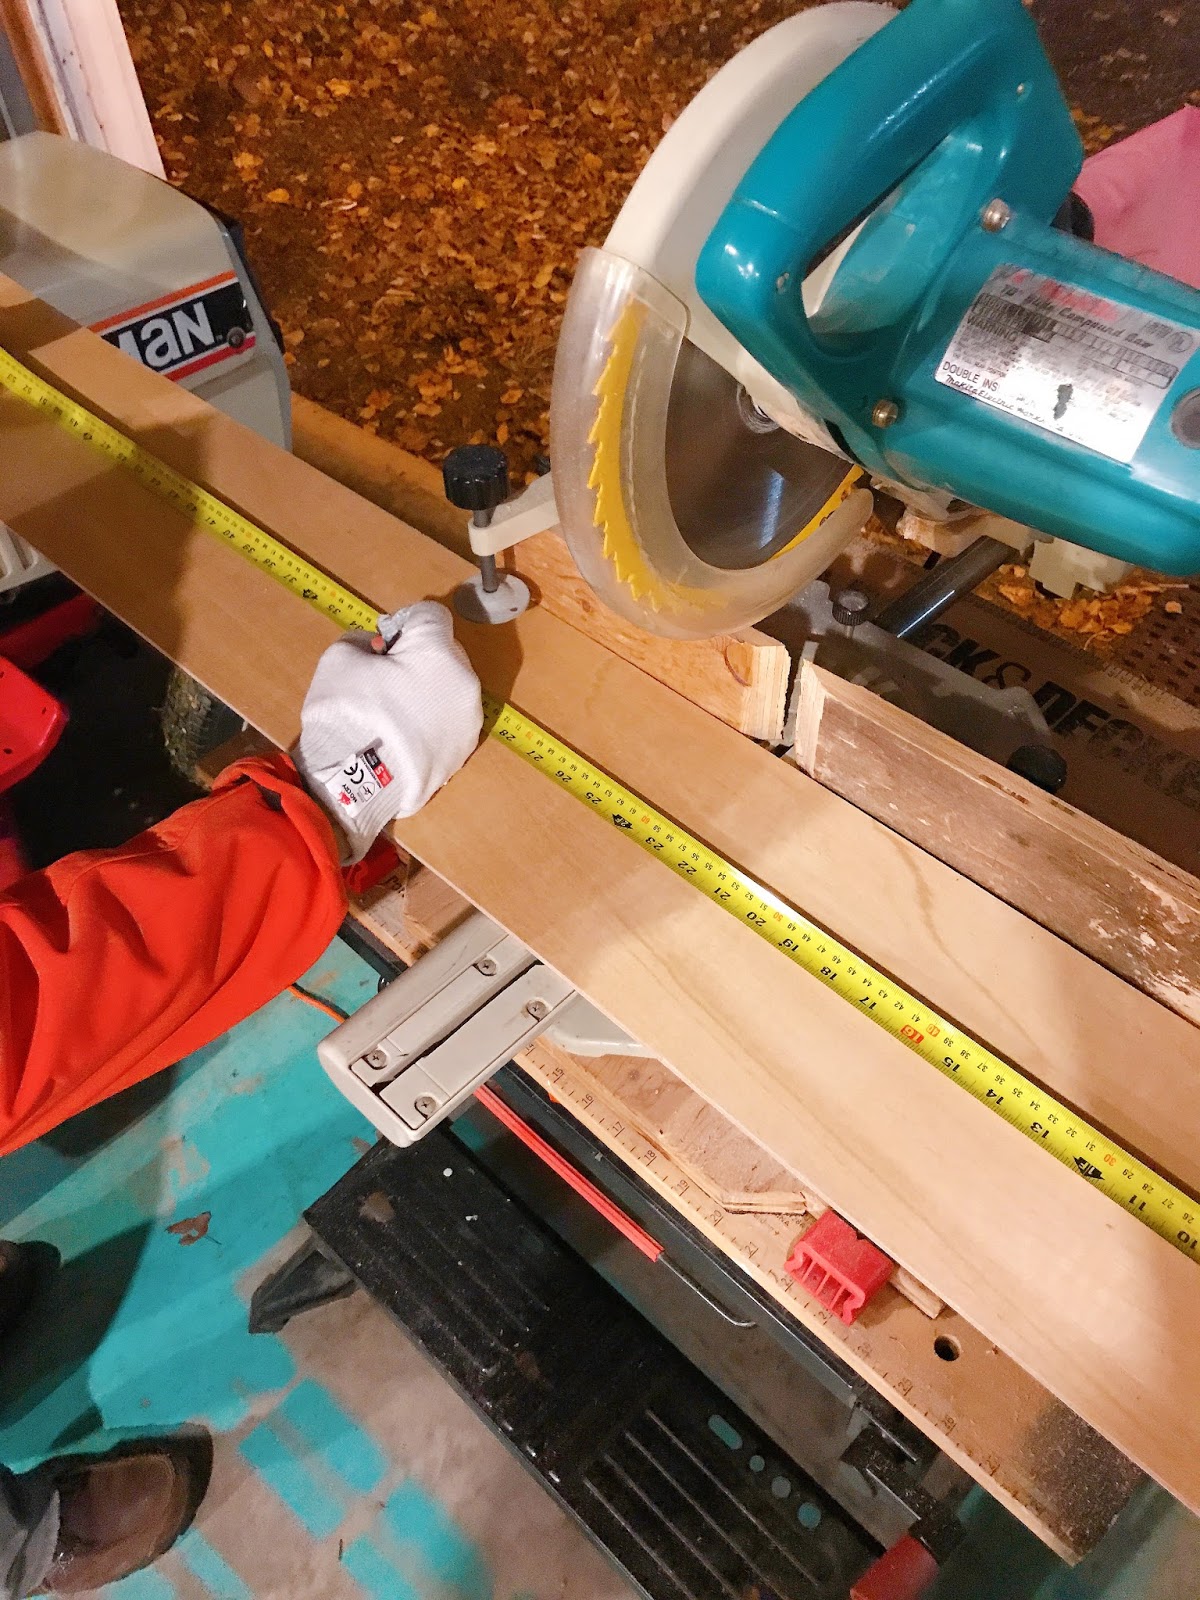
Next we used our trusty mitre saw and cut the boards into 31″ lengths – again, this measurement is totally up to you and you can even vary the lengths to mimic hardwood. I just wanted a pattern that was simple so I could focus on the color when laying out my pattern, without the added headache of sorting through boards of different lengths.

Sanding the Plywood Floor Planks:
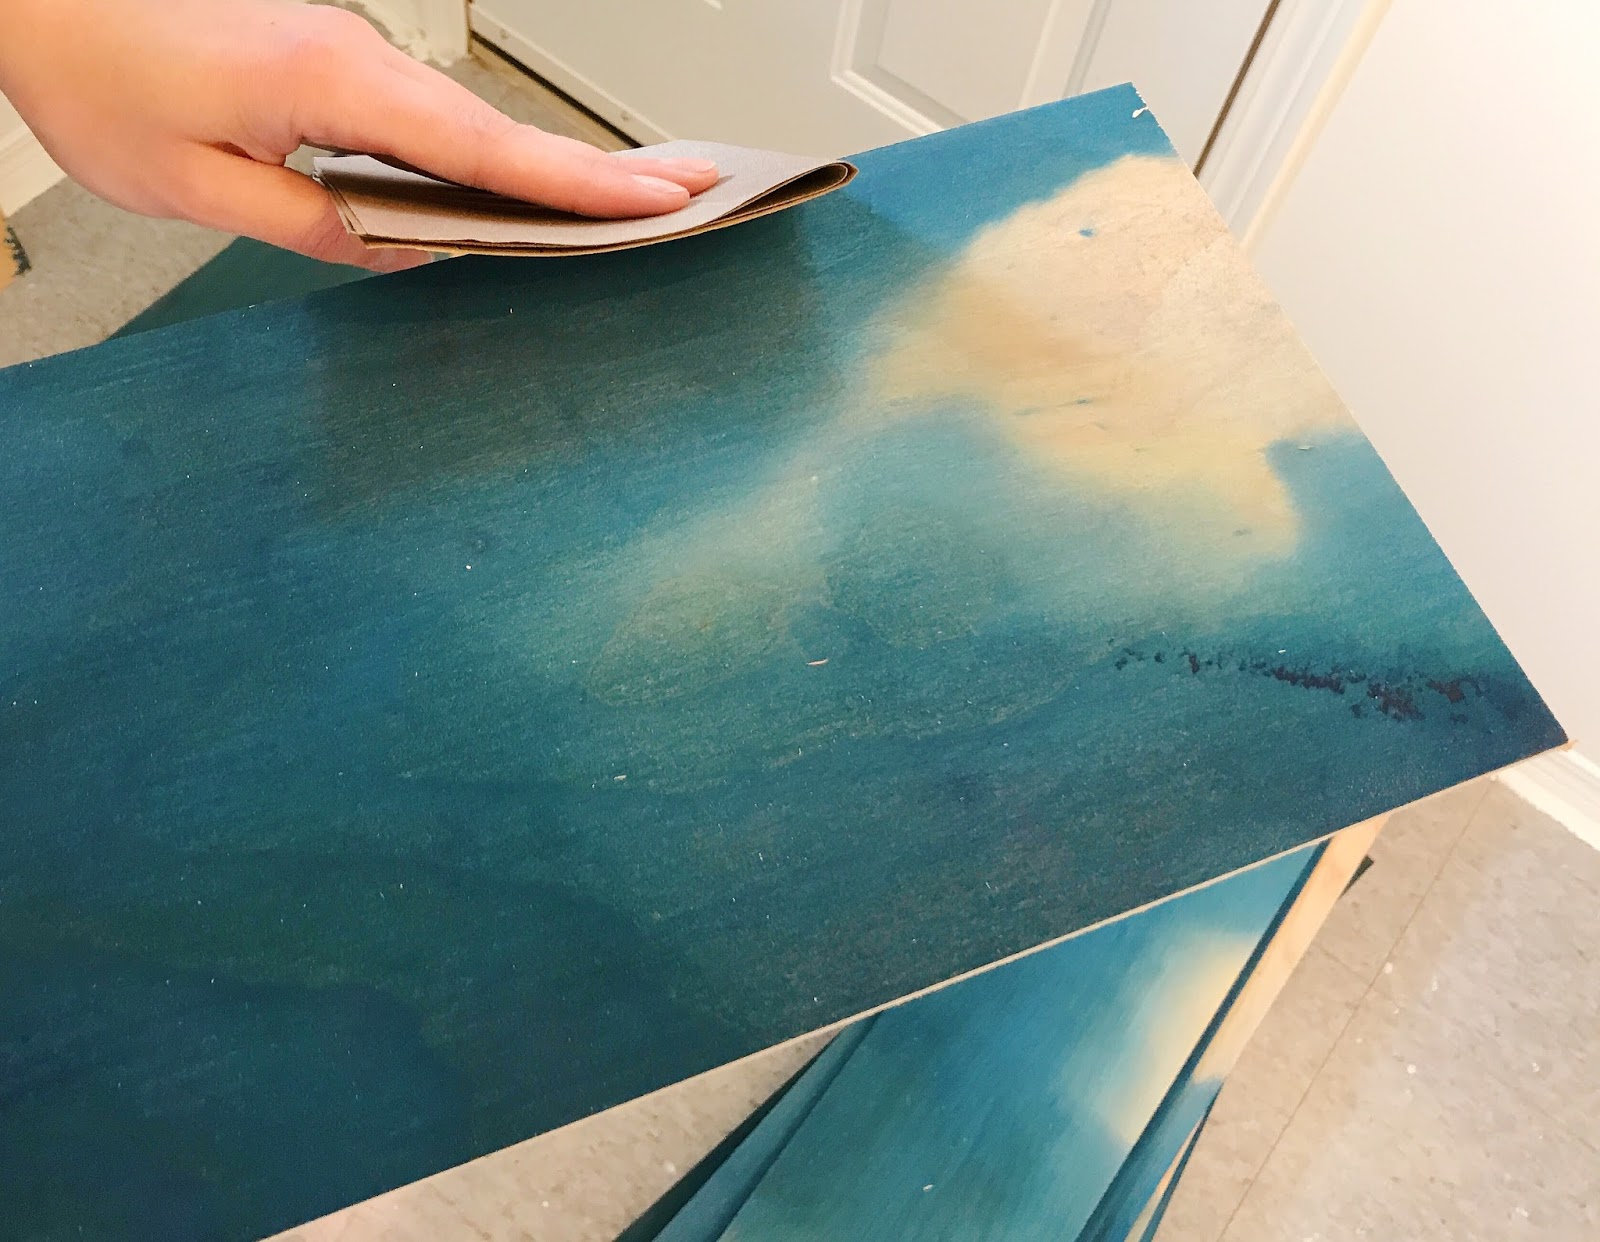
After cutting came the sanding. It went much faster than I thought, but it definitely wasn’t fun to have to sand the edges of each and every board of this DIY plywood floor. I beveled each cut edge, so it was less sharp, by running a fine grit sand paper along the edge. Then I also sanded the ends lightly to resolve any minor tear out (there was very little). This is why I recommend staining/painting after install, if you can. But I worked very carefully and sanded as little as possible to keep my blue stain intact along the edges.
While I hand sanded, Hubby took a belt sander and sanded down some weird glue blobs and resin spills to make sure we had as smooth a surface as possible to lay down our plywood planks.
Planning the Lay Out of the DIY Plywood Floor Planks:
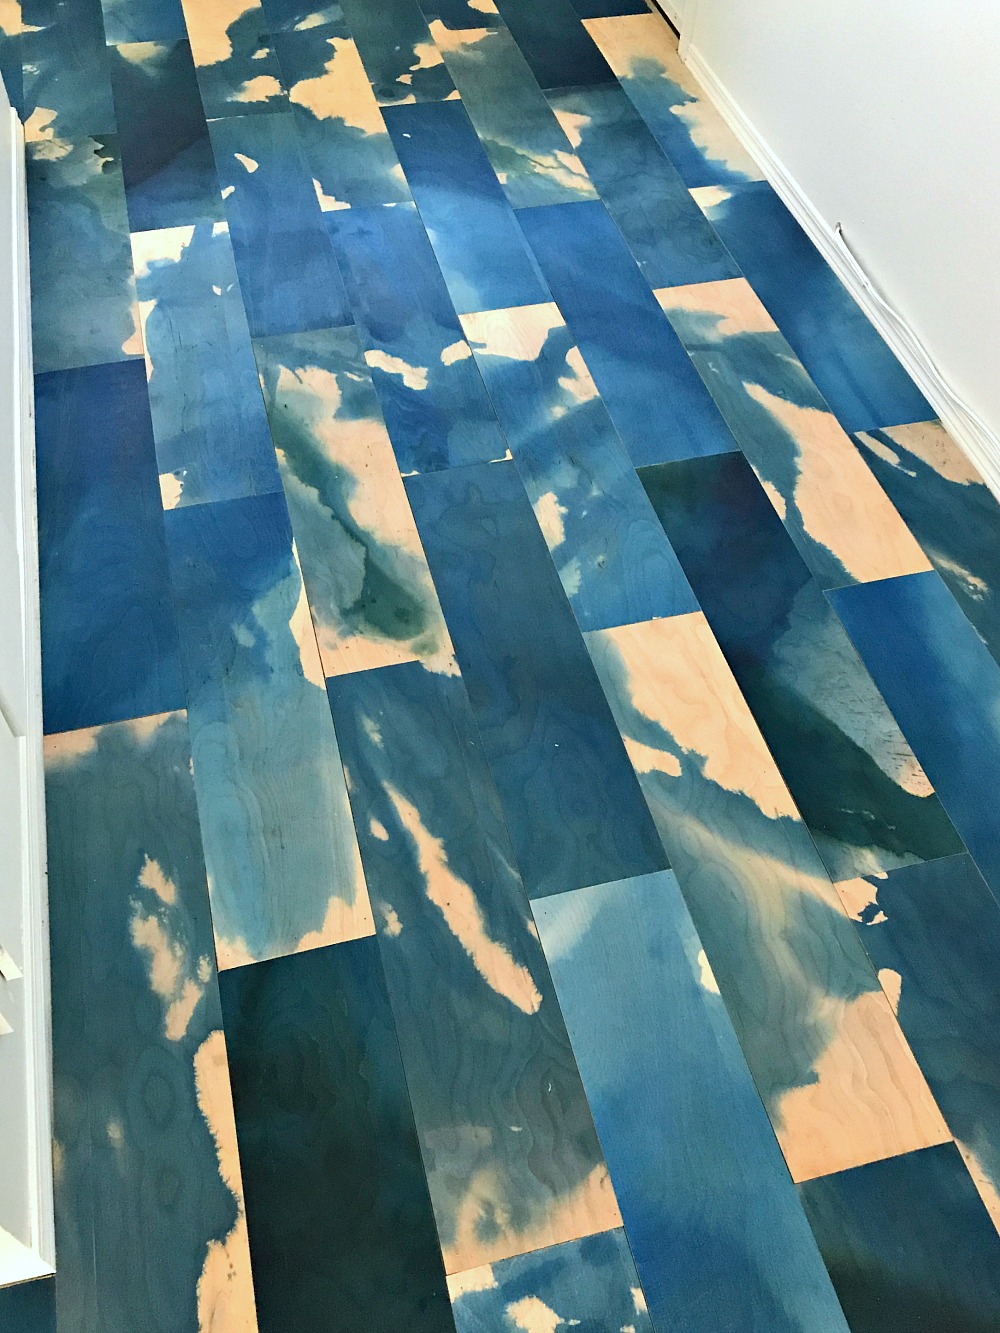
Once the boards were cut and sanded into planks, I sorted them into four piles ranging from solid stain to mostly natural wood which made it easier to lay out my “pattern” for my DIY plywood floor – I use the word “pattern” loosely.
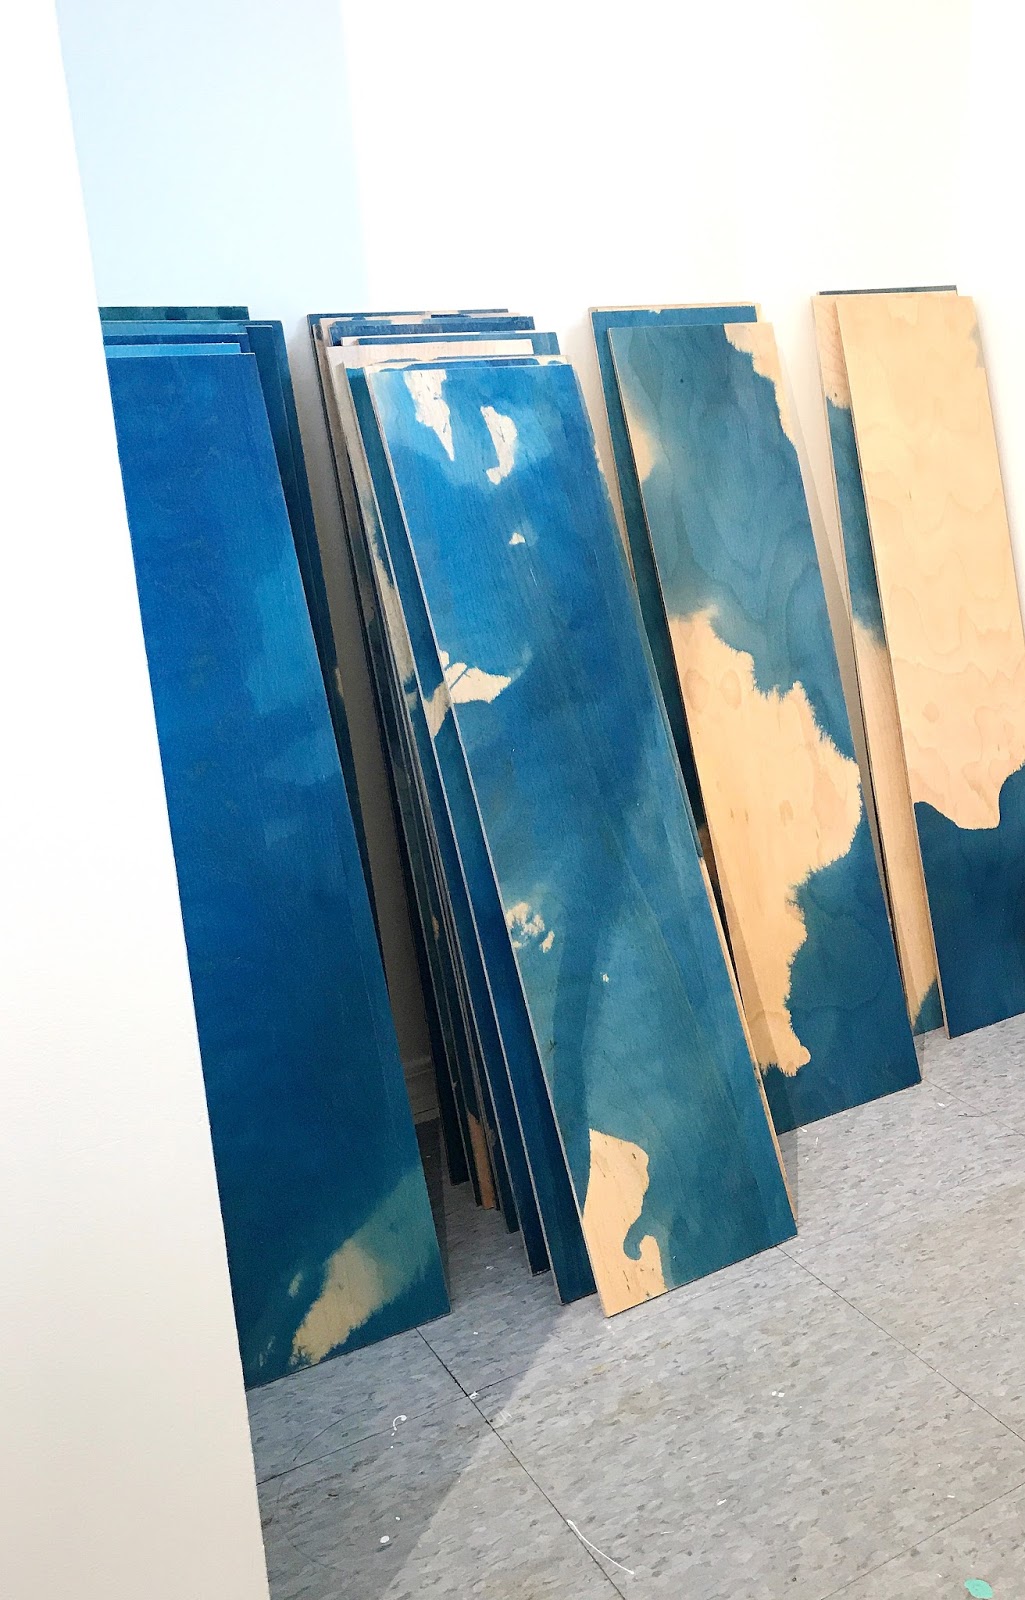
I dry fit the planks on the floor to (1) double check we had enough (phew) and (2) plan my random pattern. Isn’t it funny how much more effort a random pattern requires? I wanted to strike a balance between the different shades of blue and also the negative space ratio. Plus I jettisoned a couple of boards that weren’t straight enough (I am allergic to sawdust so I sneezed a lot while we were using the table saw, which probably explains a few loopy boards).
Installing the DIY Plywood Floor Planks:
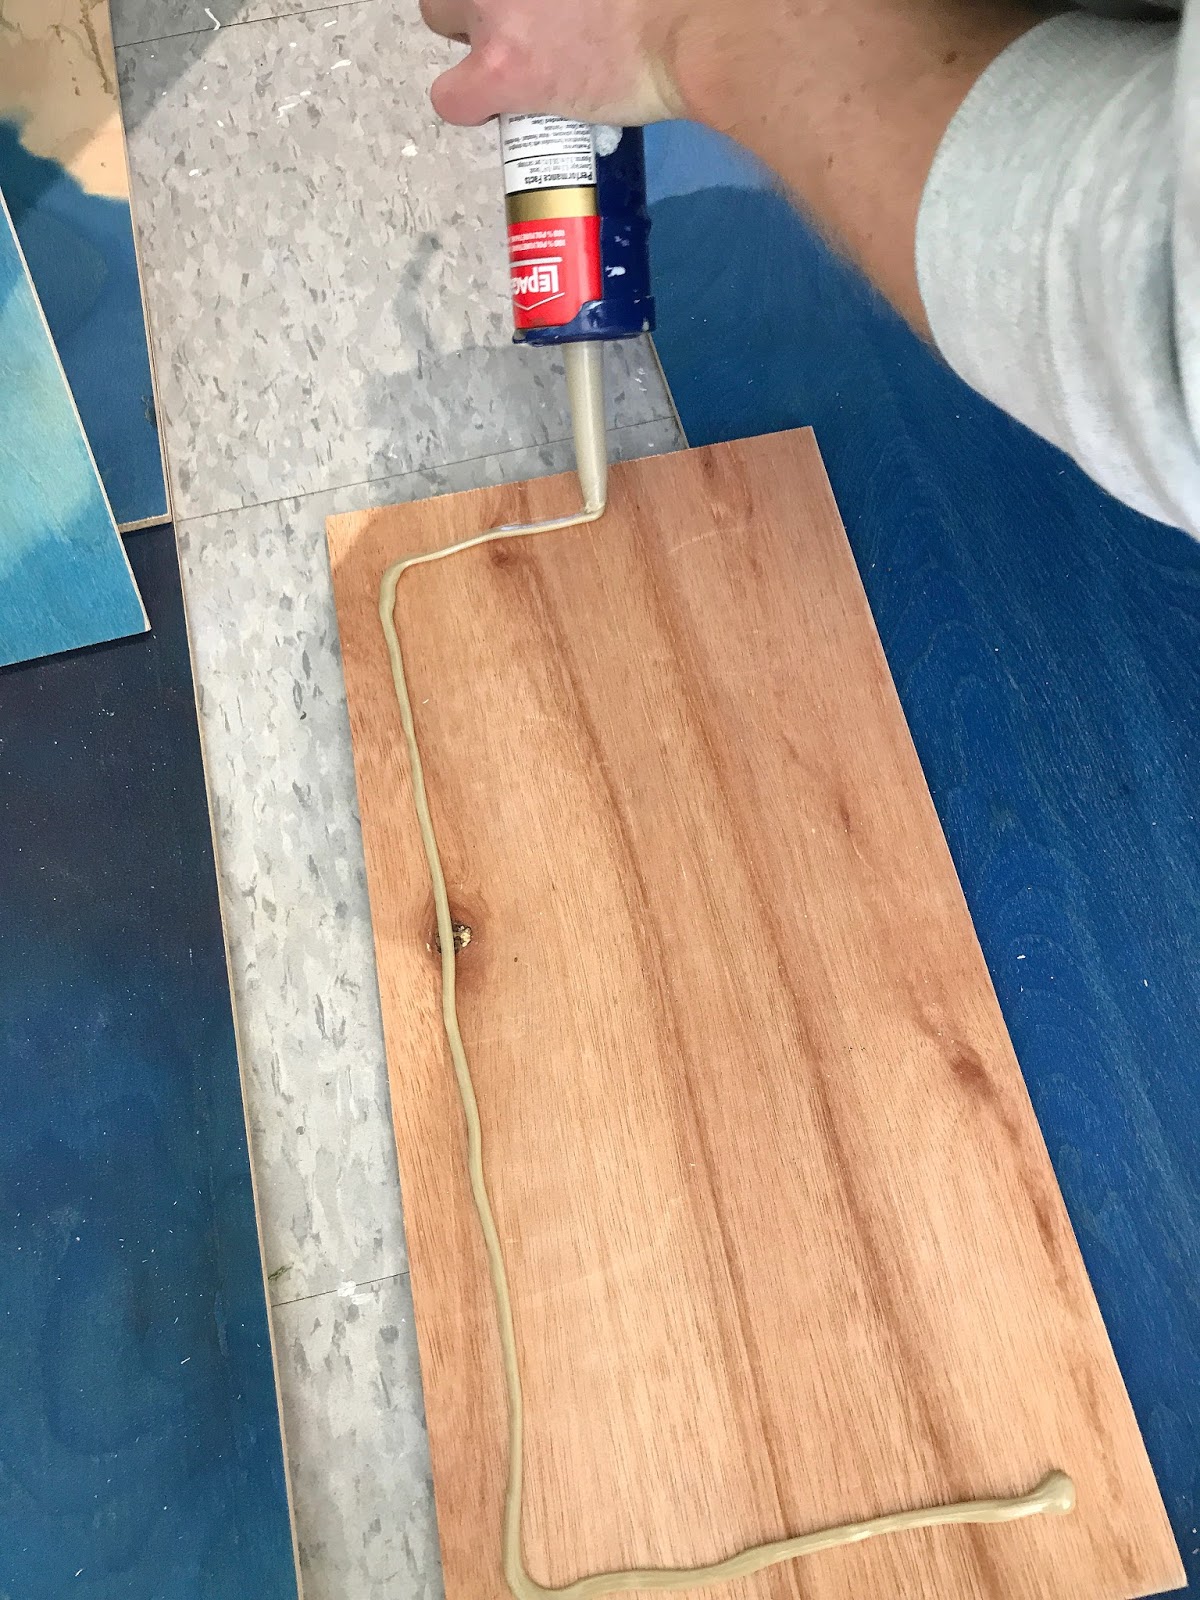
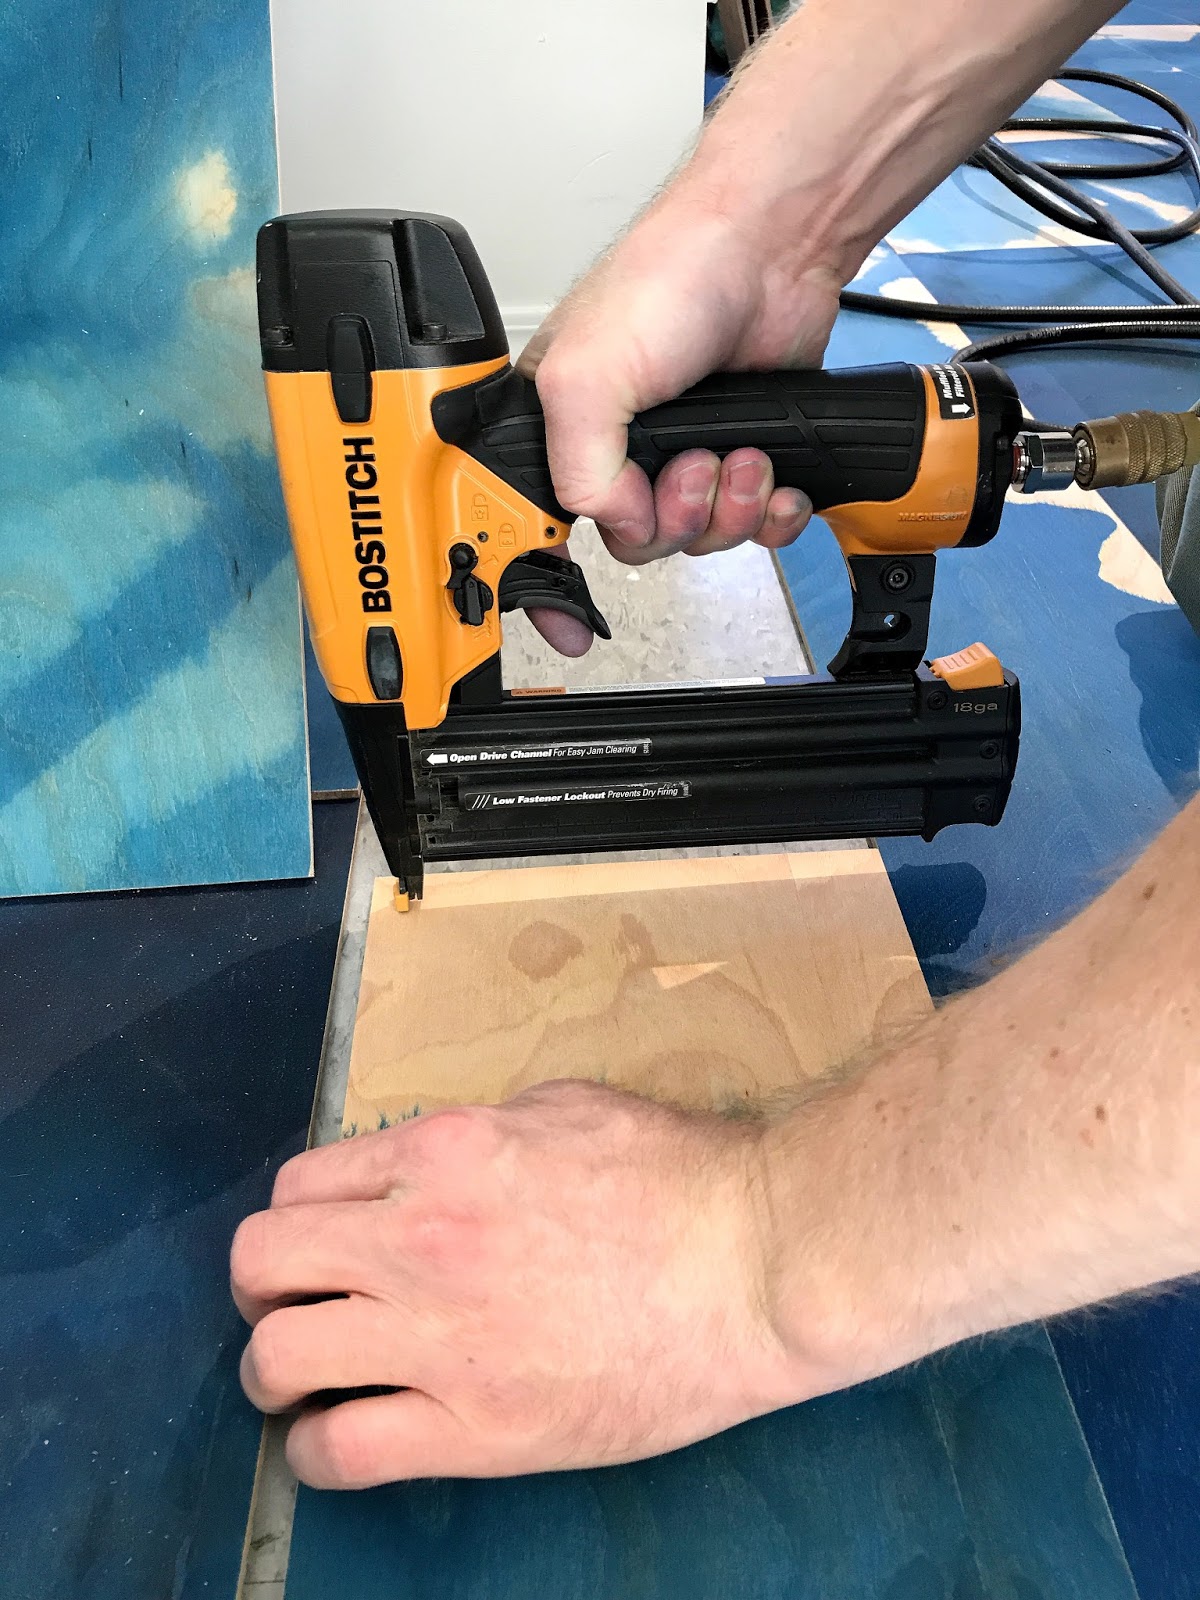
To install the boards we used construction adhesive and also our air nailer. With this busy pattern, the nails are pretty much lost. That’s the beauty of this watercolor staining process: it hides so many flaws (and dirt, too)! We didn’t line it up with the wall because it bowed, so we snapped a chalk line and worked off that. Because I knew I’d have furniture on the plumbing side of the room, we started with a full row on the small firewood cubby wall because that’s what you see when you enter the room and I didn’t want to see a half width board there.


Board by board, we applied the adhesive and pressed down, using the air nailer to affix six nails (each corner plus one on each side). If we did this again, we’d also add an “X” of adhesive to the middle of each wood plank. But as it is, everything is held down perfectly and it feels great – really solid.


It went really quickly and progress was only slowed by having to cut some weird pieces to fit around pipes, door frames, and the floor vent. We used a jigsaw for those cuts and that took a little fussing.
Even though it’s going to be hidden, I am especially impressed with how tightly Hubs fit the plywood around the pipes:

Unfortunately, we did make one mistake with this DIY plywood floor! Hubby and I disagreed slightly about how to lay down the floor: he wanted to alternate starting the pattern with a whole board on alternative ends so the pattern would zig zag a bit but we’d have fewer cuts. I rallied for 15 additional cuts, which would mean the seams would all line up. We went with my pattern.
For one day.
When we came back on the second day to finish up the floor, I dry fit the planks and went to monkey with the poly in the garage – it was the only time I wasn’t working on laying the floor with Hubby – and he installed an entire row with his desired layout. He just totally forgot the conversation we had, lol! So now, 3/4 of the way across the room there’s a jog in the pattern. You can see it in the photos I’ve shared but so far no one – online or in person – notices but us. If this were in the house and a permanent flooring, I’d have ripped up the boards but I didn’t want to risk wasting any and coming up short. I figured the busy pattern would work to our advantage with this little error.
Here it is installed, before the polyurethane coat:
Finishing the Plywood Floor Planks:
With the stain already applied, I only needed to clear coat but, like I mentioned, the stain really should have been allowed to cure for a week. But I had to get moving on this project, so we went ahead and finished it. I tested a plank and my worst fear was confirmed: the polyurethane re-activated the over-dyed stain and turned pale blue! It made the stain run a bit onto unstained areas, but not enough to make me dislike it.
So I went ahead and applied the clear coat, juggling different brushes and pots of poly to try and keep the color from running. The first coat took hours! That’s why with this marble staining method, I’d recommend a spray on finish done prior to install (but after sanding). But for a regular stain or paint, you would have a much easier time because my watercolor method is what bogged down the progress.
After the first coat was finished, I waited four hours and then lightly sanded. That helps smooth any bumps or raised grain, plus it helps “key” the next layer – basically it gives the poly something to grip. Hubby helped and together we wiped the sanding dust off really well and then applied the second coat which went so much more quickly because the color was locked in and no longer bled. Yay! For this brand, if the third coat is applied no later than 3 hours, you can skip sanding and just apply the finish – so I definitely set an alarm and waited for the two hour mark before testing if it was dry (it was!) and quickly applying the final coat.

A little confession: we stayed up until 5am one night so we could do the poly in one shot – and skip that second sanding. I’ll do anything to avoid more sanding…
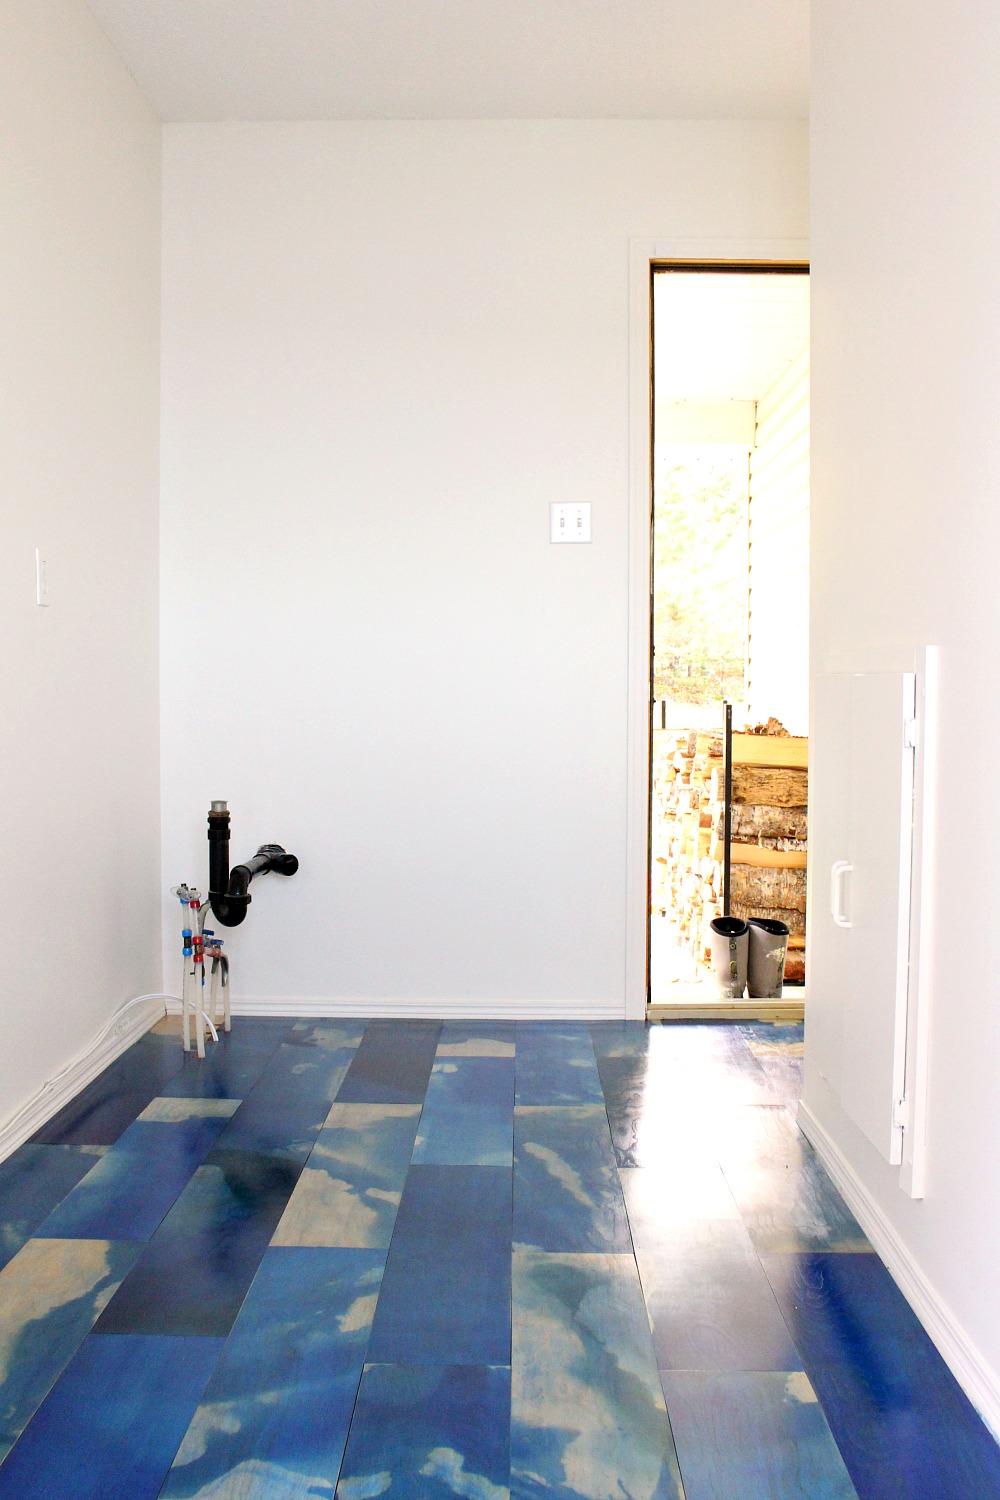
The semi-gloss polyurethane adds so much depth and such a gorgeous sheen to the floor – and the bleeding isn’t really noticeable so it was worth the gamble, for sure! My Mom says it actually really works with the stain and makes it look even more like aerial shots or water or topographical maps. That’s a win! I actually don’t think anyone would have noticed if I didn’t point it out (you can scroll up to see the photo of the floor pre-poly again), but I just wanted to make everyone aware of this issue.

What Does a DIY Plywood Floor Feel Like?
I had seen DIY plywood floors online before and always questioned how nice they would feel underfoot Because this is a room I will probably often wear shoes in, smoothness and comfort ranked low on my list of priorities but – surprise, surprise – it feels nice and smooth! The plywood I bought was not construction grade, it came from a lumberyard with nice quality woods designed for furniture building and the like, so it was already incredibly smooth and well sanded. Sanding the edges helped prevent any sharpness between the boards and sanding between the coats of poly – plus applying three coats it total – really helped the smoothness as well. All of our nails were installed below the surface of the wood (none stick out), so this floor is actually very nice to walk on. I’ve spent a lot of time padding around in here in socks, puttering and organizing. There are some imperfections: teeny gaps because the boards aren’t 100% straight – and of course our weird pattern disagreement – but nothing that impacts how it feels.
Here’s the real test: I can dry Swiffer in here without the cloth getting caught on anything – it just glides right across. That’s a good indicator of a smooth, even floor, I think.
I’m definitely surprised and really impressed with how much this DIY plywood floor feels like a real floor. I was honestly expecting that it would feel cheap but it doesn’t! If anyone has lived with DIY plywood floors, I’d love to hear about how they’ve worn over time and whether you do/don’t like them.
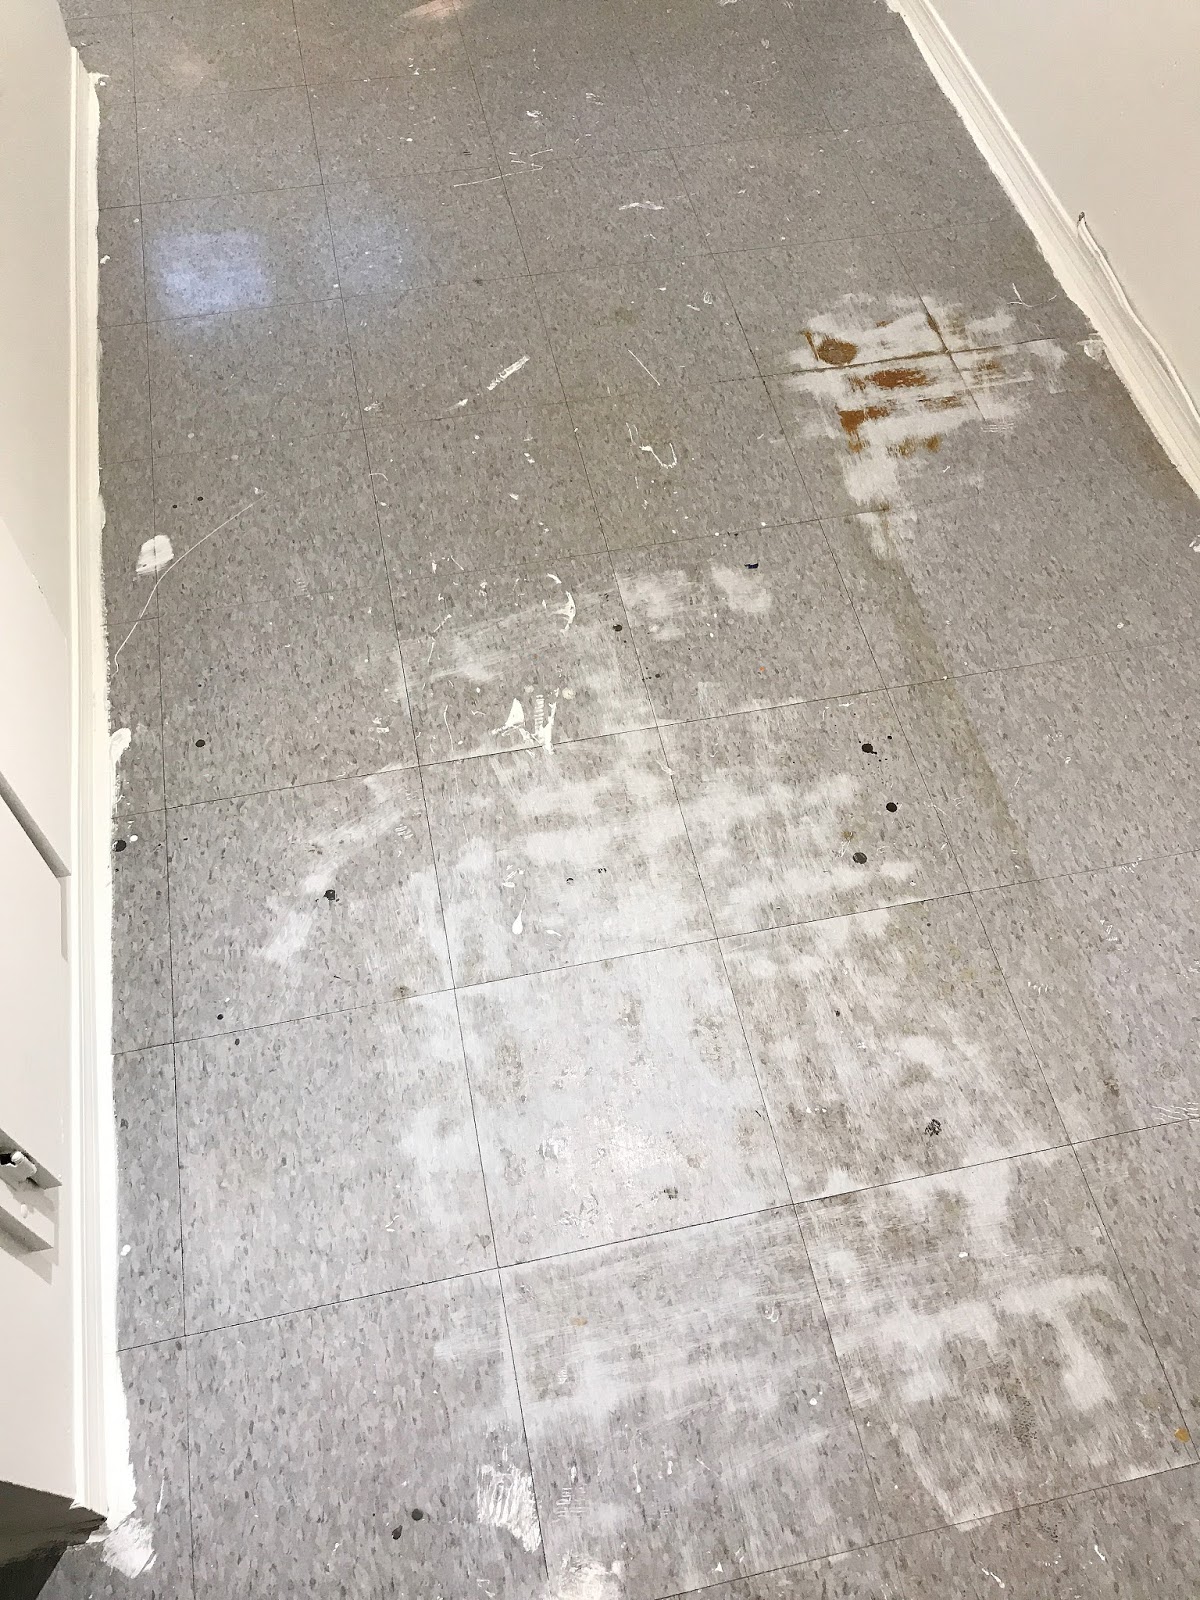
I’ll definitely share an update about how this plywood floor wears and whether we discover any problems or complaints but, so far, I am absolutely SMITTEN! They look so amazing and they were easy to install over the old tile floor. I am sure I will curse these when we go to renovate and have to remove a million nails but that’s a problem for Future Me.

Current Me is pretty excited to do some plumbing and some more organizing and show off the new and improved Fish Room tour – soonish! But these DIY plywood floors are definitely my favorite part so far.

UPDATE: Check out the finished Fish Room (ie. Craft Room) right here and don’t forget to take a look at how I got the water color design by peeking at this post.

These are GORGEOUS!!!!
Thank you so much!!! I’m so happy with how they turned out and they look so good with the furniture I’m putting in here, which is really light and airy.
I think the "bleeding" worked out just fine. I actually like it more than before the poly.
Thanks for saying that! It ended up really softening the look and making it more “watery” so I’m lucky my design allowed for that. Happy you like 🙂
Wow! I’m completely swooning over these floors. I’d be interested in knowing how these wear. I’d love to do something like this in my basement but I have cement underneath so I’m not sure glue alone would keep everything in place. Hummmm
Your floors are BEAUTIFUL! I love blue and the water color effect worked out fabulously! “I’ll do anything to avoid more sanding…” Me, too! 🙂
Author
Thank you so much! And I’m glad you can relate, haha.