This DIY painted soffit and fascia project is a collaboration with Rust-Oleum – but all thoughts, opinions, and reckless ideas are my own.

Yup, I painted my soffit and fascia! It’s not a typo – you are reading about my DIY painted soffit and fascia. There is literally NO stopping me when it comes to inexpensive paint makeovers.
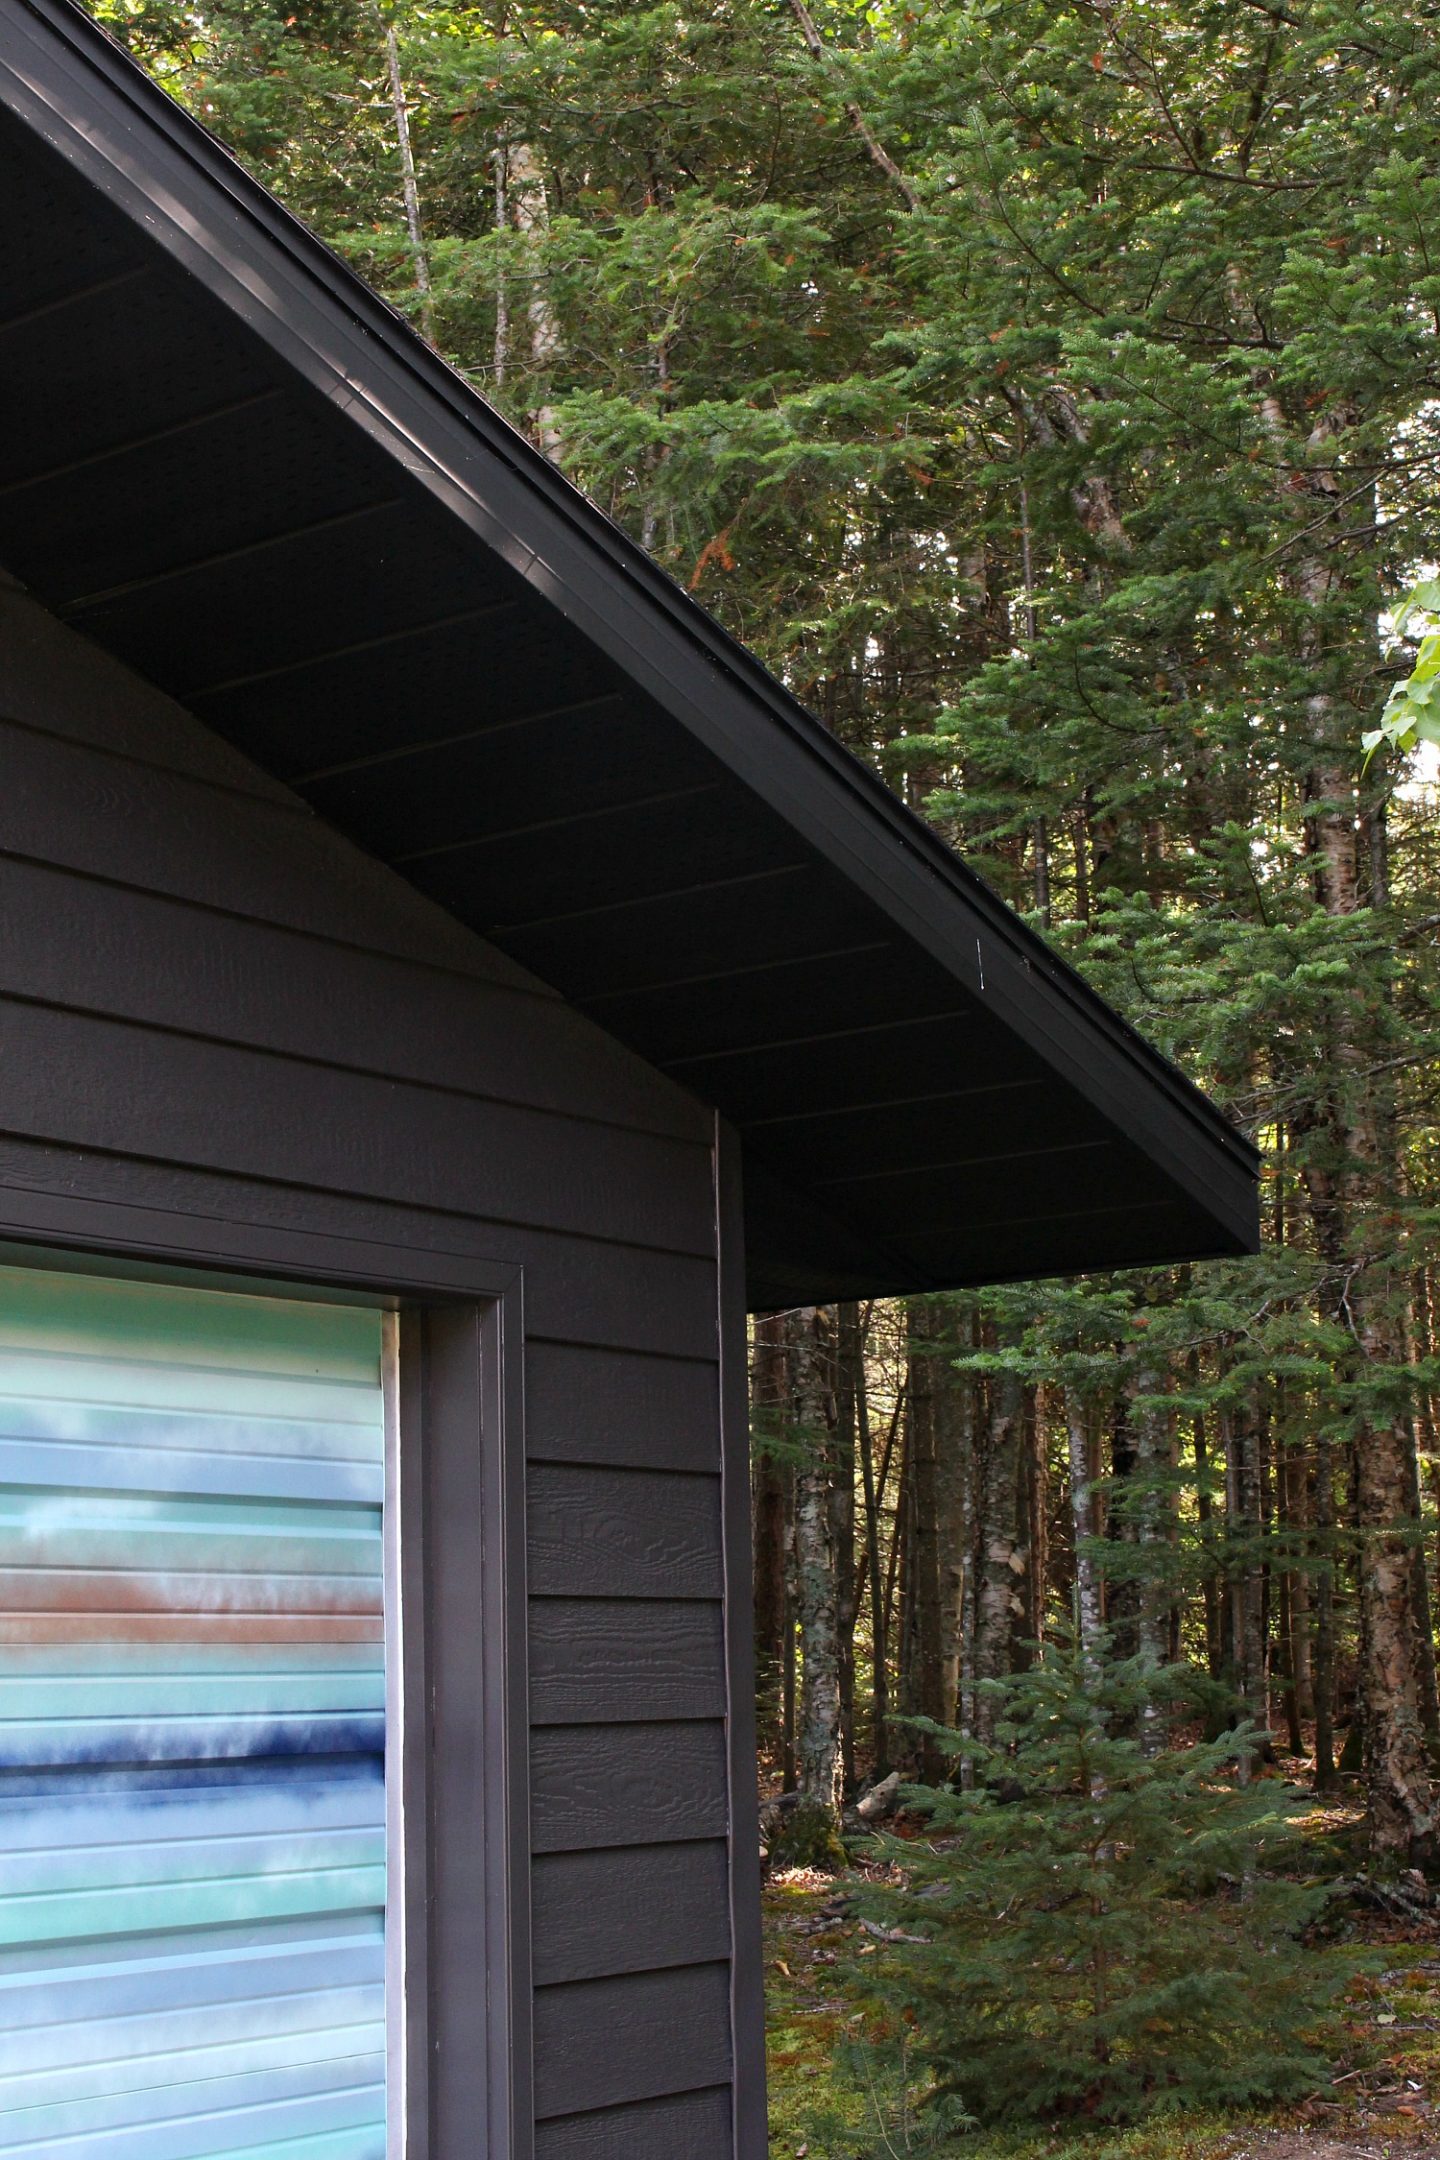
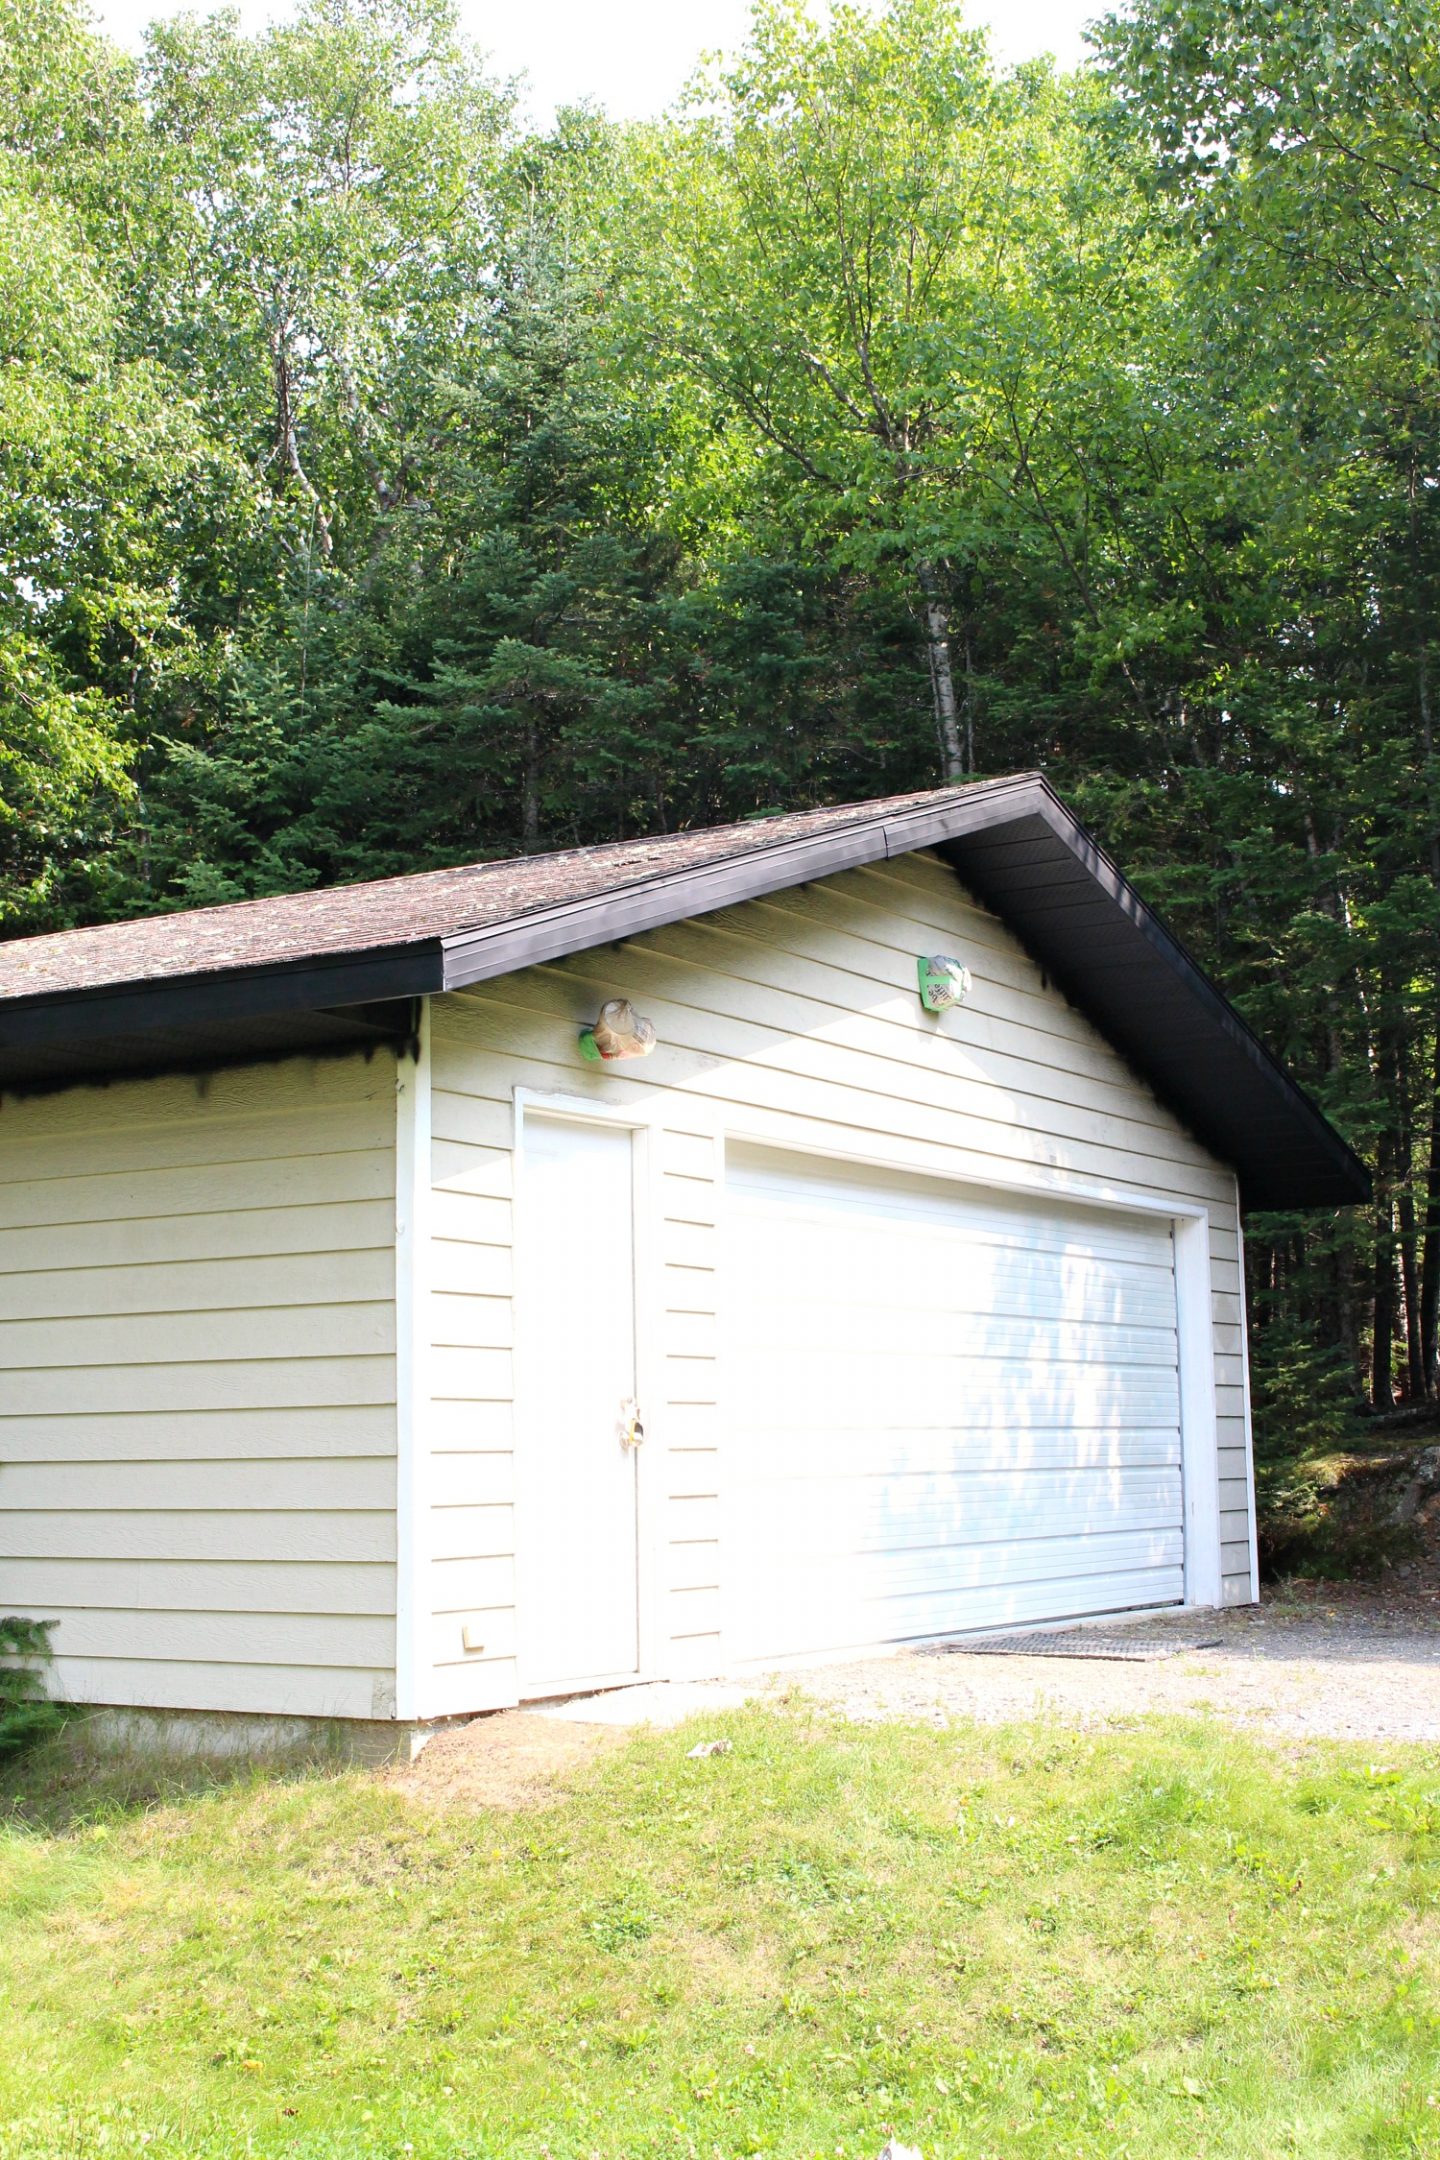
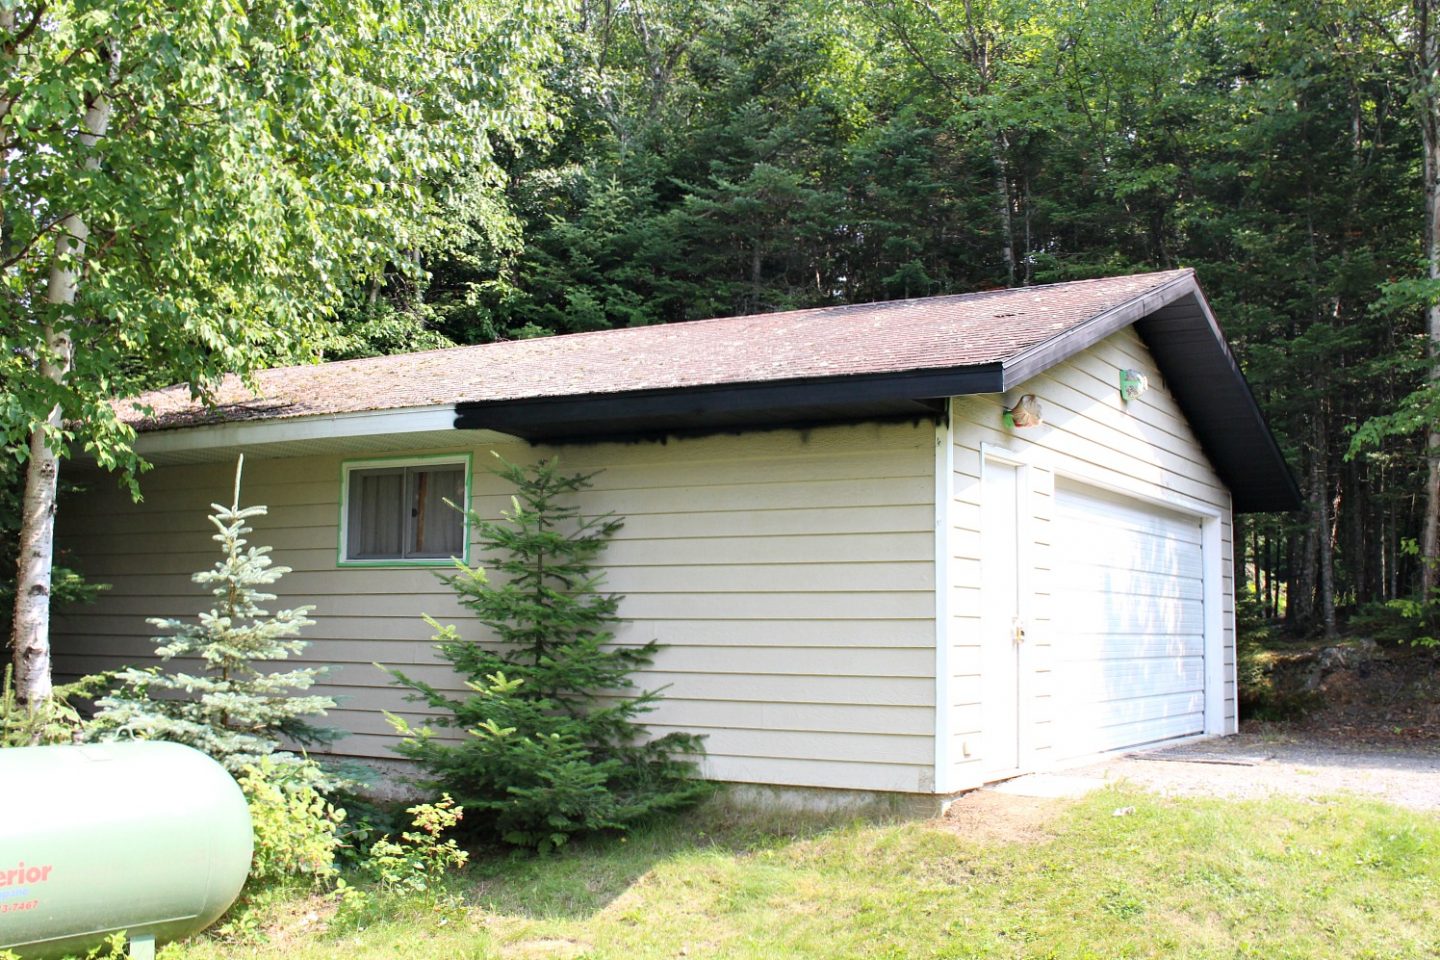
If you follow me on Instagram you know that although our copper roof is (almost) done, the rest of the house exterior renovation hit a little roadblock and is currently on hold. The house is looking verrrry rough, with naked insulation and dangling pieces of soffit, but that’s okay because the garage is finally looking super cute! We’re not 100% done – the garage is getting a new copper light and it needs a black motion light too – but it’s so close, and looking so much better than before, so I just had to start showing you the work we’ve done.
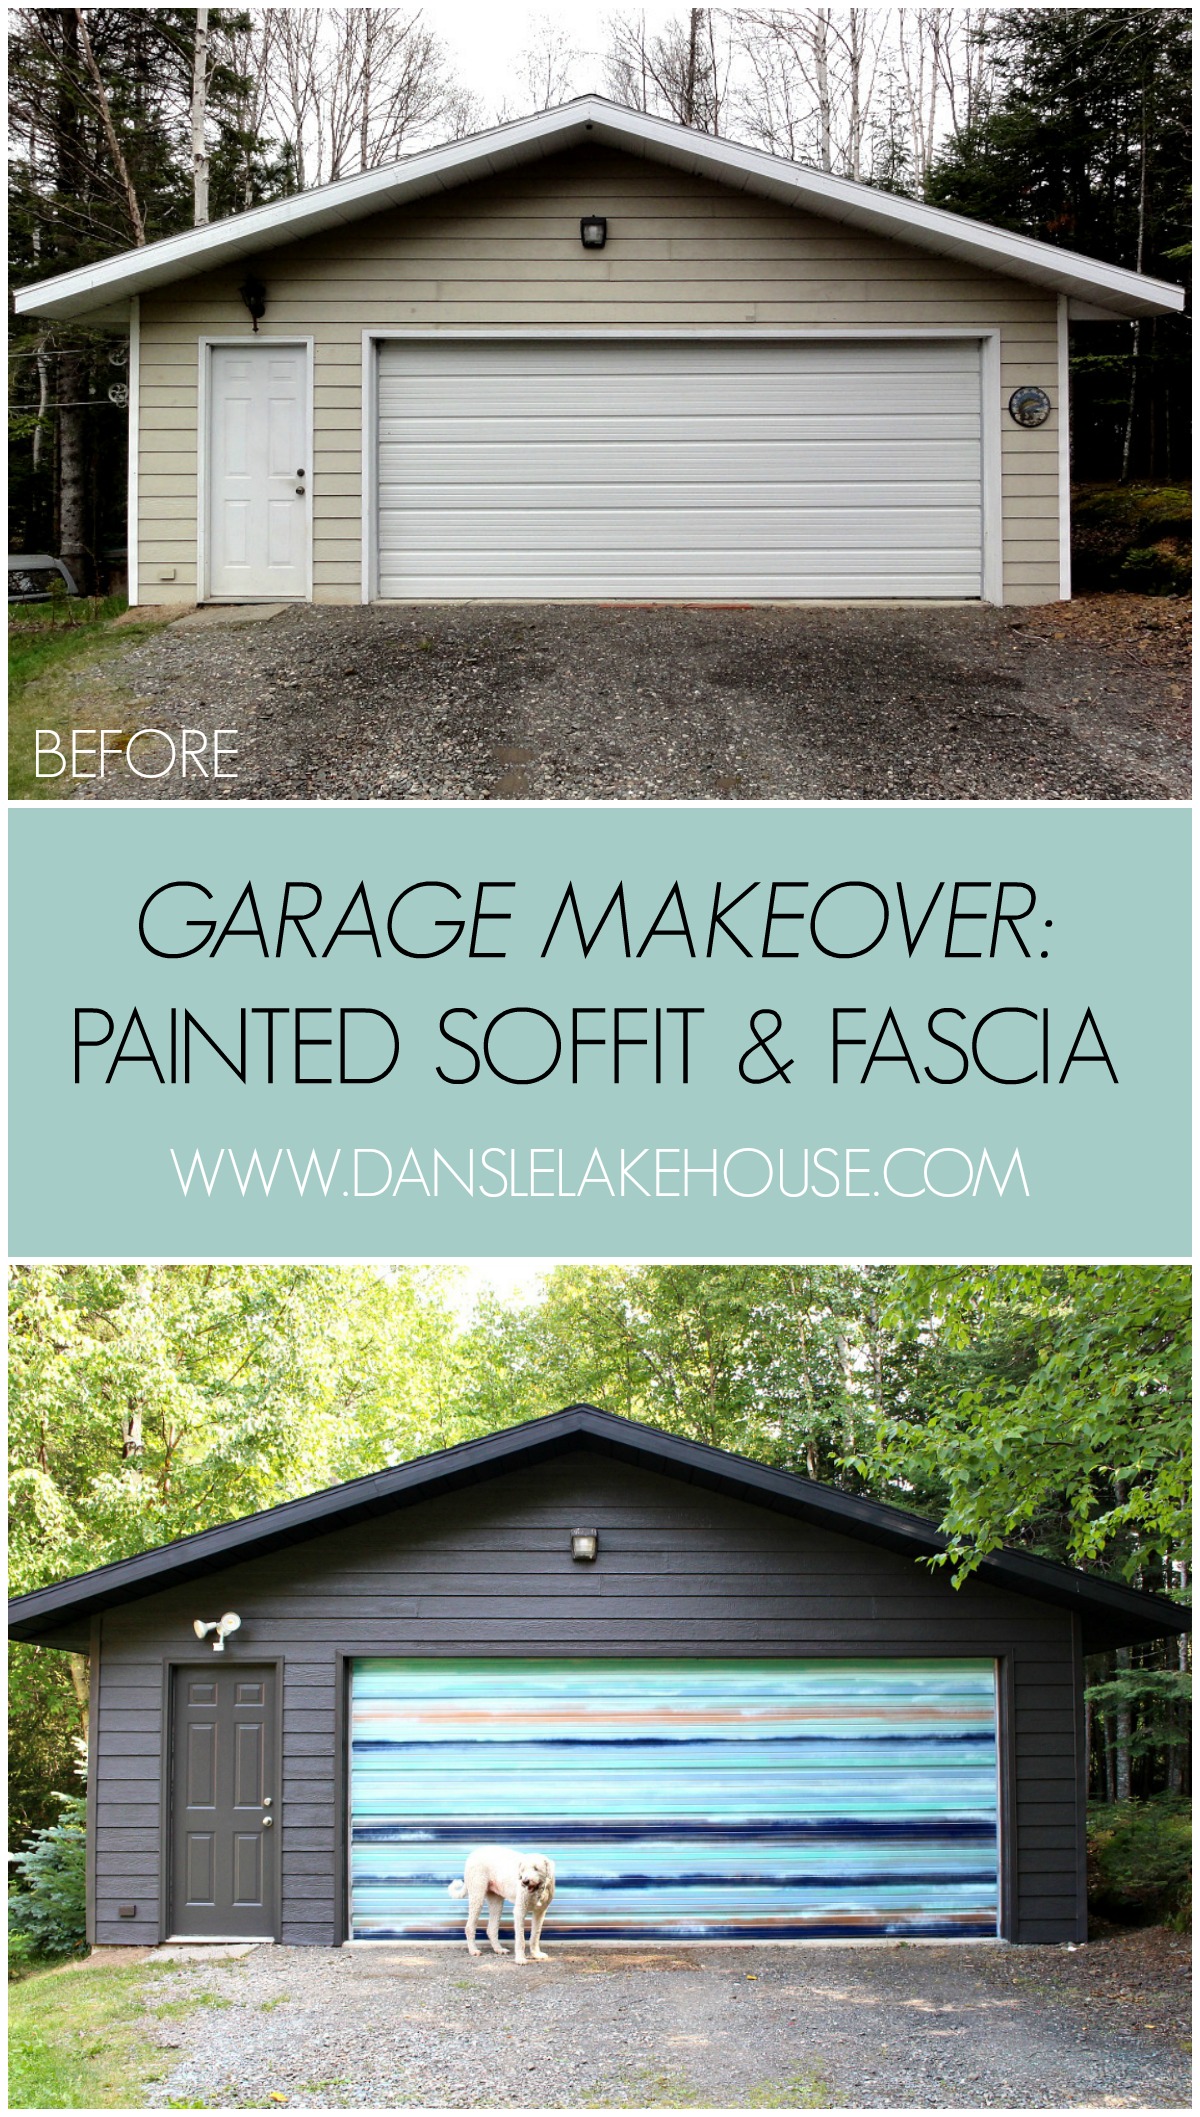
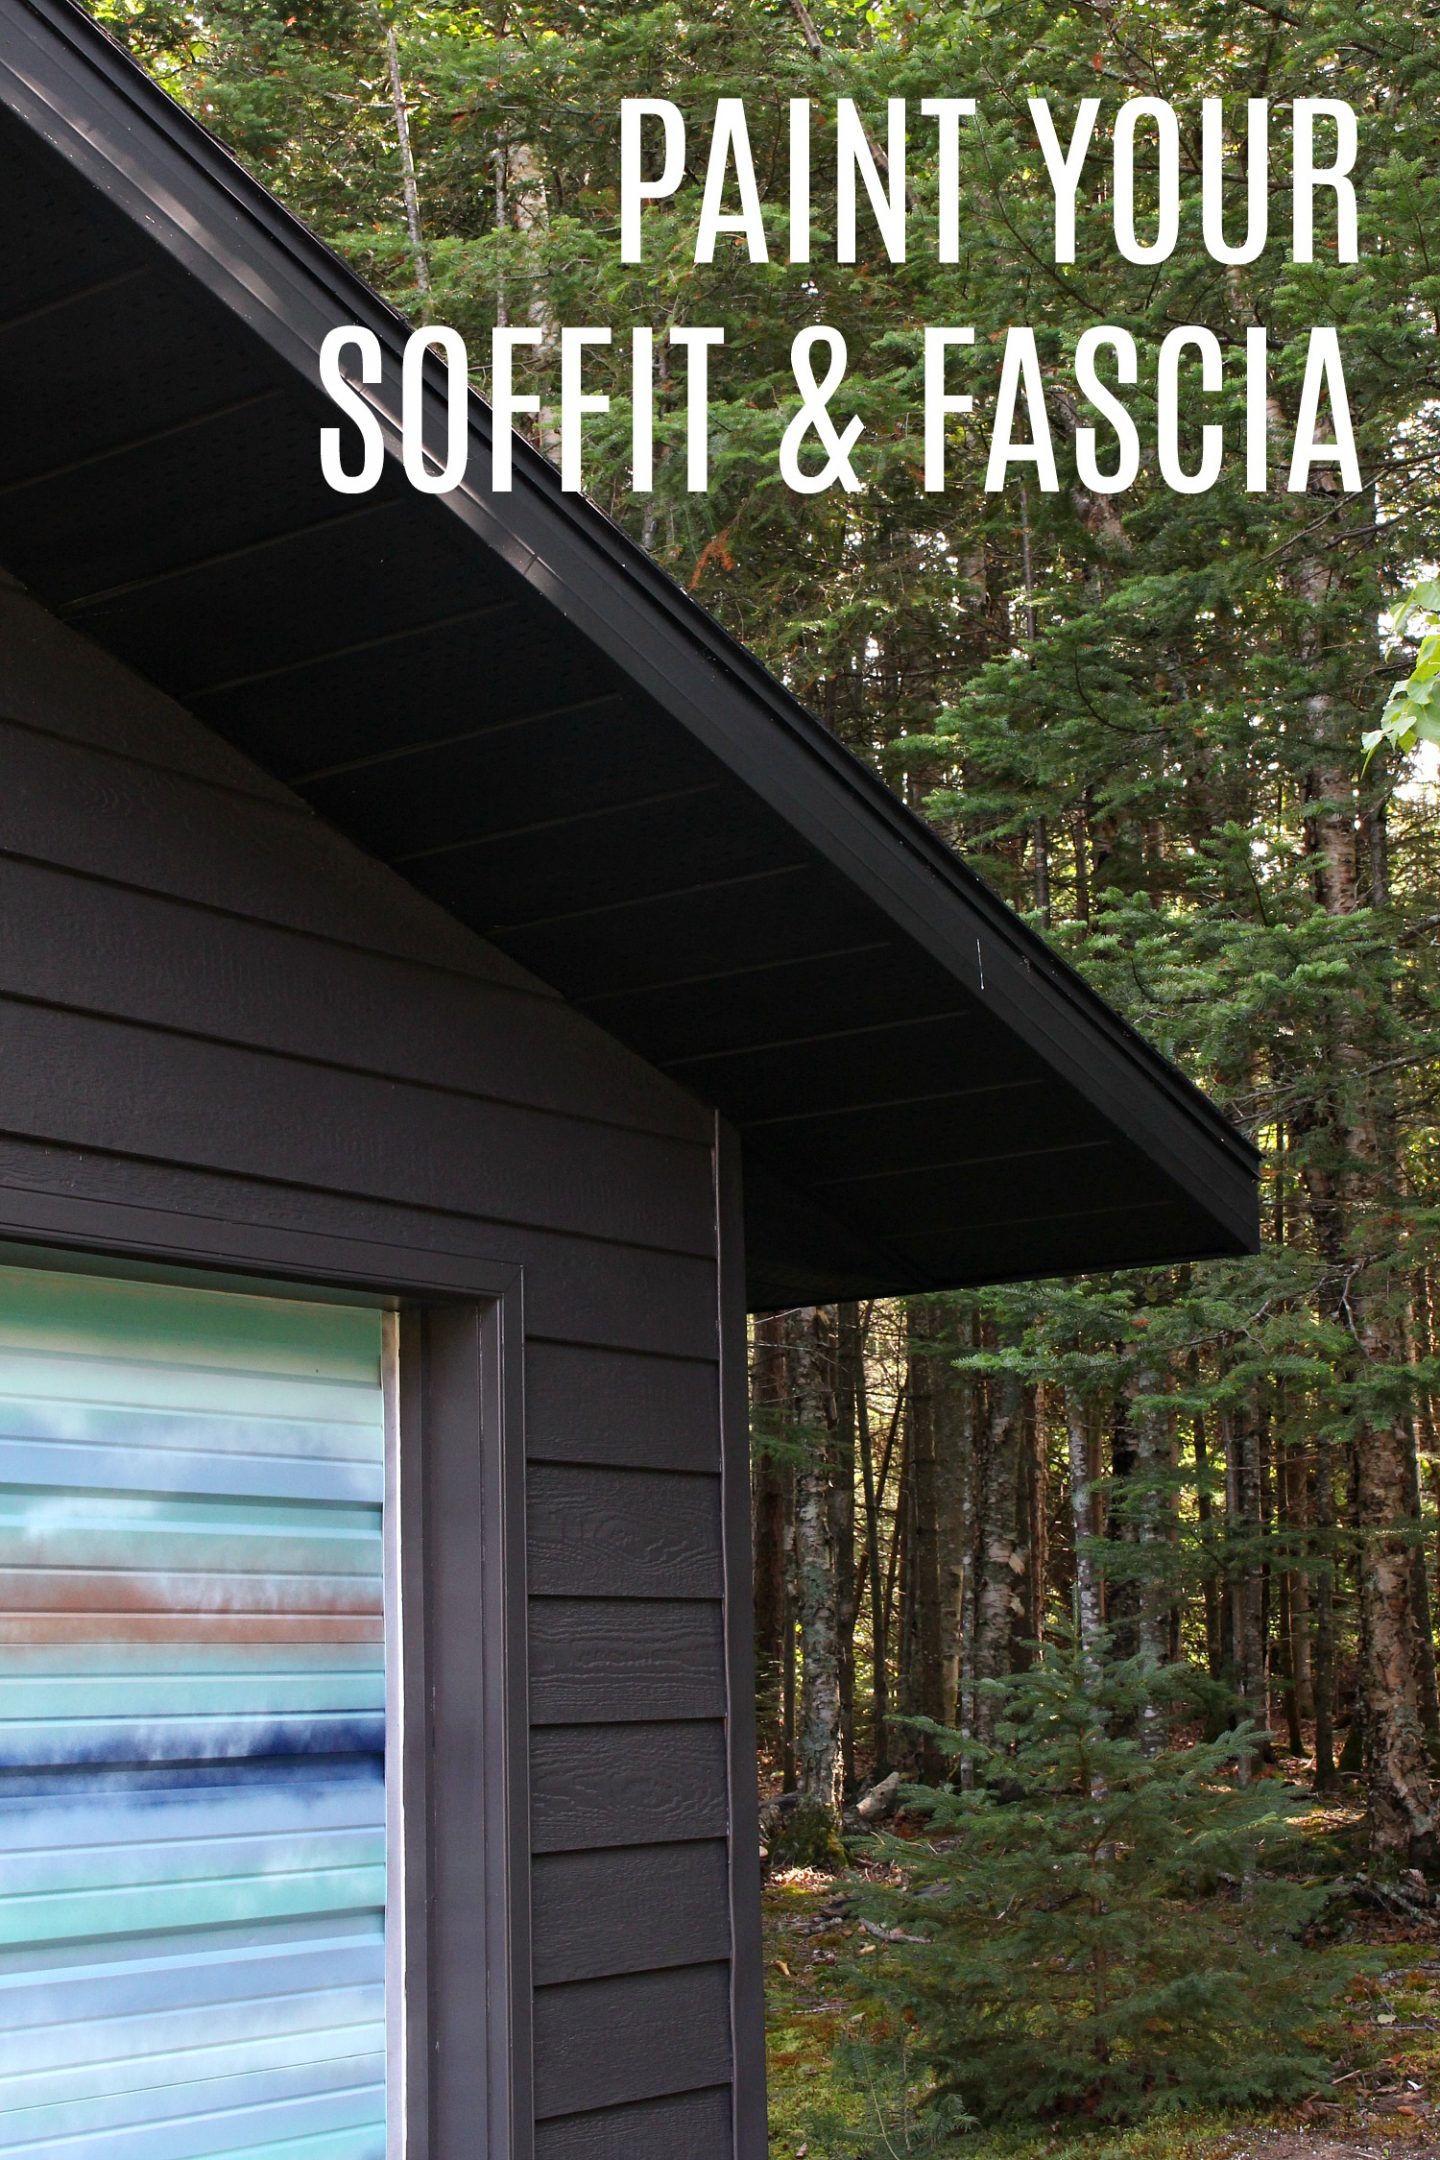
Today I’m sharing our DIY painted soffit and fascia, tomorrow I’m chatting about my wicked awesome mural, and then on Friday I’ll share how we painted the siding – along with some tips for making that chore go much faster. When we decided on finishes for the house exterior, we chose a copper roof, black windows, dark grey/brown siding, and black soffit and fascia. Goodbye mismatched beige vinyl siding, cedar wood siding, and grey manufactured stone. My goal in this life is to have a house with the same siding on all four sides (so novel!) – so I even painted the stone dark grey. Although the garage is older than the house, with a different kind of siding, the color matched the house and so did the soffit and fascia. While upgrading our house exterior, I didn’t want to lose out on all that matchy-matchy goodness, but we sure as heck did not have money to re-do the garage siding or soffit! I wanted the garage to match the new house facade, but with approximately $0 to spend, I knew I would have to DIY some changes and paint my little heart out. That’s how a person ends up with a nutty plan like DIY painted soffit and fascia.
Supplies For Painting Soffit & Fascia:
- TSP or something like this Prepaint Krud Kutter
- Bucket
- Scrub brush
- Pressure washer
- Sturdy ladder
- Latex gloves
- Safety glasses
- Dust masks or respirator
- Painter’s tape and plastic (if you’re taping off the siding to protect it, vapor barrier works so well)
- TREMCLAD Oil-Based Rust Spray Paint (Flat Black)
How to Paint Soffit and Fascia:
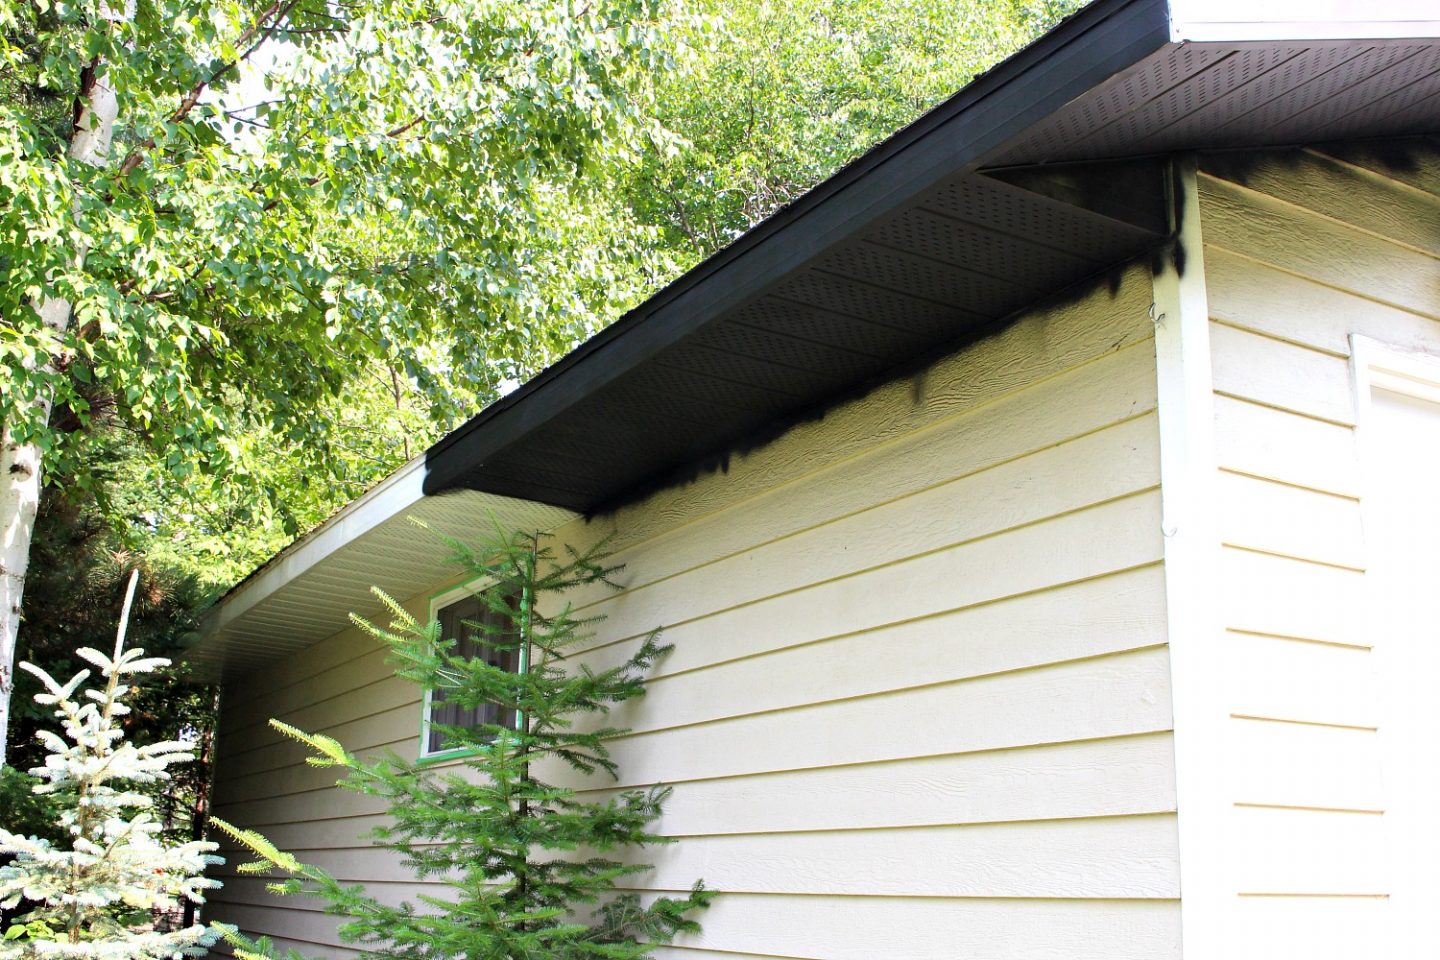
Only time will tell if this holds up, and I don’t mind being a guinea pig, but here’s how I painted my soffit and fascia. First, I scrubbed it clean with TSP and then rinsed super well with a pressure washer. I had to remove years of mildew and moss so scrubbing took awhile. Because pressure washing really pushes a lot of water into surfaces, be careful pressure washing a house – especially around windows. I let the soffit and fascia dry for quite a few days before starting to paint and we kept our eyes on the weather for a day with very little wind.
Even though we’re replacing them, Hubby and I wrapped up the exterior lights with plastic bags and tape, and donned protective eye wear, gloves, and face masks. Because Hubby and I were painting in a somewhat enclosed area under the soffit, we got a lot of spray paint back on us – way more than when I paint furniture on the driveway on a windy day – so it was super important to protect our eyes and lungs. Wearing long sleeves and gloves is something I also highly recommend.
Hubby and I both hate ladder work, so we took turns clamoring up to the peak and painting. The actual task was straightforward: we just applied the paint using sweeping motions and thin layers. To really get in there, we found we had to spray in multiple directions, otherwise we were left with little white spots where the ventilation is. We also found that spray painting on a super hot day caused problems because the metal swelled so when it cooled, it shrank and we had to touch up some white lines that appeared. Even though we got a lot on us, the over spray on the siding was surprisingly minimal, but I sure am glad we decided to this step before painting! At one point we plan to replace the roof too, so I didn’t tape it off, but very little actually got on the shingles.
It took us about two days, and approximately 12 cans of spray paint (I didn’t keep track and I painted other projects in between), but it saved us a ton of money so it was well worth the effort.
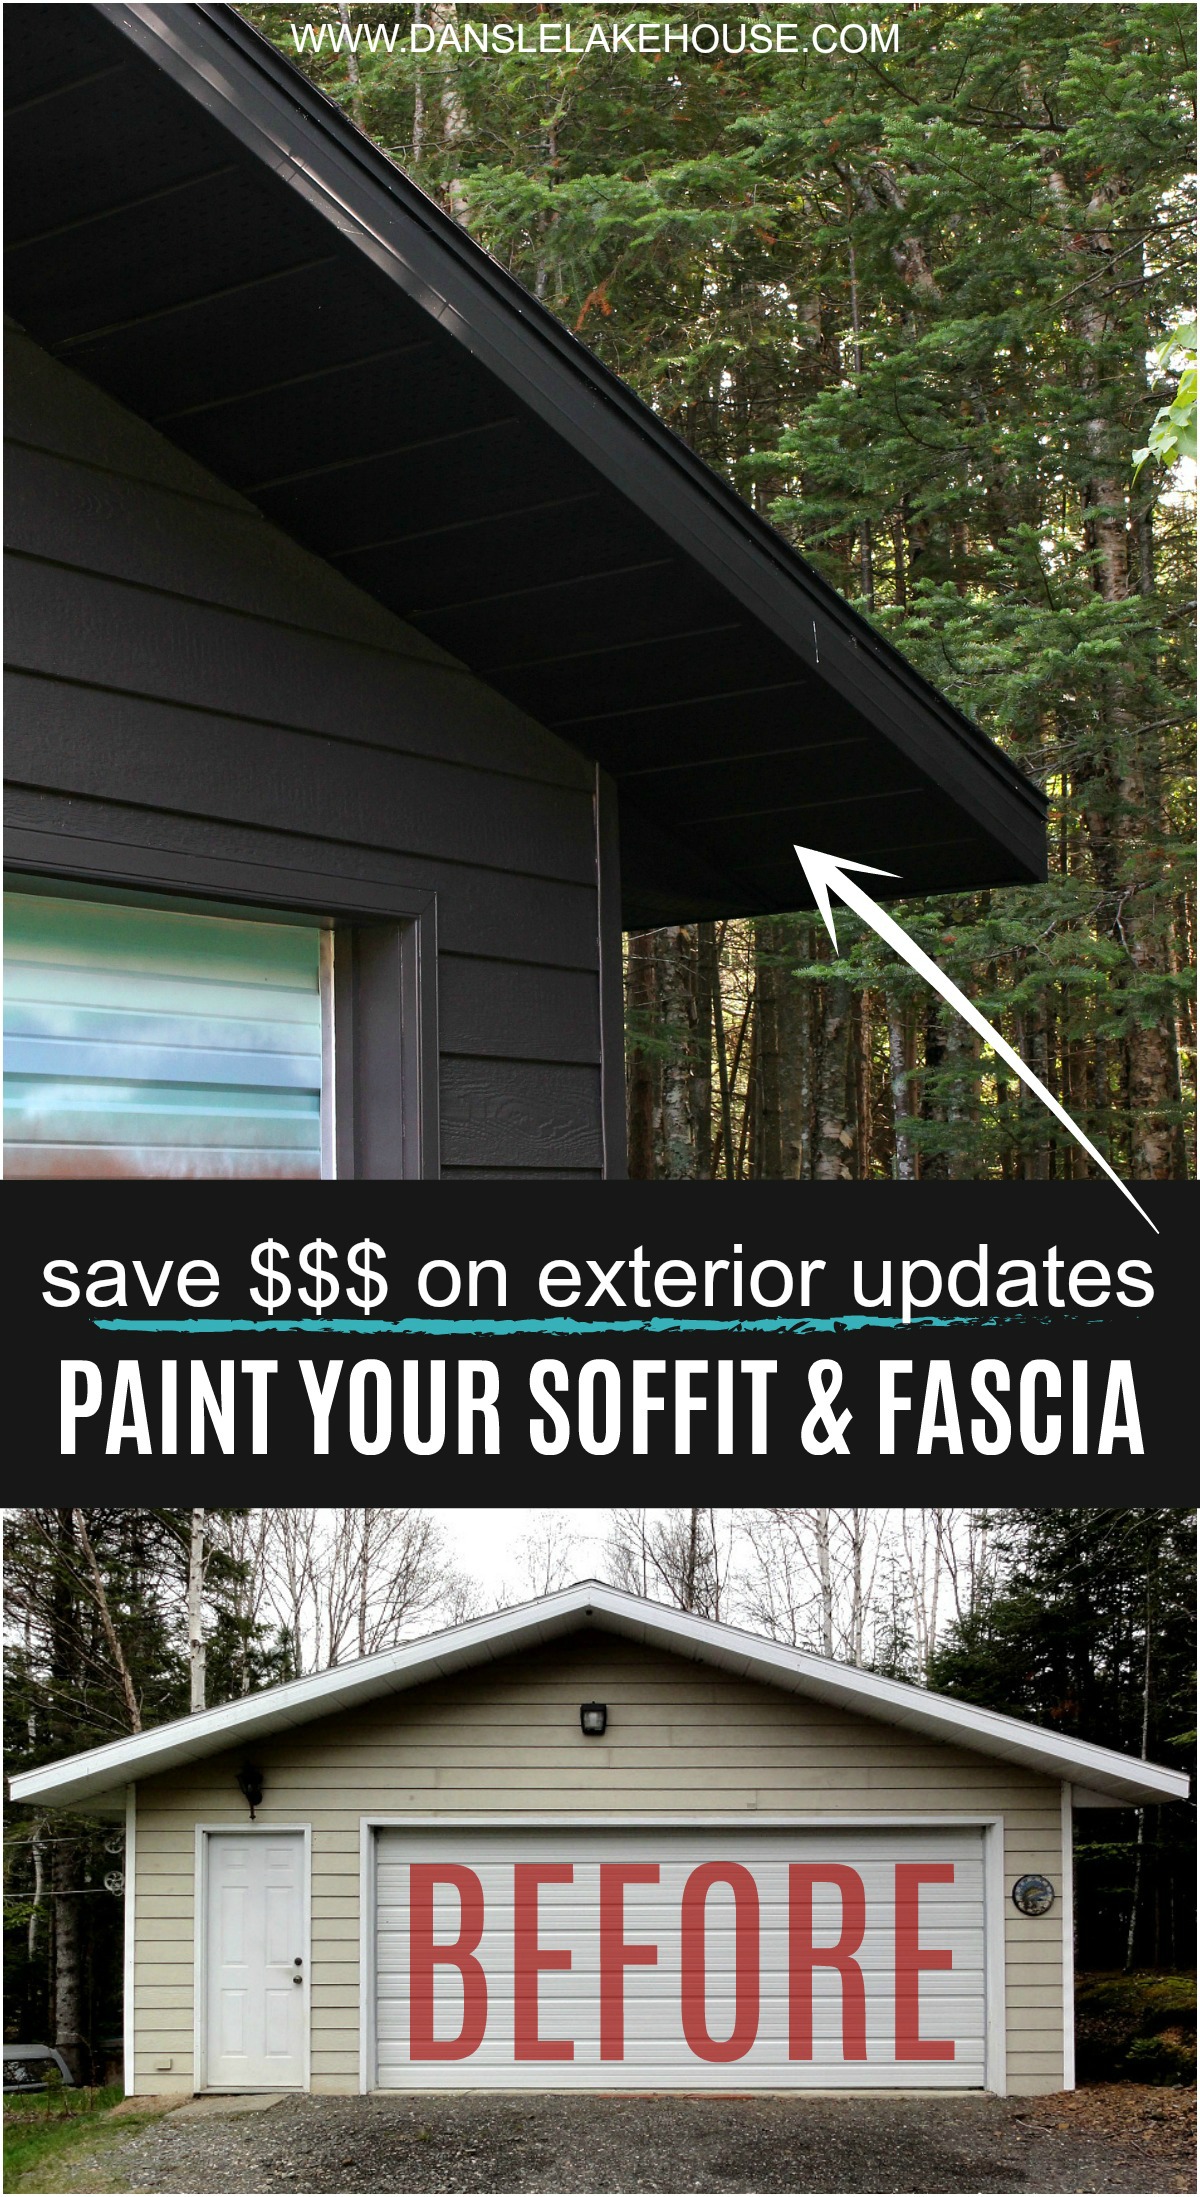
If I had been on the fence about black soffit, this would have been a great way to experiment. I love our DIY painted soffit and fascia and now I’m really excited for the house reno to pick up again.

It literally took two seconds for the spiders to come back – that’s what’s glistening in the photos, making it look like the paint is cracking.

Love this whole project! You guys are intrepid… And the look is gorgeous. We have an old garage that has three colors (only two matching sides) and I’m already plotting a makeover based on your methods. Can’t wait to see the story of the door!
Author
Thank you! I am so happy with how the garage is turning out – it’s getting me even more anxious for the house reno haha.
Just curious how this held up. It looks so good and I want it so it to my own garage but I’m worried about peeling… ?
Author
It has not peeled or chipped at all. I believe because it’s sheltered and no water/snow sits on it, it has held up perfectly. I did take time to do the prep outlined in the post, which is important – it needs to be clean and dry for paint to adhered well. But it honestly looks brand new and I’d recommend this DIY with confidence, using the paint I used.
Would brush on rust oleum paint work as well as spray paint? Thinking we would t need to worry about overspray?
Author
You could tape off and use something inexpensive like vapor barrier to help with overspray but totally understand your concerns. Brush on paint should work just as well – you might want to try using a small, foam roller for smooth results. I’d also recommend multiple thin coats. You won’t get as smooth a result, but because you’re not looking up close at soffit/fasica anyway, I doubt you’ll notice!
This is a great tutorial! I’m going to try this at home!
Author
Happy painting!