If you’ve ever searched for a certain fabric print or table linen to no avail, you’ll love this DIY stenciled fabric tutorial – I’ll show you how to stencil fabric and make your own fabric prints. I’m also sharing two DIY stenciled fabric projects: an easy DIY stenciled table runner plus a DIY stenciled table cloth with matching napkins. Here’s a sneak peek at both projects, then I’ll dive into how to stencil fabric, including some fabric stenciling tips and supply list for making stenciled fabrics.

I collaborated with Stencil Revolution for these easy DIY stenciled fabric projects. I chose the Starvos stencil (which can also be used on painted floors or concrete to create a gorgeous tiled effect).
Supplies for Fabric Stenciling:
- Stencil (pay attention to scale: we chose the 6″ by 6″ size)
- Fabric or pre-made linens of your choice (here’s a plain navy tablecloth)
- Stencil brush (I’ve heard makeup sponges can work well too)
- Acrylic paint + textile medium (or fabric paint)
- Plastic to cover work surface
- Rags to blot and keep stencil clean
- Painter’s tape (to secure the stencil – optional)
Can You Use Acrylic Paint to Stencil on Fabric?
Yes! You can use acrylic paint to stencil on fabric by mixing it with a textile medium, which will turn the acrylic paint into a washable fabric paint.
What Are Stencils Made of?
For this project, you’ll want a stencil that is laser cut, so the design is very crisp, and manufactured using a sturdy material, like mylar.

How to Create DIY Stenciled Fabric Linens:
Find the basic steps for how to create DIY stenciled fabric below, then read on for more details and photos:
- Choose a sturdy, thick fabric to avoid bleed through
- Launder your fabric of choice to remove sizing
- Iron to create a smooth surface for stenciling
- Protect your work surface with a plastic drop cloth
- Mix acrylic paint with a textile medium into a small palette or container
- Plan the stenciled design
- Secure the fabric and stencil in place (simply hold it or use painter’s tape)
- Dip the stencil brush into the paint and apply the paint with a stippling motion
- Apply paint in multiple, thin coats (thick paint can bleed under the stencil)
- When the coverage looks suitable, remove the stencil by lifting straight up (do not drag)
- Set the stencil aside and wipe the underside clean with a damp cloth
- Repeat the process
- Let the fabric dry overnight undisturbed
- Depending on the brand of textile medium or fabric paint you used, follow the manufacturer’s instructions for setting, ironing and laundering

How to Choose The Right Type of Fabric to Stencil:
For fabric stenciling, choose a tigther weave fabric to avoid bleed through. We only got a little bleed through with the grey cotton runner, which is a very thin fabric, but the poly-blend table cloth was thicker with a tighter weave, so we didn’t get any bleed through with that at all. Although I had success with a poly-blend, typically natural fabrics, like linen and cotton, will be best for fabric stenciling. If you’d like to stencil a sewn item as opposed to fabric, click here to learn how to sew an oval table cloth and pop over to this tutorial to learn how to sew a mitered corner. With those two sewing tutorials, you can easily sew your own table runner, tea towel or table cloth – or you can purchase a plain, solid table linen and give it an easy upgrade.
How to Prepare Fabric for Stenciling:
Before you begin stenciling fabric, wash and iron the fabric to remove any sizing and also to create a smooth surface for stenciling. However, note that some fabrics will shrink in the machine but it’s best to have it shrink before an item is sewn or stenciled, in my opinion.
How to Plan and Secure Your Stencil Placement:
Map out your design and placement and, if possible, experiment with stenciling on a scrap piece of fabric. Unlike a floor or wall, where you can touch up a mistake by correcting with the base color paint, stenciling a fabric is a one shot deal – but don’t stress, because once you’ve tried a few stenciled trial runs, it becomes really easy. You can hold the stencil in place with one hand but, if you’d prefer a sturdier surface, use painter’s tape to tape the fabric to your work surface and secure the stencil on the fabric with painter’s tape as well. Alternatively you can use a repositionable adhesive spray on the back of the stencil. With the pattern mapped out, it’s time to start stenciling!

How to Mix Acrylic Paint with a Textile Medium:
Find a small container, like an old yogurt container or paint palette, and mix up the acrylic paint with the textile medium, following the manufacturer’s instructions. The brand of textile medium we used for this DIY stenciled fabric project is photographed below and it required a 2:1 ratio of paint to textile medium.

How to Use a Stencil Brush:
Dip the stencil brush into the palette and dab it on a paper towel or rag to remove any excess paint. It’s better to apply multiple, thin coats of paint as opposed to one thick layer.

How to Avoid Smearing the Stencil:
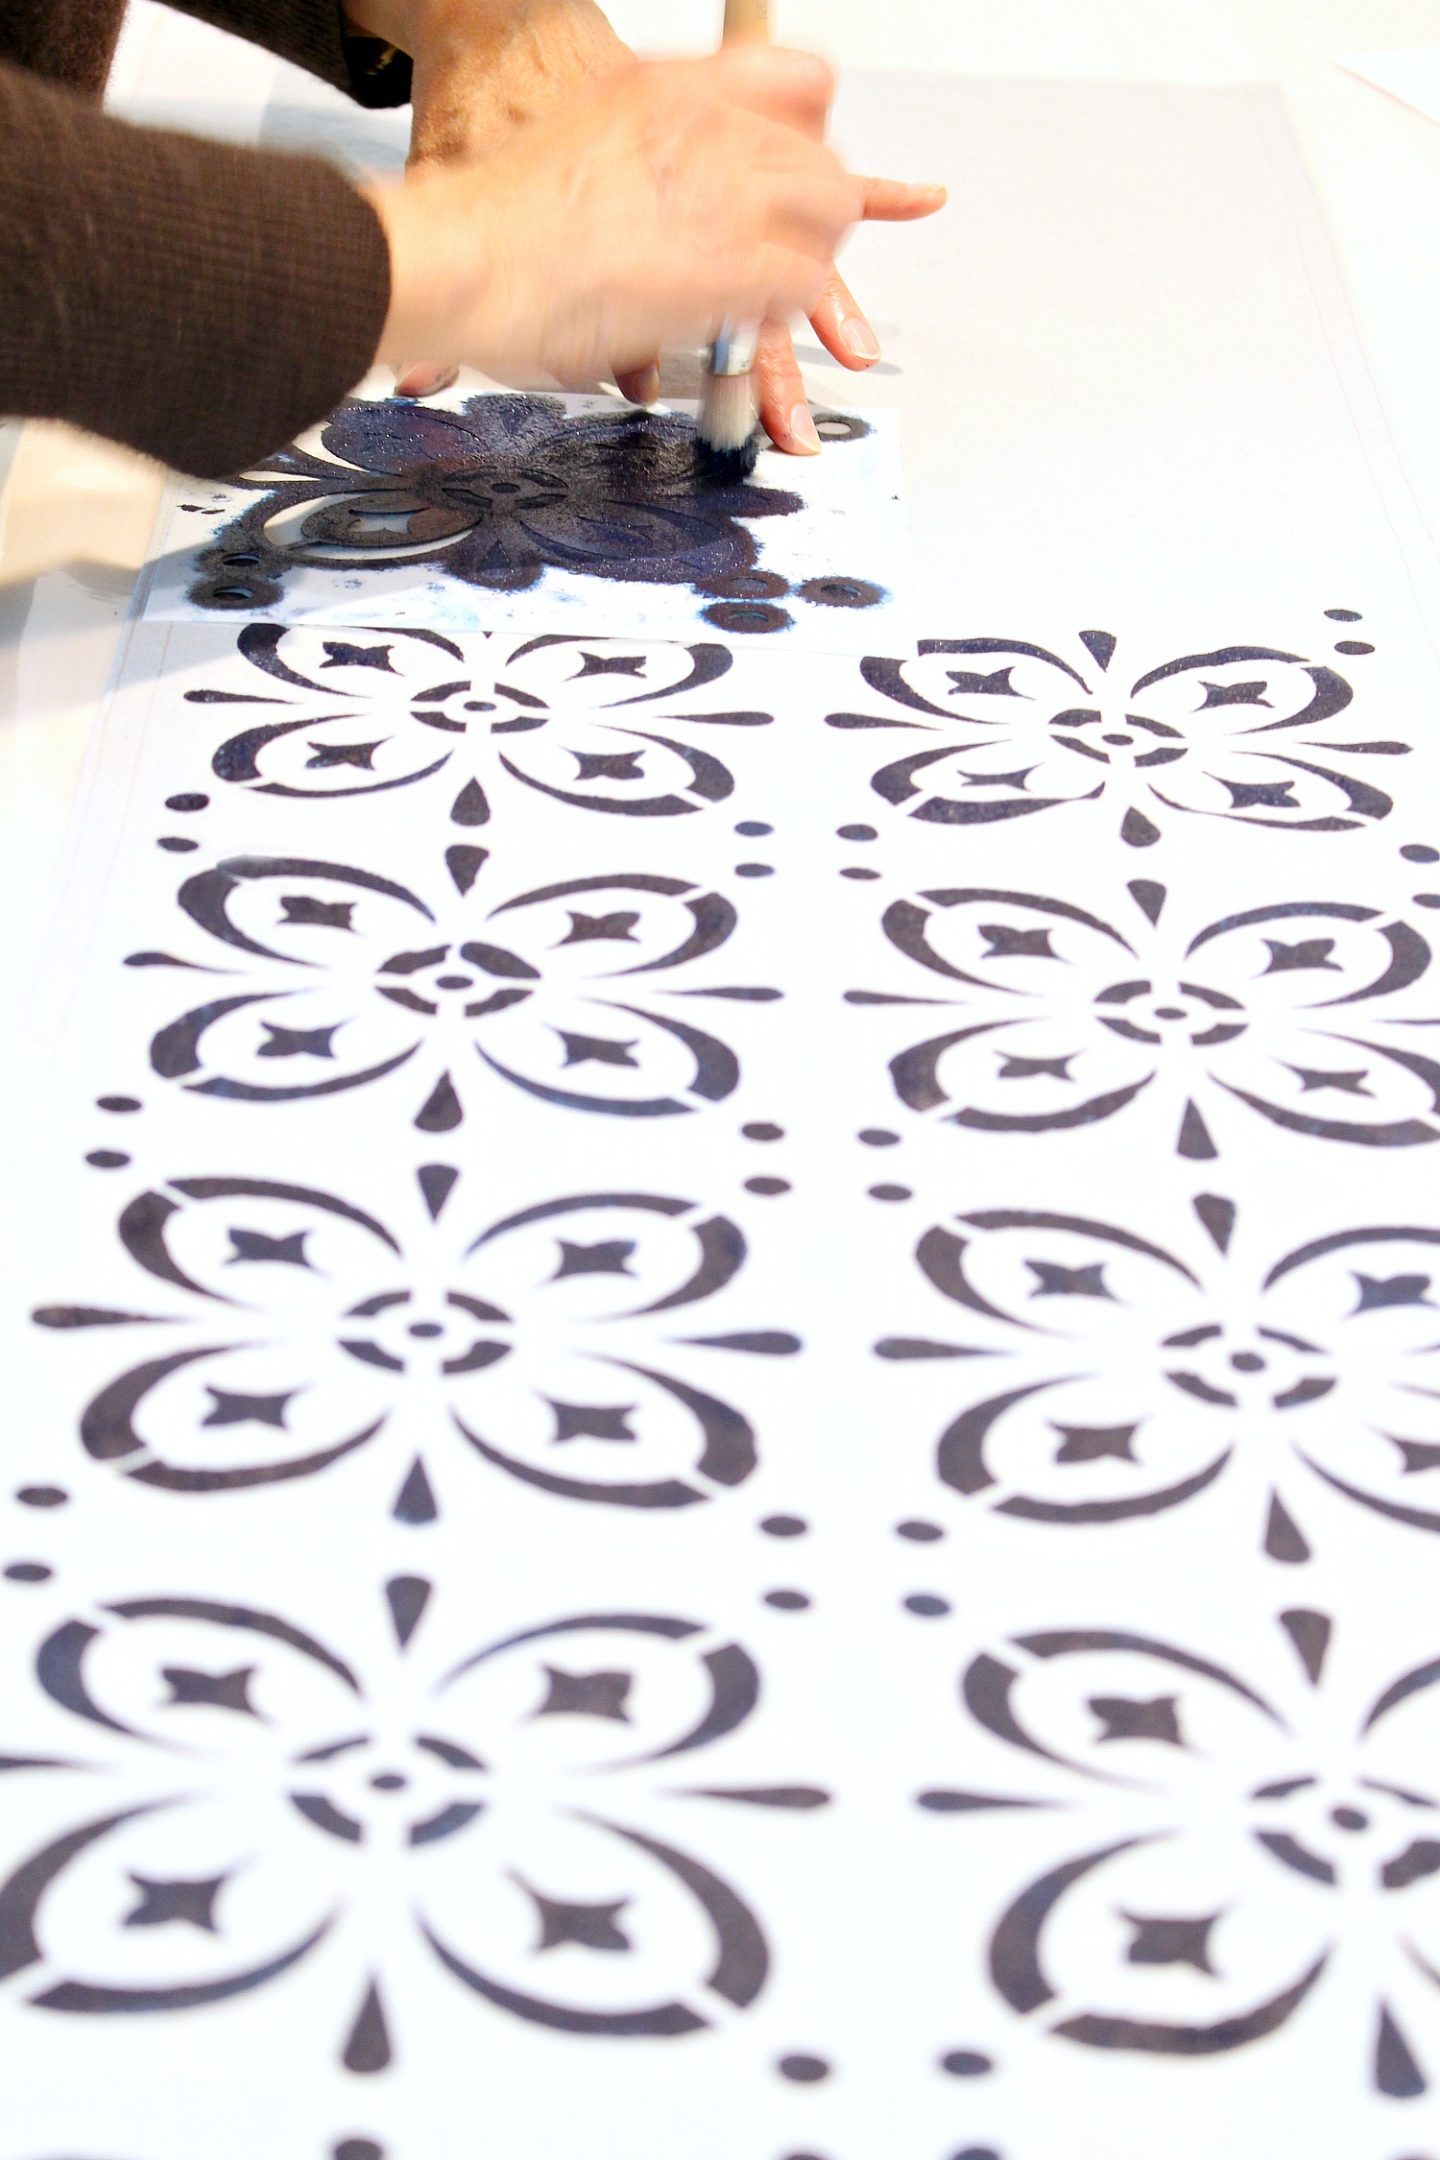
With the stenciling brush, use this stenciling technique: make a stippling motion, moving the brush up and down – being careful not to drag the paint across the stencil. As mentioned, use a light tough and thin layers of paint – paint applied too thickly can seep under the stencil. For best results: apply one thin layer, let it dry a few minutes, and then keep applying thin layers. Work from the outside of the stencil inward, make a vertical stippling motion and lay on the paint, being careful not to budge the stencil.

How to Prevent Paint Smearing When Stenciling:
When the paint looks uniform and the coverage is to your liking, remove the stencil without dragging it: just lift it straight up in one swift motion, and lay it face down on an old rag. Using a clean, slightly damp rag, wipe the back of it to prevent any paint from smudging the next piece of the design. This extra step helps keep the design crisp without smearing.
How to Set a Stenciled Design:
With the design completed, let the fabric dry overnight undisturbed. Depending on the brand of textile medium or fabric paint you used, follow the manufacturer’s instructions for setting, ironing and laundering your new DIY stenciled linens. For this brand of textile medium, we let the paint set for 7 days, then heat set by using a dry iron and a pressing cloth. We laid the pressing cloth over the stenciled design and placed the iron on top for 10 seconds. We repeated for each section of the stenciled design. Regular acrylic paint could eventually peel with use and washing, but the textile medium softens the feel of the paint and gives the acrylic paint more permanence. With this medium, the paint dried flexible and did not crack.
How to Customize a Stencil:
If you want a slightly different look to get more mileage from one stencil, you can tape off sections to customize the design:


See the Finished DIY Stenciled Fabric Projects:
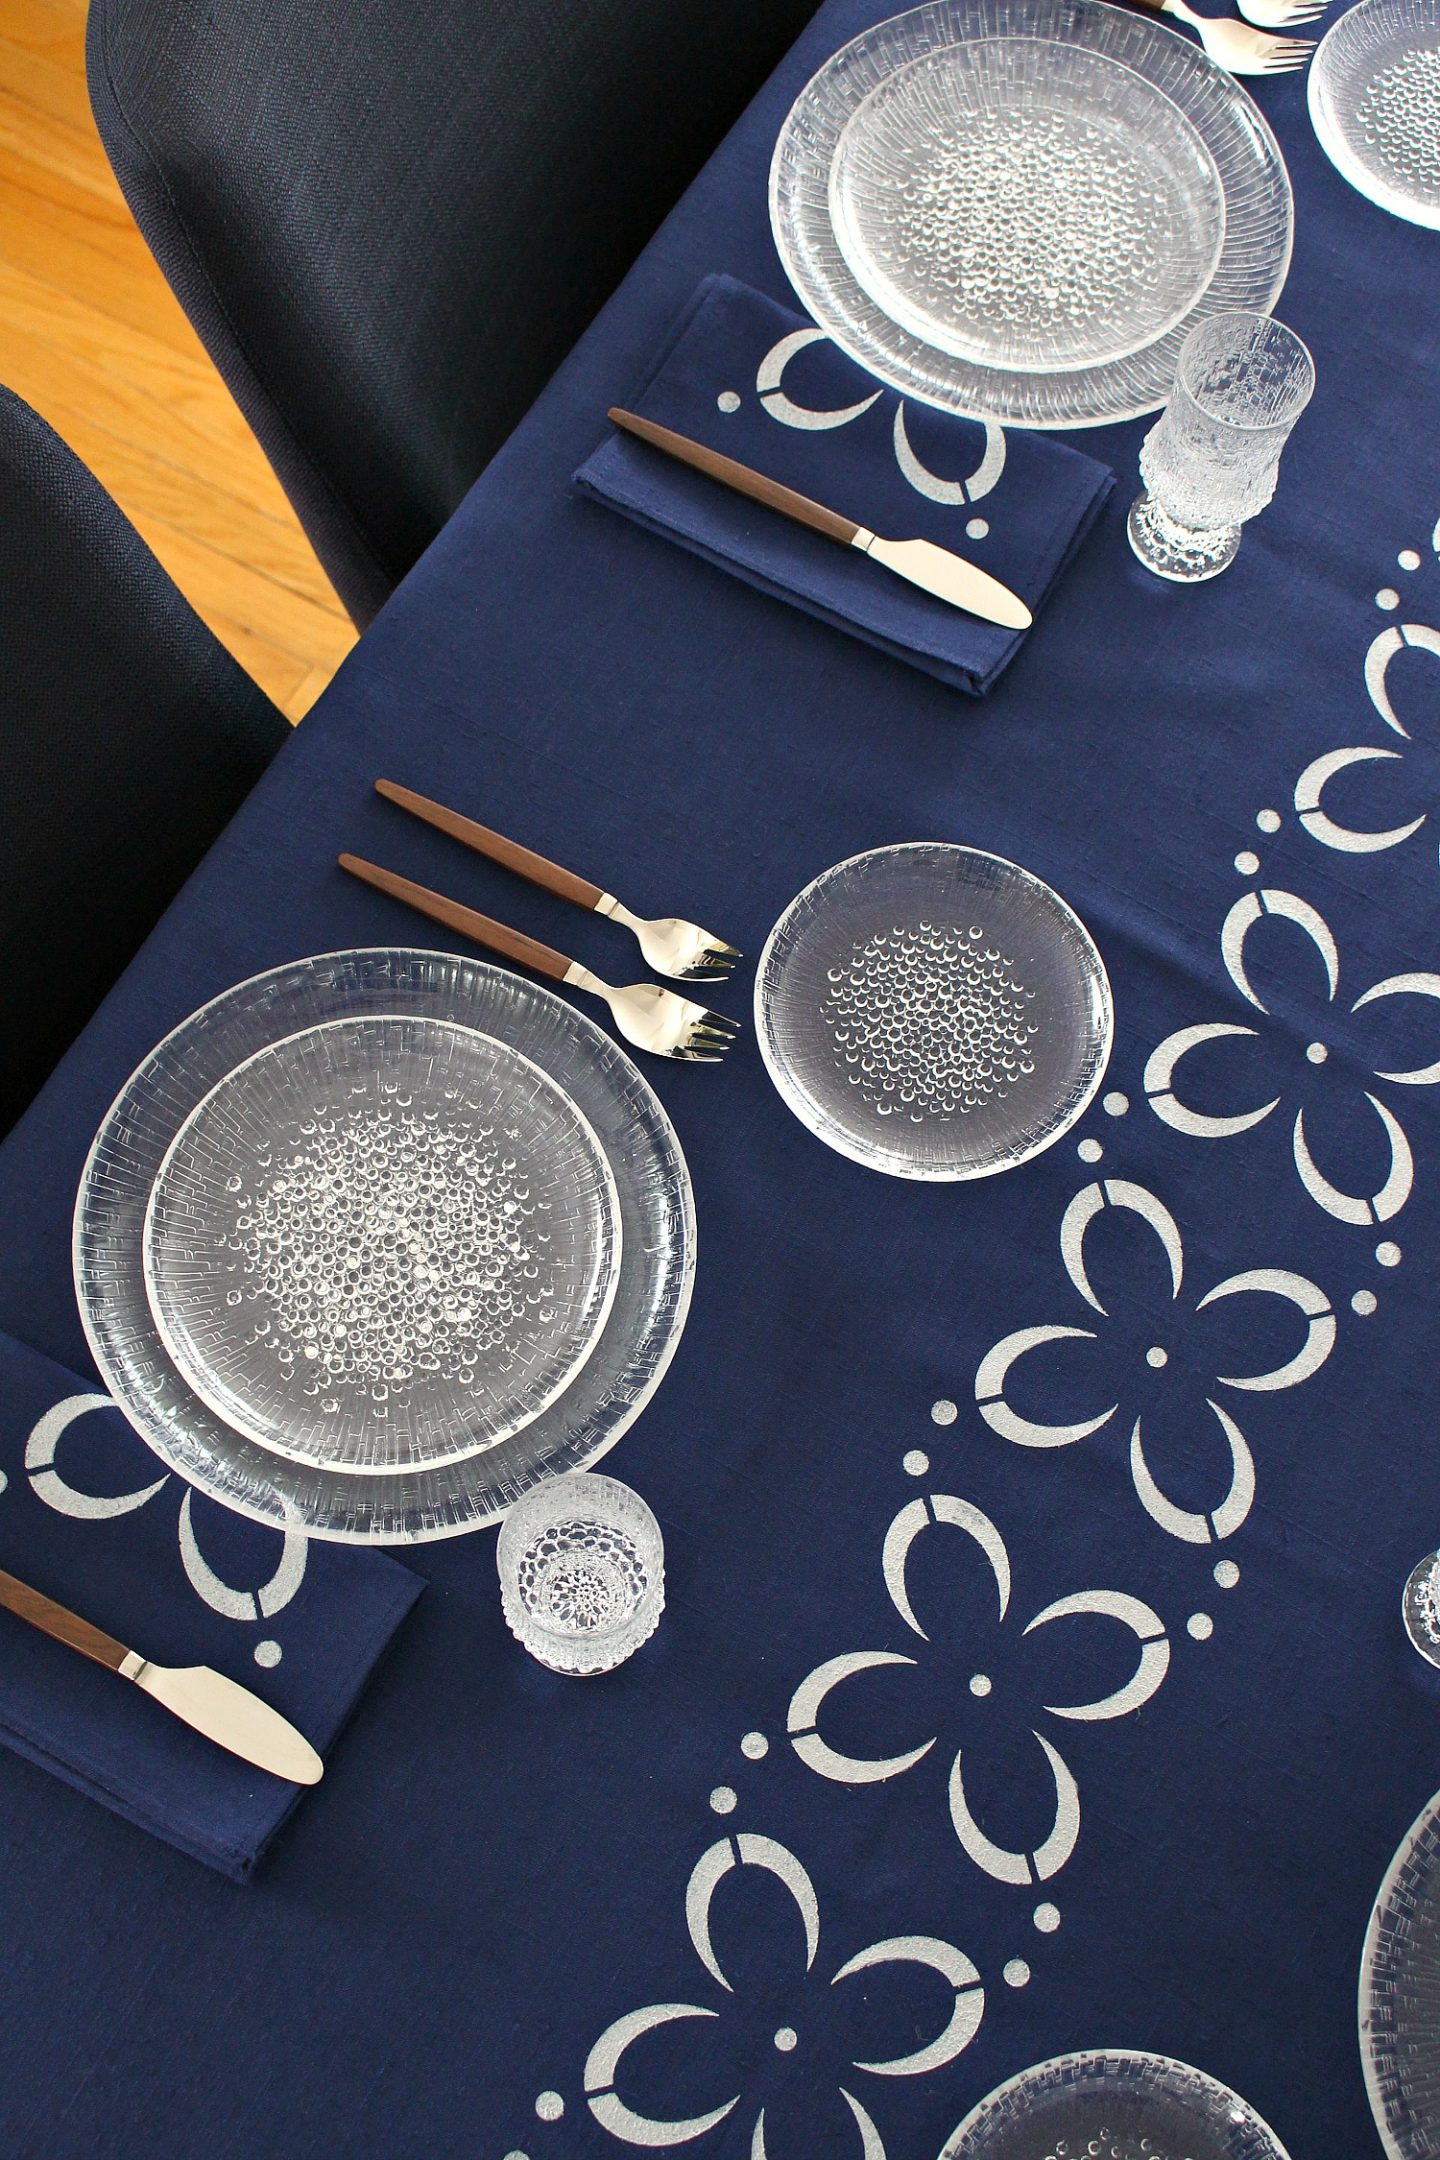
Now let’s take a better look at these gorgeous DIY stenciled linens! Styling these linens was so much fun – check out that Iittala Ultima Thule platter – a recent thrift store score. I love how it pairs with the 1960s Rorstrand china I thrifted years ago (they have a new design, in Indigo blues, which is just as pretty).


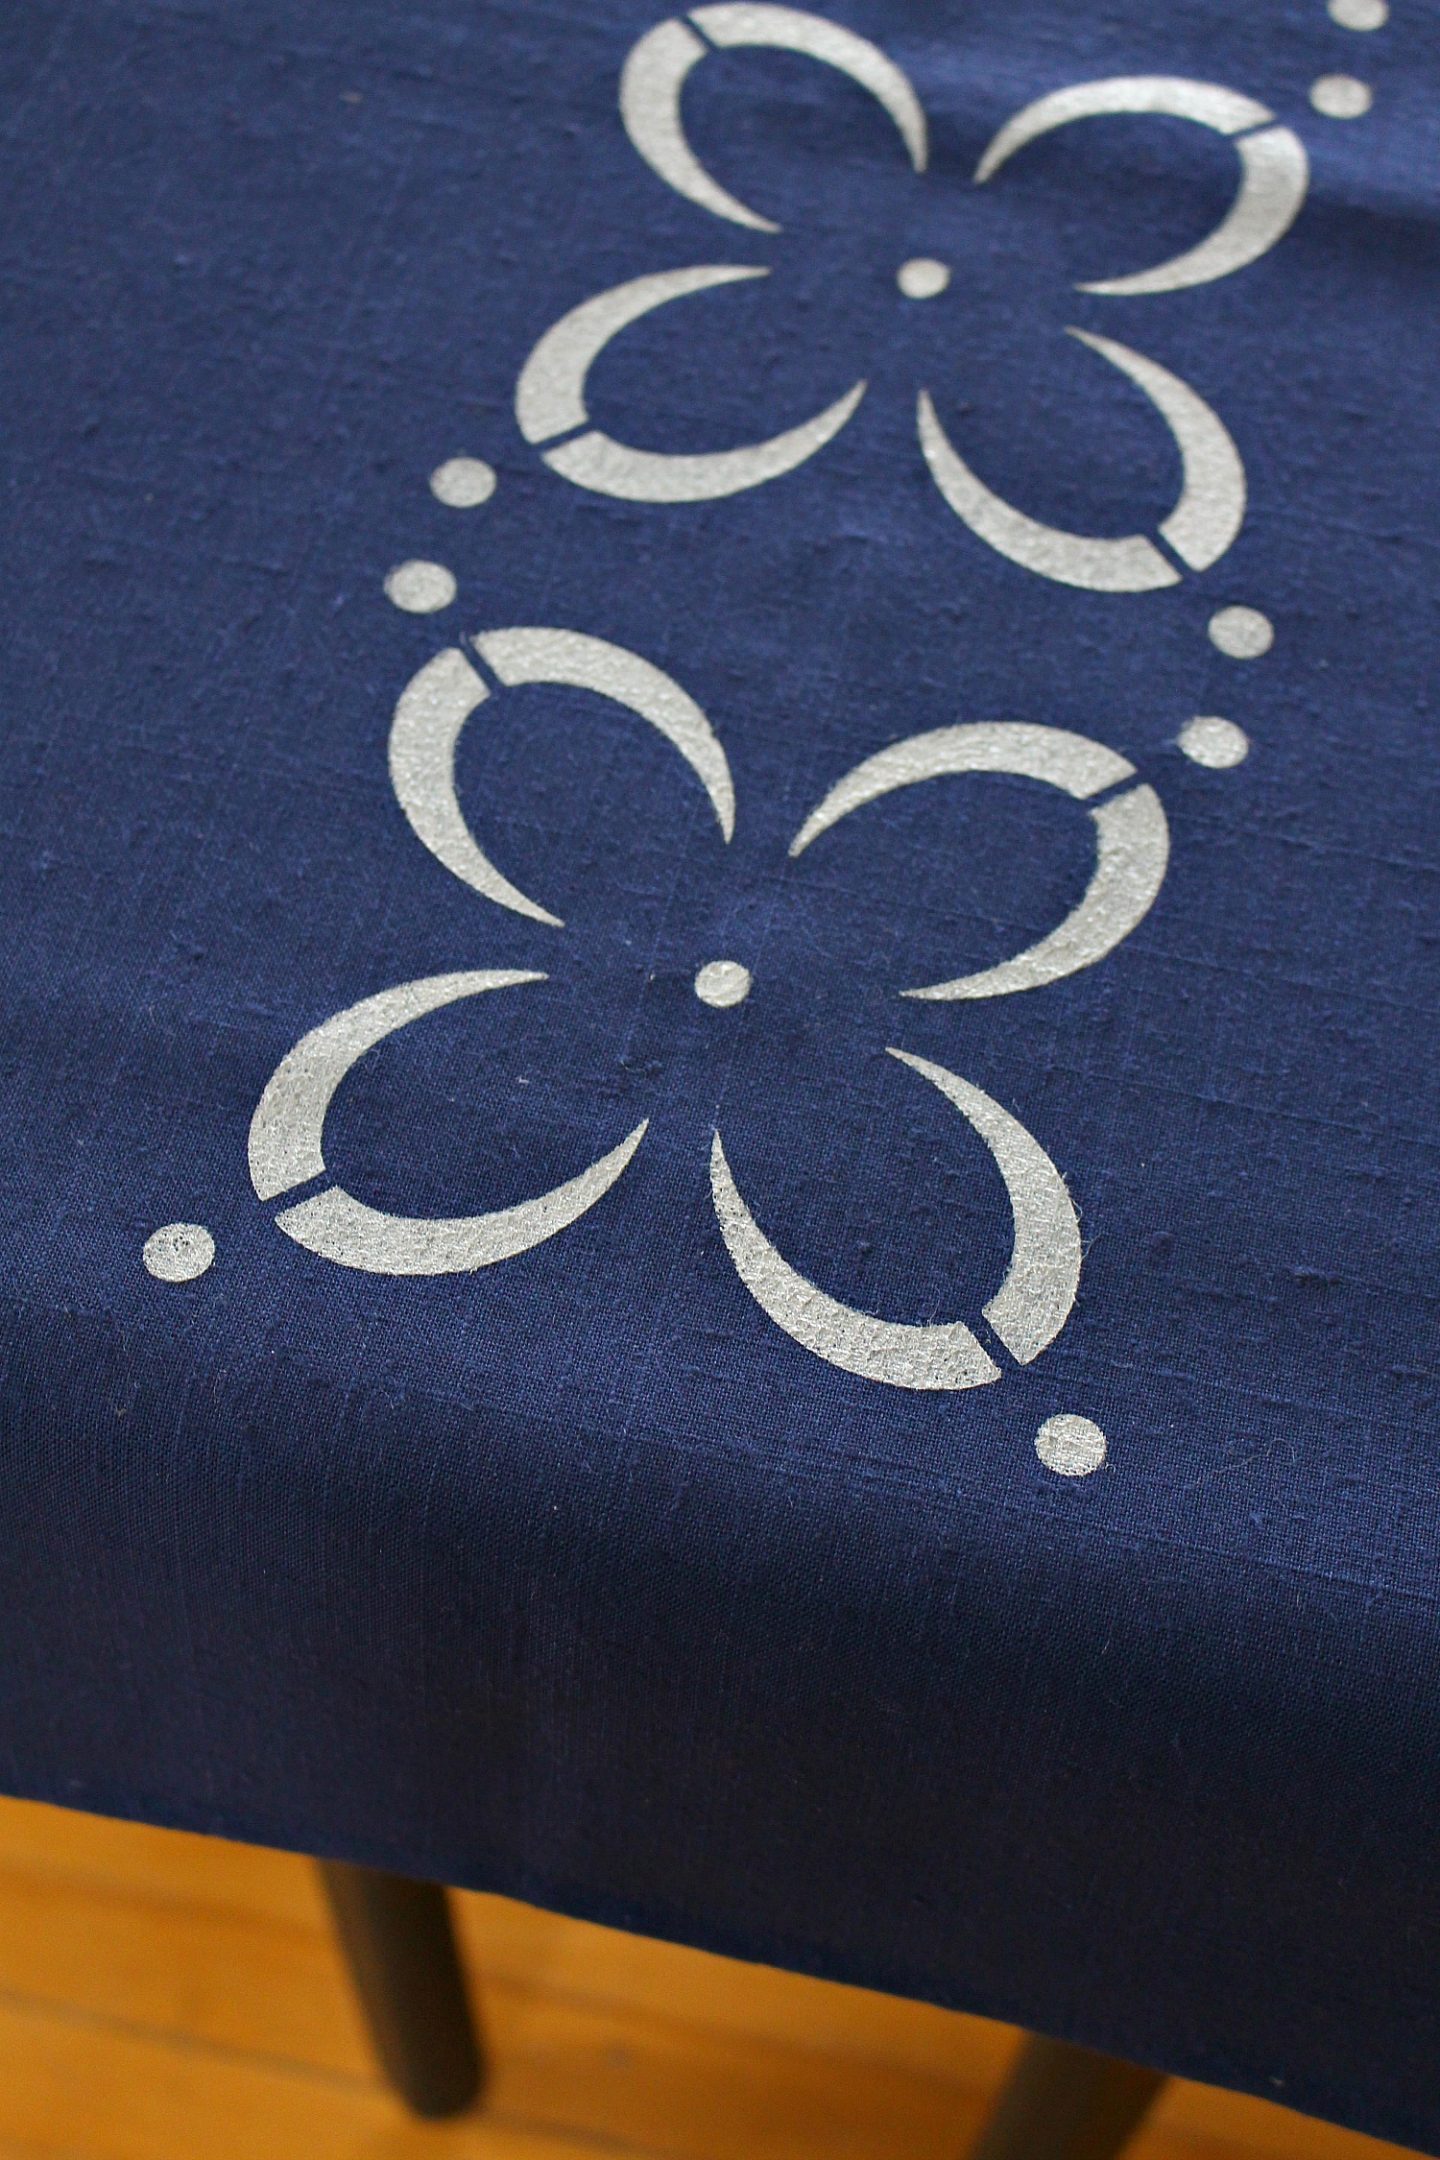
That DIY stenciled runner turned out so well. The navy table cloth is a simplified version of the design – you can’t give a stencil to a DIYer and not expect them to hack it a little. Plus we got a little creative with where we placed the stencil: the placement of the stencil on the napkins was designed so that when folded, one half of the design is revealed:


I hope you enjoyed this step-by-step tutorial for DIY stenciled fabric – let me know if you have any unanswered fabric stenciling questions in the comments.
P.S. Don’t Forget to Pin for Later!


This post was sponsored by Stencil Revolution but all thoughts and opinions are my own. If you’re looking for more inspiration and stencil ideas, check them out on Instagram, Facebook, Twitter, or Pinterest. Thanks for supporting the brands that help me create fun DIY content Dans le Lakehouse.

I saw this on IG, but only just now wandered over to the blog. You did a really nice job with the stencil. Very crisp. And I liked how you did an inverse with the colors. The directions/photos will be a great resource in the future. Thanks for working out all the details for the rest of us 😉
Author
Thanks so much! So happy you like this project. I enjoy being a DIY guinea pig, lol 🙂
Really beautiful job! I love DIY for certain decor items, but honestly never thought of linens. These don’t look like a DIY product, these look like something that I’d buy in a boutique style shop!!
Great tutorial!
Author
Thanks so much! That’s such a nice compliment. I’m so happy you like these DIY’d linens.
Hi, Tanya! I’m just getting back to you on this, and hope maybe you can give some help. I loved your oval tablecloth from way back when, but couldn’t figure out how to cut the curve for an oval. Did I miss something in the tutorial? We are settling into my mom’s little cottage (she passed in mid-July, it feels like yesterday), and I’d love to use some of these stenciling techniques to set off her MCM table. Thanks!
Author
I’m glad to hear you’re settling into the cottage, I’m so sorry for your loss. It’s so lovely to hear about the projects you want to tackle. For cutting the oval tablecloth, I think we traced an oval tablecloth that I already owned. It’s so far back, my Mom and I are wracking our brains. If the fabric is wide enough though, you can also lay your fabric on the table and mark the overhang with a pin all the way around. So measure along the straight side, pick an overhang, pin it there, and work your way around the curve and measure the distance down. Then you can cut pin to pin. Does that make sense? We should really get into videos, lol. I hope this helps a little 🙂