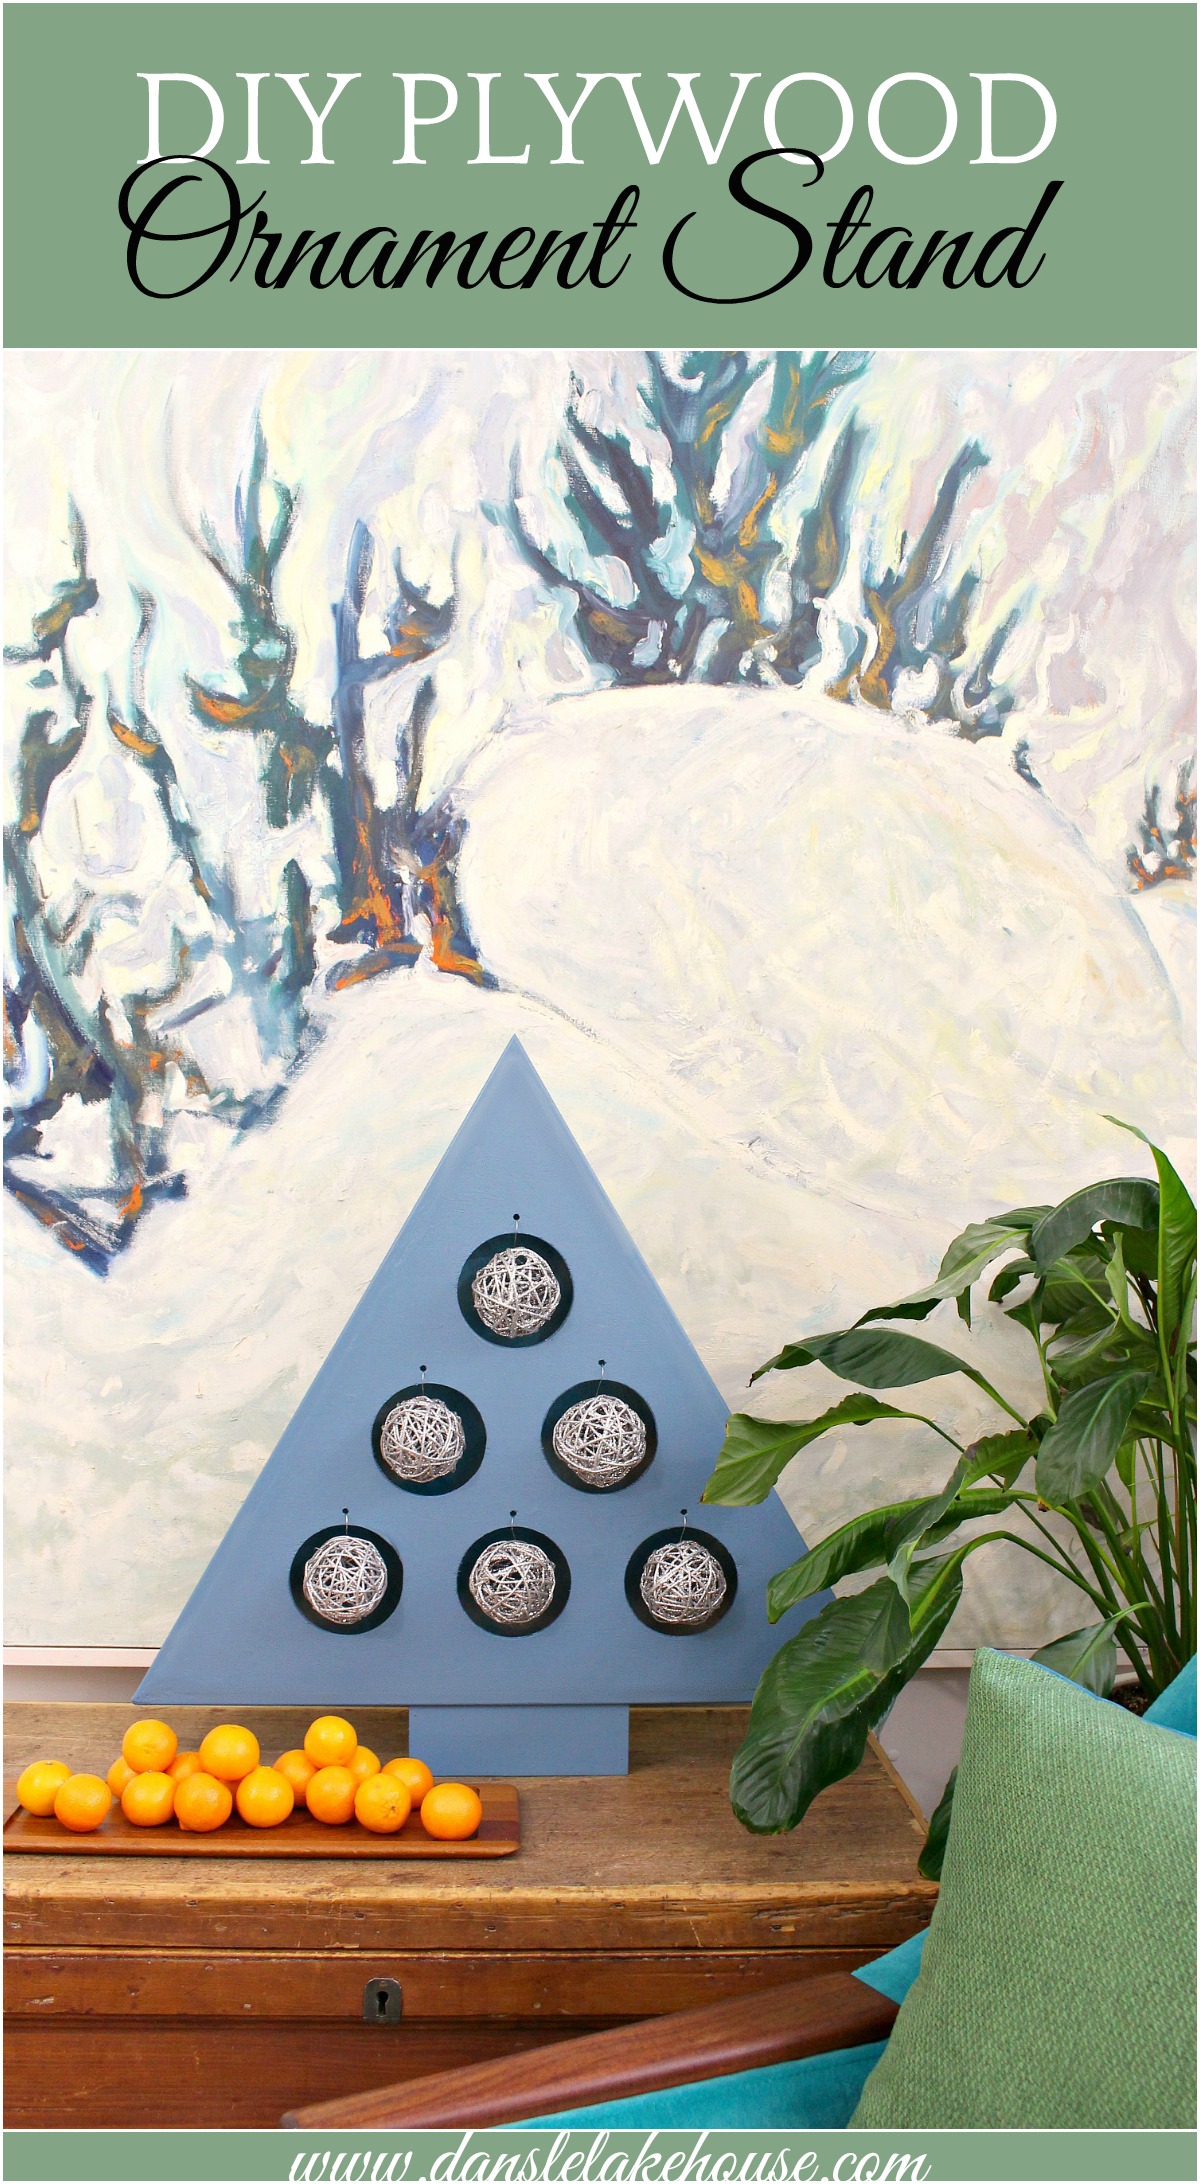
This DIY plywood ornament stand might be my favorite wooden tree yet! Remember my DIY plywood tree with Scandi vibes? I still think it was a little wibbly wobbly, but it got such lovely feedback and has been shared by a ton of websites, including Apartment Therapy. Then I made the Crate and Barrel knock off A-frame ornament stands for a friend and those were a hit too – I even had people message me and show me the versions they made using my tutorial. That’s my favorite kind of reaction! I love that so many people enjoy the idea of these wooden trees. They’re so cute on a mantle or in small spaces where a traditional Christmas tree just isn’t feasible. My most recent wood ornament stand has a modern vibe and a light up interior that casts a soft glow at night.

Isn’t it cute? This DIY plywood ornament stand project has such a simple design and I used wood scraps for it, so it’s budget-friendly. Here’s how to make this DIY plywood tree.


Supplies for this DIY Plywood Ornament Stand:
- 1/4″ plywood
- scrap window trim (or use plywood)
- jigsaw
- miter saw
- hole saw (we used 4″)
- drill
- wood glue
- air nailer/compressor (optional – you can use clamps or tape als0)
- wood filler
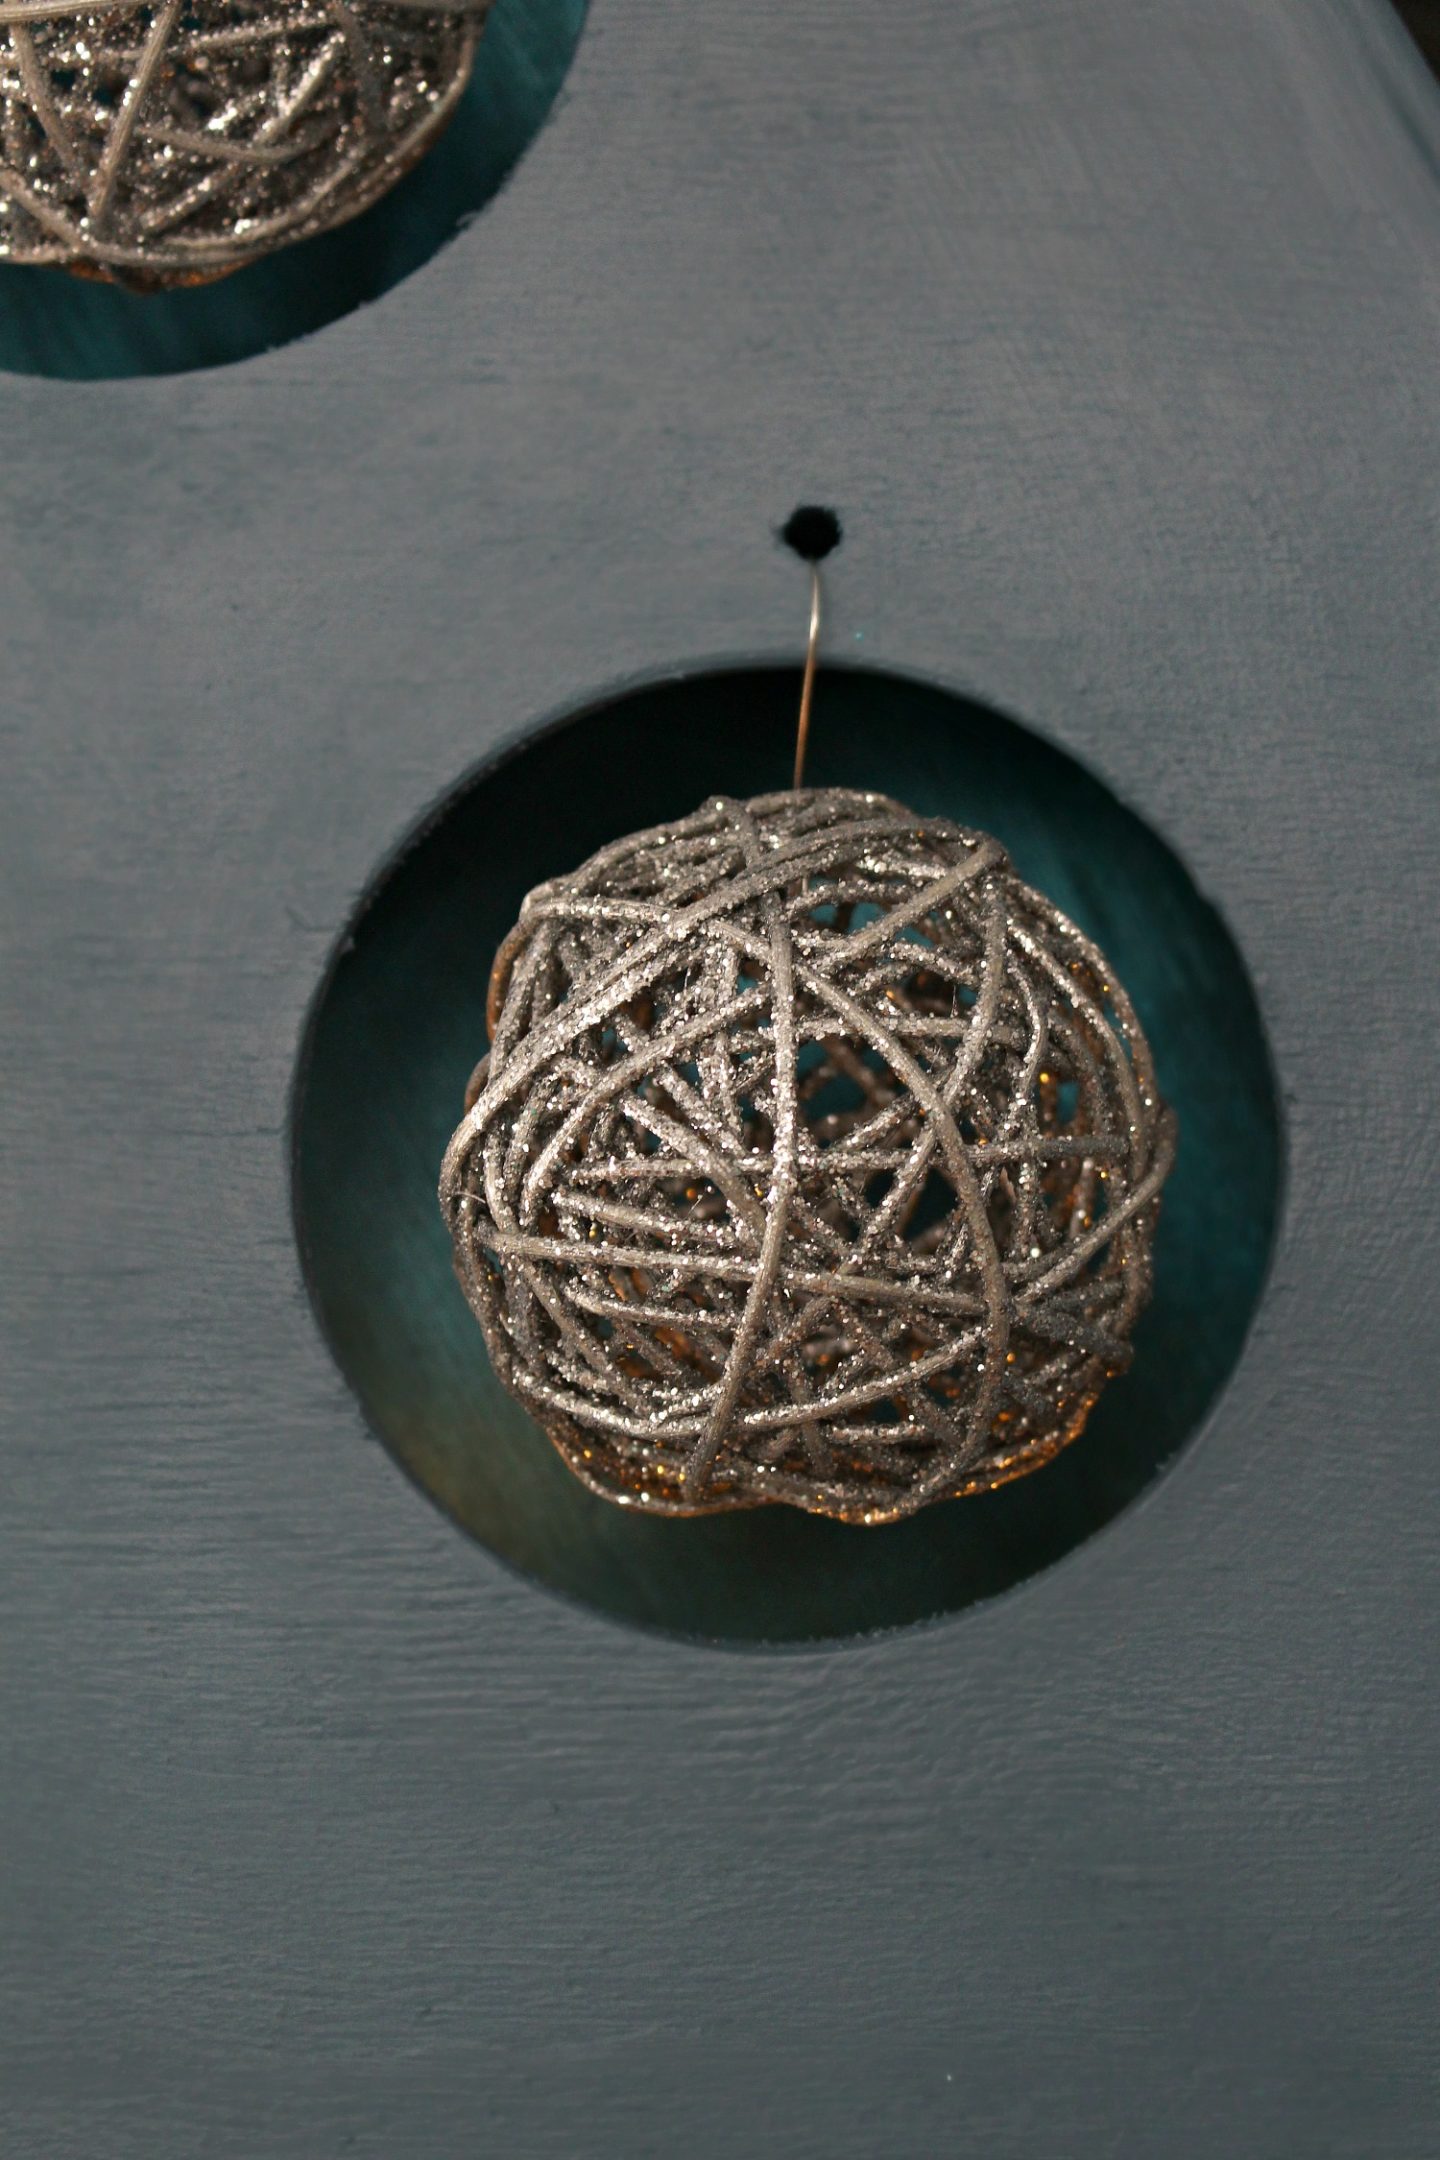
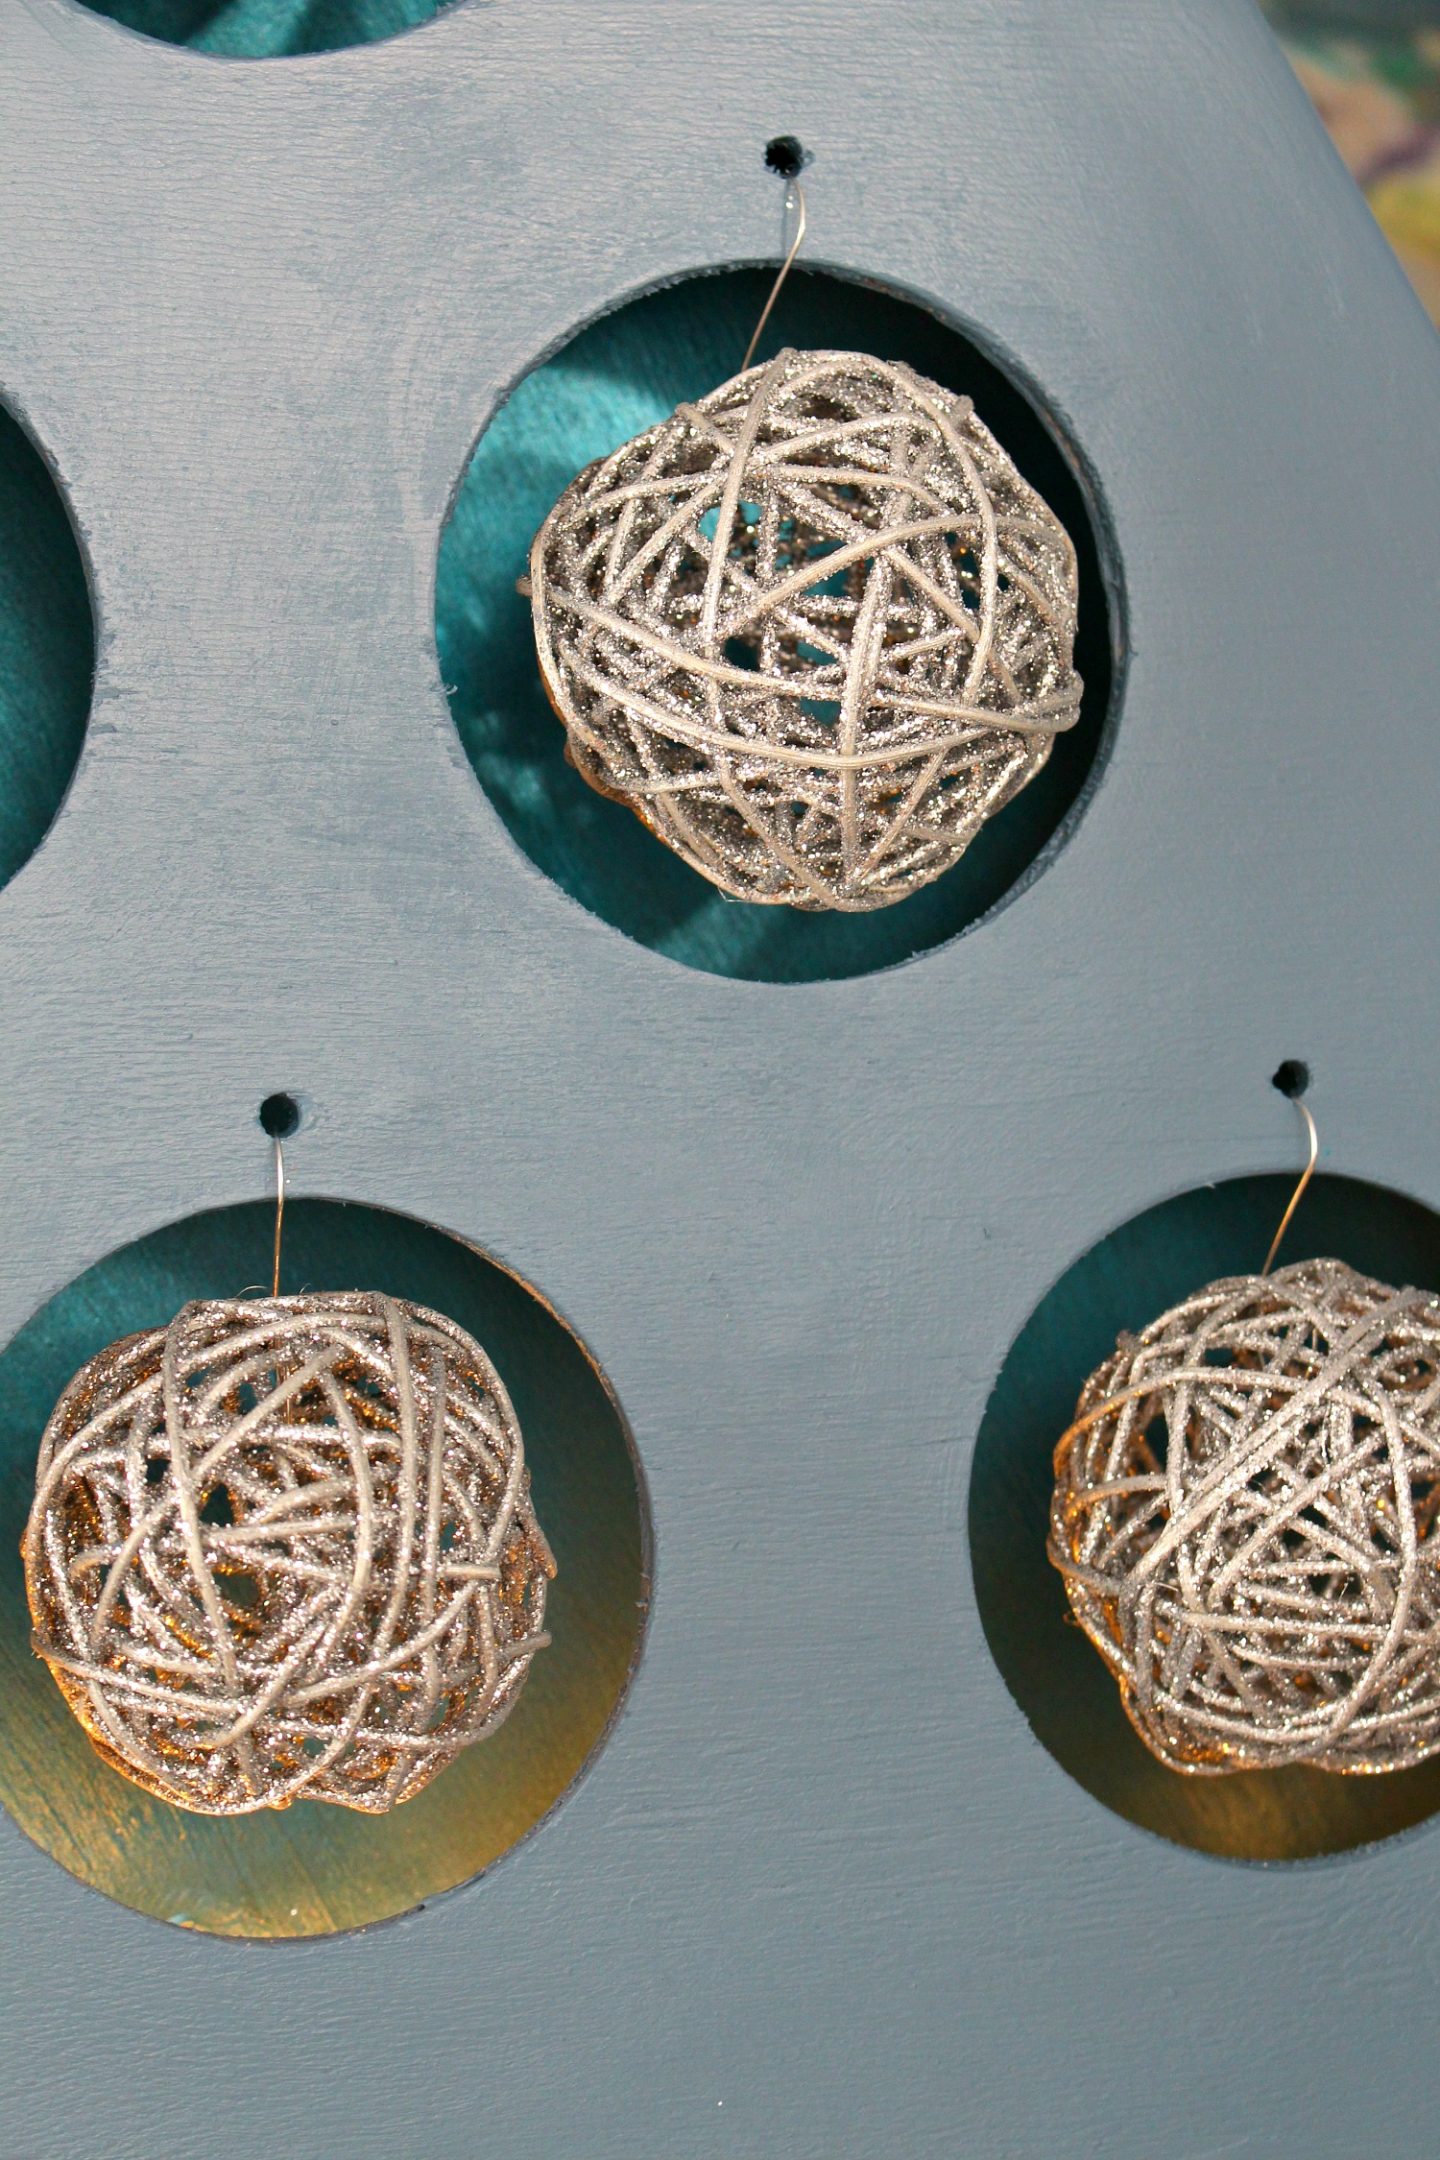
- paint (I used a test pot of Behr’s Blueprint for the exterior, and a shimmer teal acrylic for the interior)
- battery operated lights (optional)
How to Make a DIY Plywood Ornament Stand:

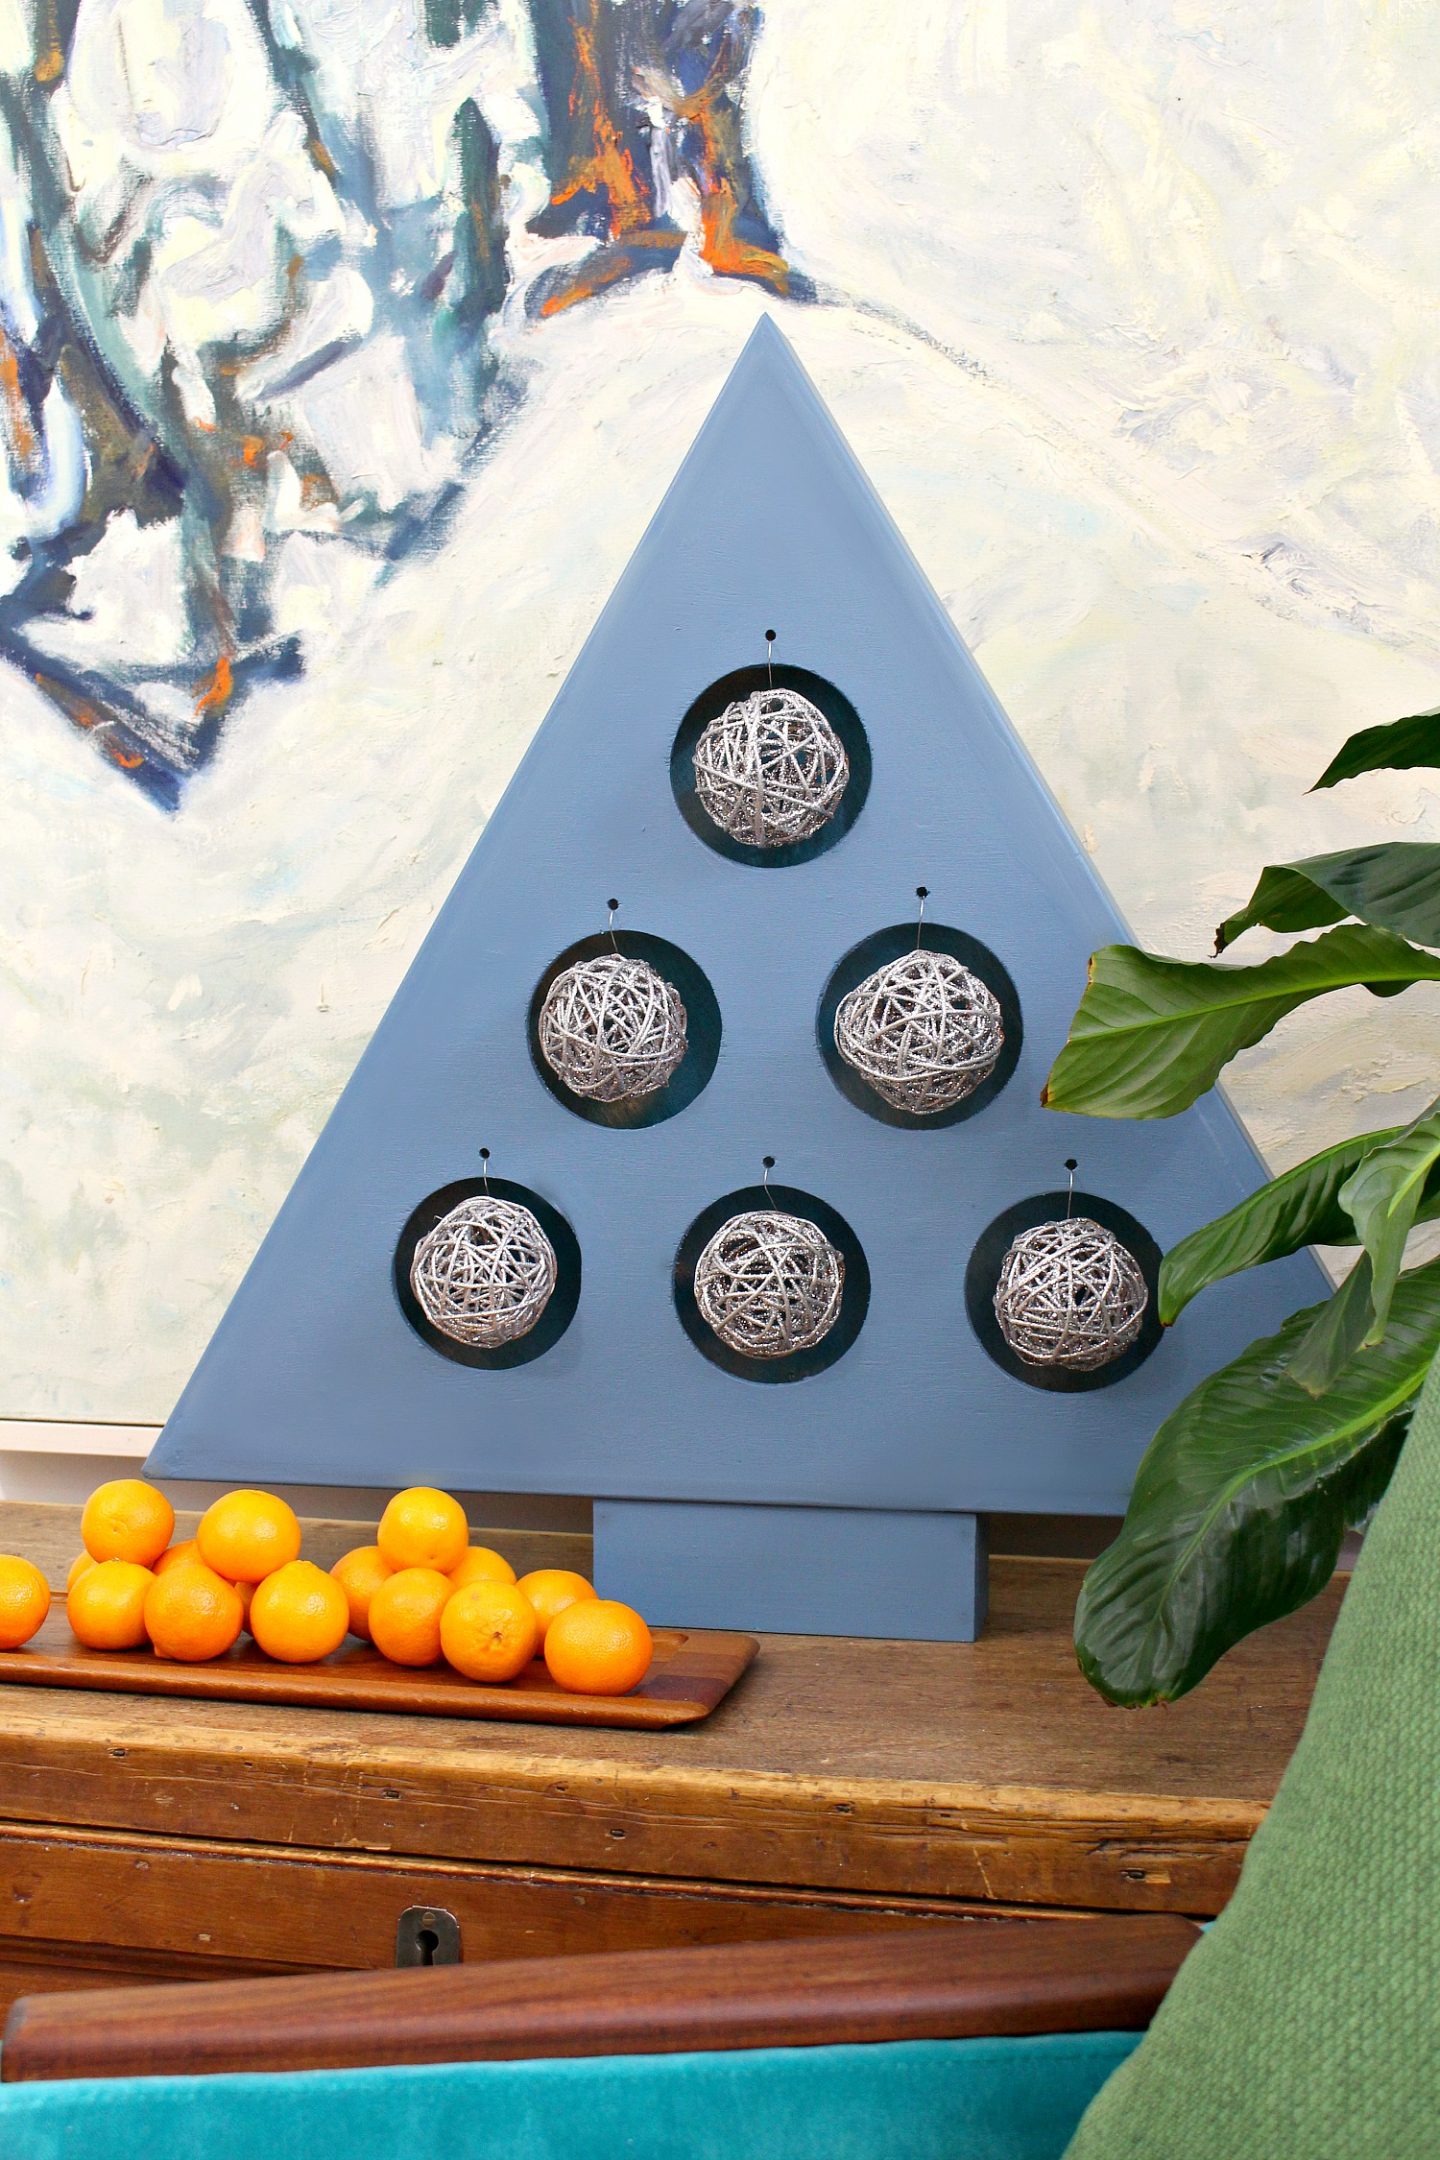
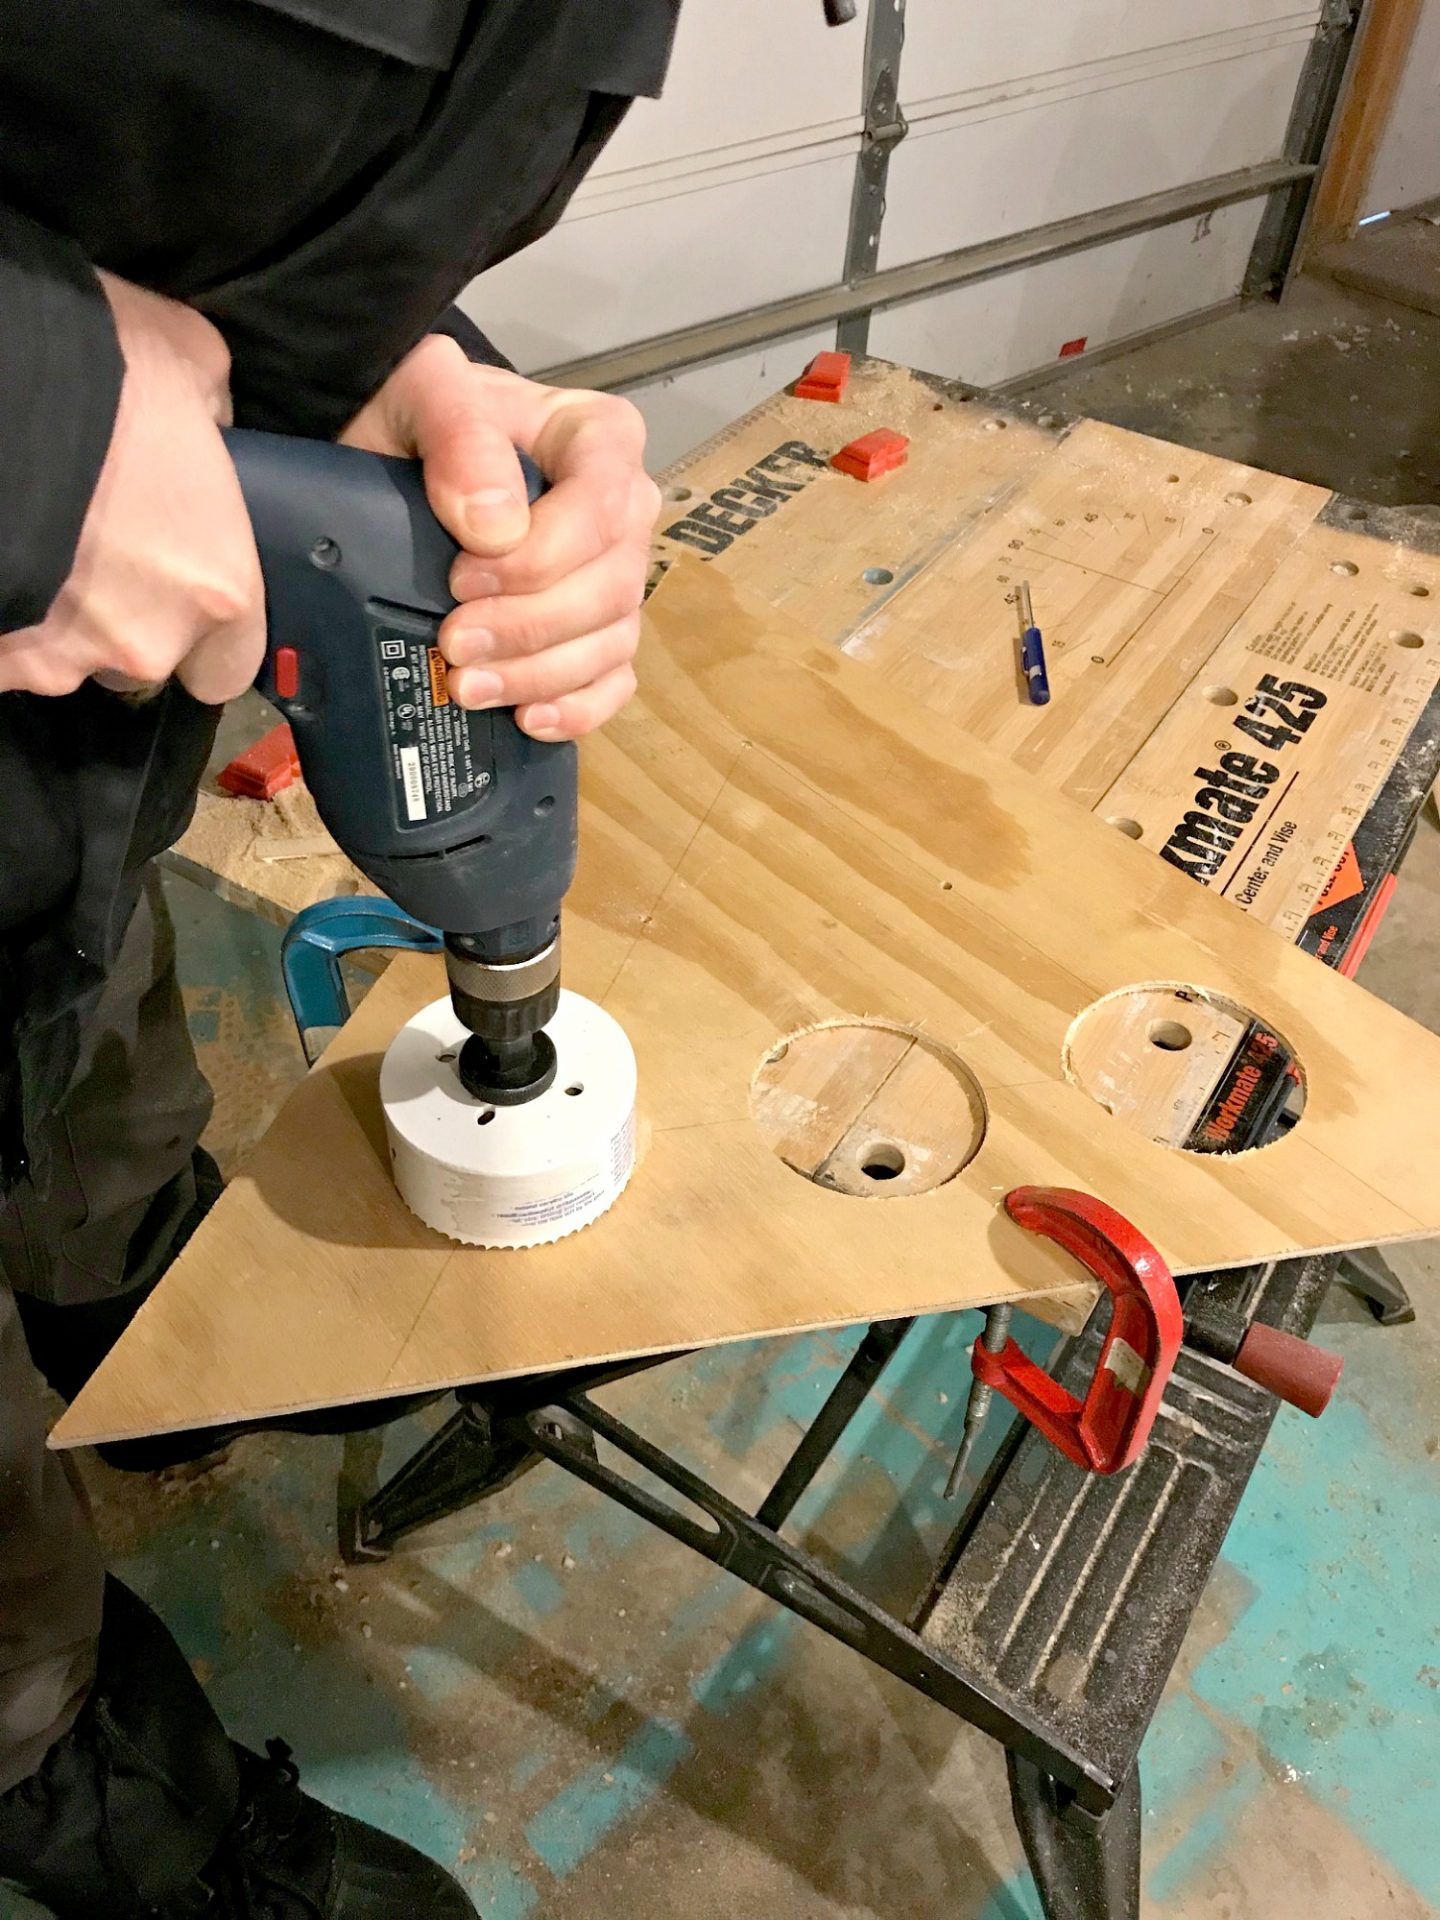
The first step is to figure out what size tree you’d like to make. I decided to make a tree with six holes and spaced that out roughly to figure out the size I wanted. Hubby and I used scrap 1/4″ plywood for the front and back of the triangle ornament stand. First we drew a 60 degree acute angle from one edge of the plywood. We already have a 4 inch hole saw so we decided that size hole would be good. From the edge of the plywood draw a parallel line 4 inches from the edge. This is the radius of the hole plus a 2 inch space we wanted around the outside. Then draw a line parallel to the 60 degree line you made, also 4 inches towards the centre. Where these two lines intersect is the centre of the first circle. 6 inches along those two new lines are the centers of each of the next circles. You should have 5 circles drawn. Draw a line between the centers of the last two circles and draw a circle centered on that line. You should now have 6 circles arranged in a triangle. From the last line draw another line parallel to it a 4 inches away from the centre. This should complete the triangle with the circles in the middle.
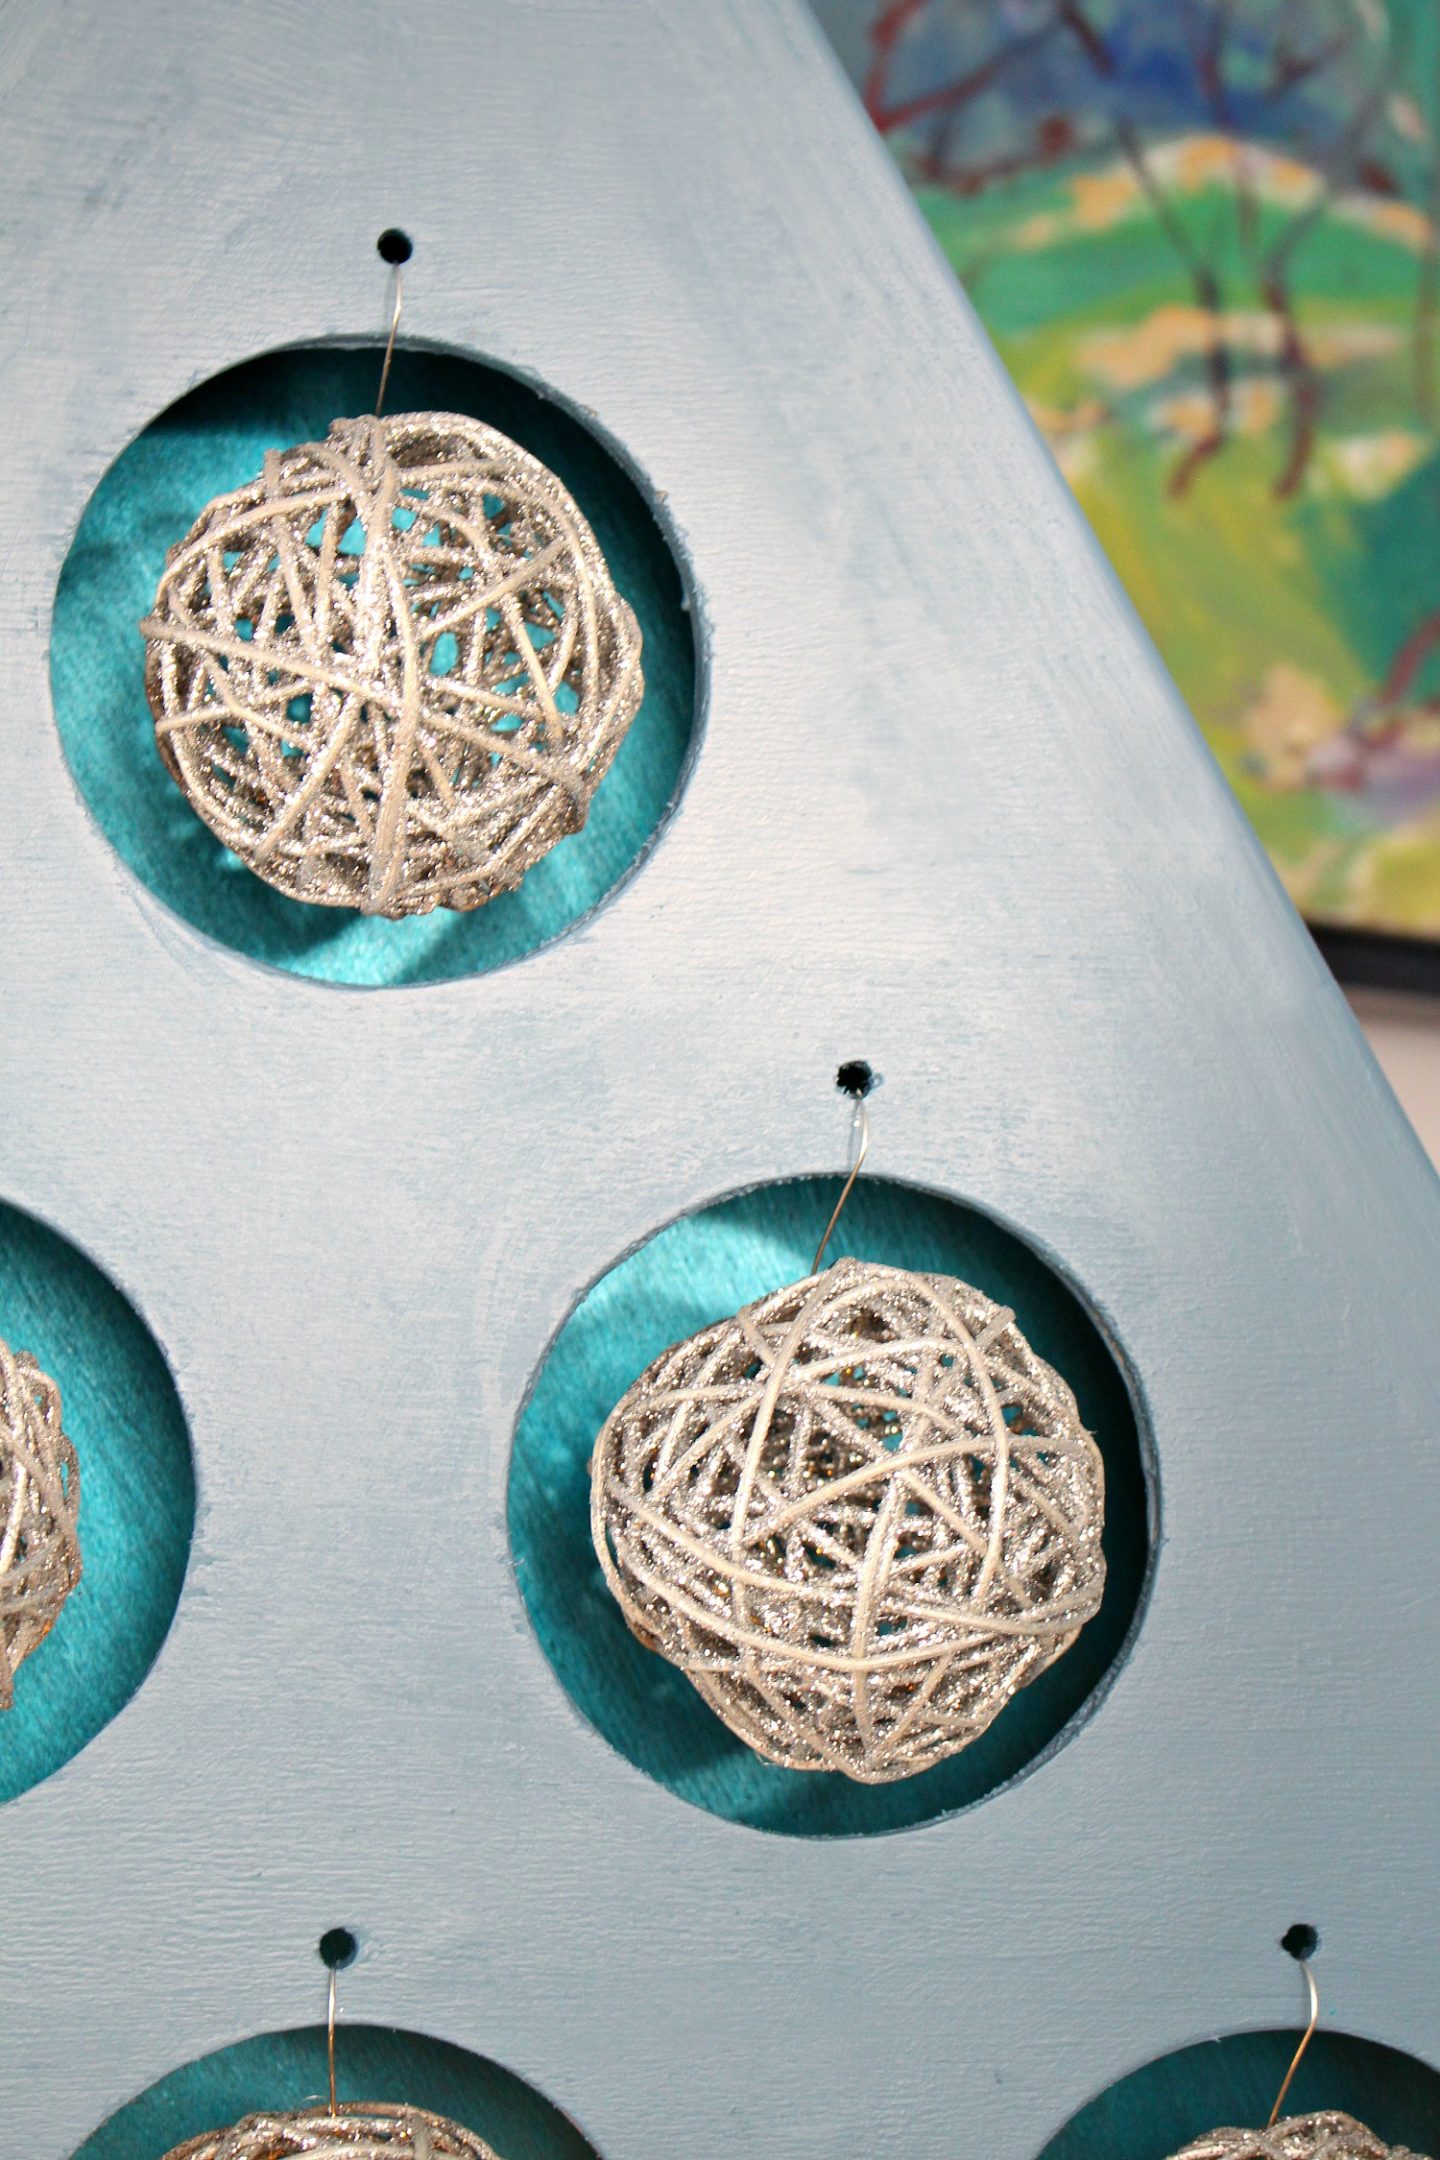
We cut out the triangle using a jigsaw and then cut out an identical triangle shaped piece for the back piece. Then we used a small drill bit to drill a pilot hole in the centre of each circle. We followed up with a hole saw and cut out each circle. I used a fine grit sandpaper to smooth out all of the edges, including the holes. We also used a drill to add a hole above each large circle, for the ornament hook.
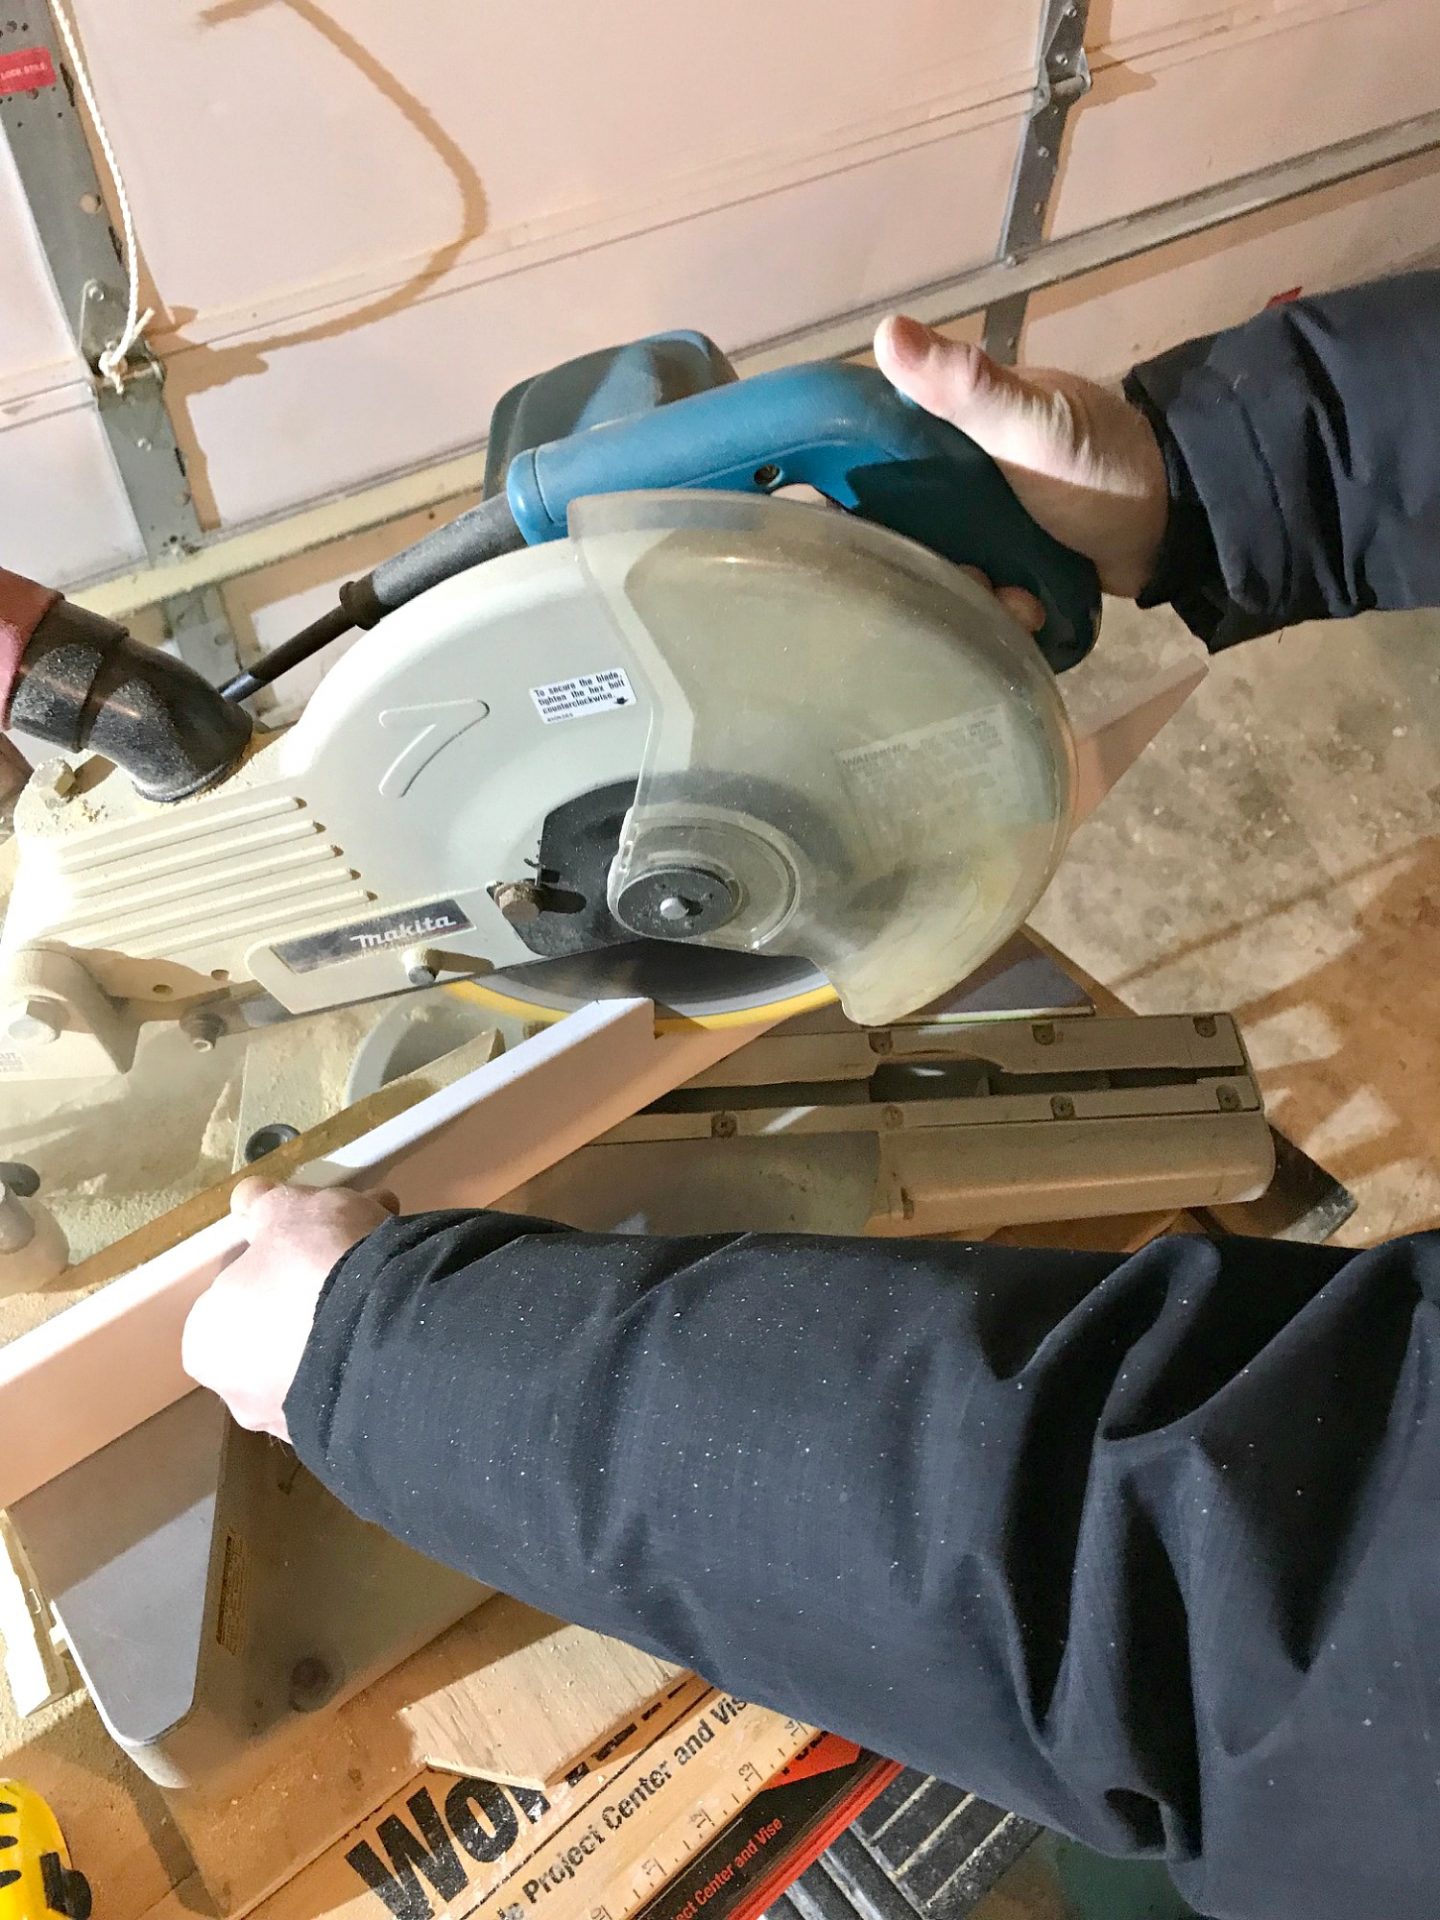
We grabbed some leftover window frame pieces for the sides of the ornament stand. We used a miter saw and an adjustable bevel to compare angles, although we still messed up a bit and they didn’t meet up fully – so I fixed that with wood filler after! So don’t stress to much about this part.
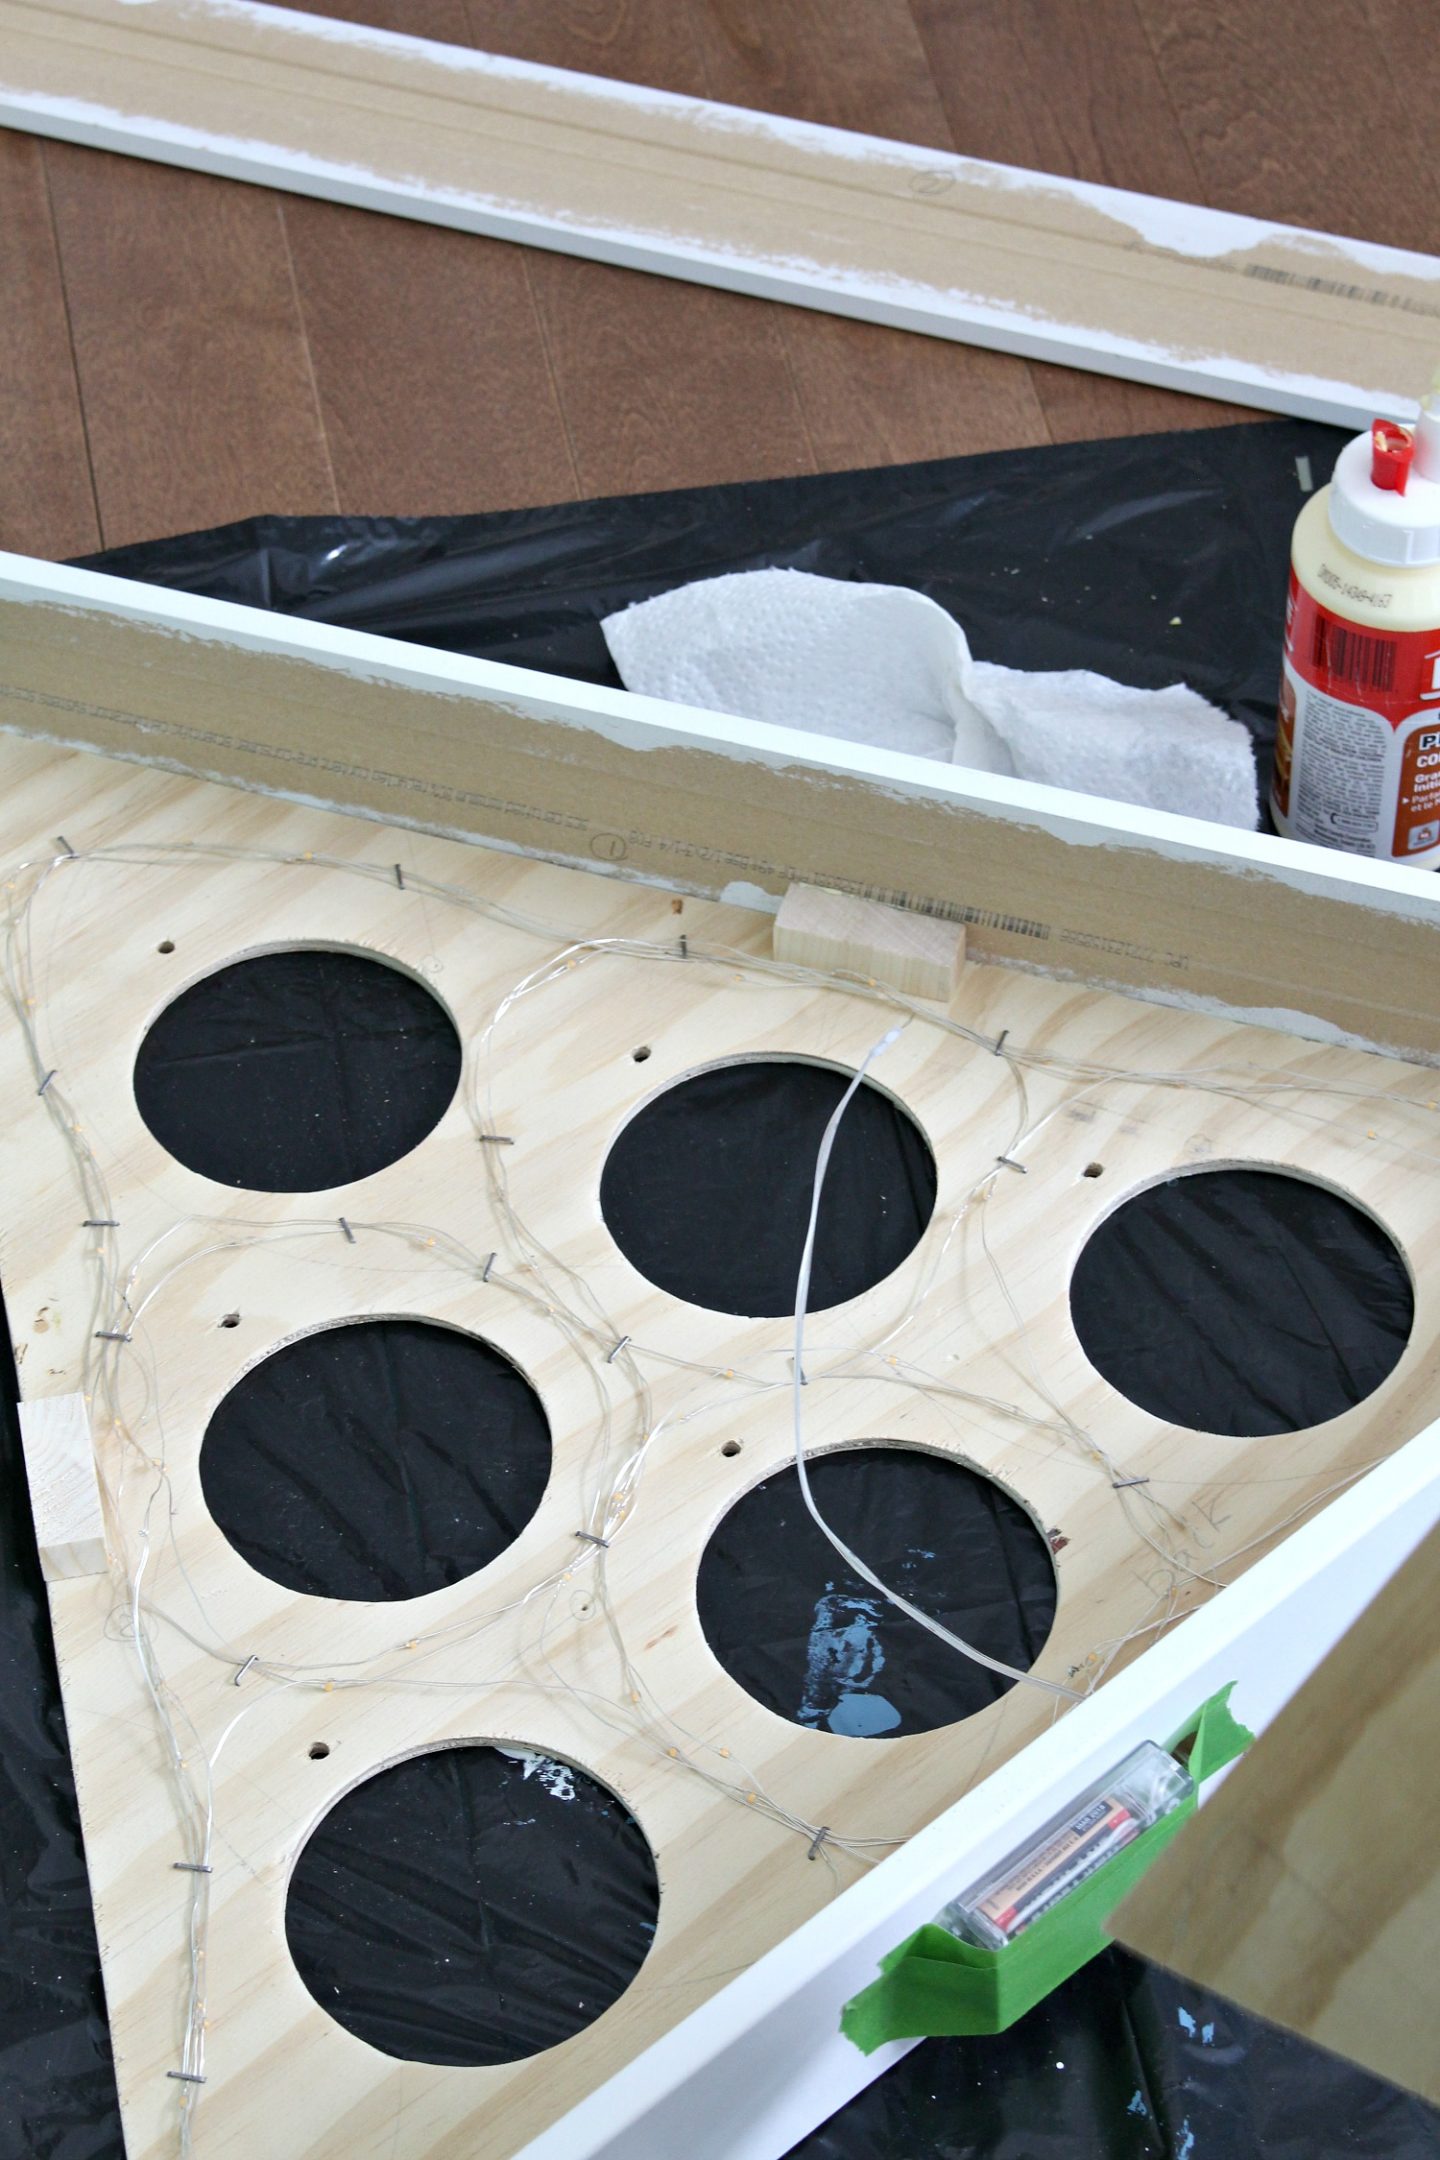
With the front, back, and sides cut out, we also cut out some small pieces (1/4 round but you can also use scrap plywood) for corner support and then cut two 1/4″ plywood rectangles and two squares to form the hollow base of the tree. While the tree is still in pieces, drill a hole in what will be the bottom – I ran the lights up through that and then stapled them to the inside of the front, leaving the battery pack hanging out the bottom, so it can be tucked into the hollow base. You could also just lay some light in the bottom, if you want to be able to remove/reuse them. But then the bottom circles will glow more brightly.

Paint all of the insides of the pieces – I only did the back and regretted it because then I had to awkwardly paint the rest once it was assembled. So definitely paint all of the inside because it can be seen through the holes (duh, why does my brain not always work?). I used a shimmering acrylic paint, but you can use any color (although a shimmer paint will glow nicely).
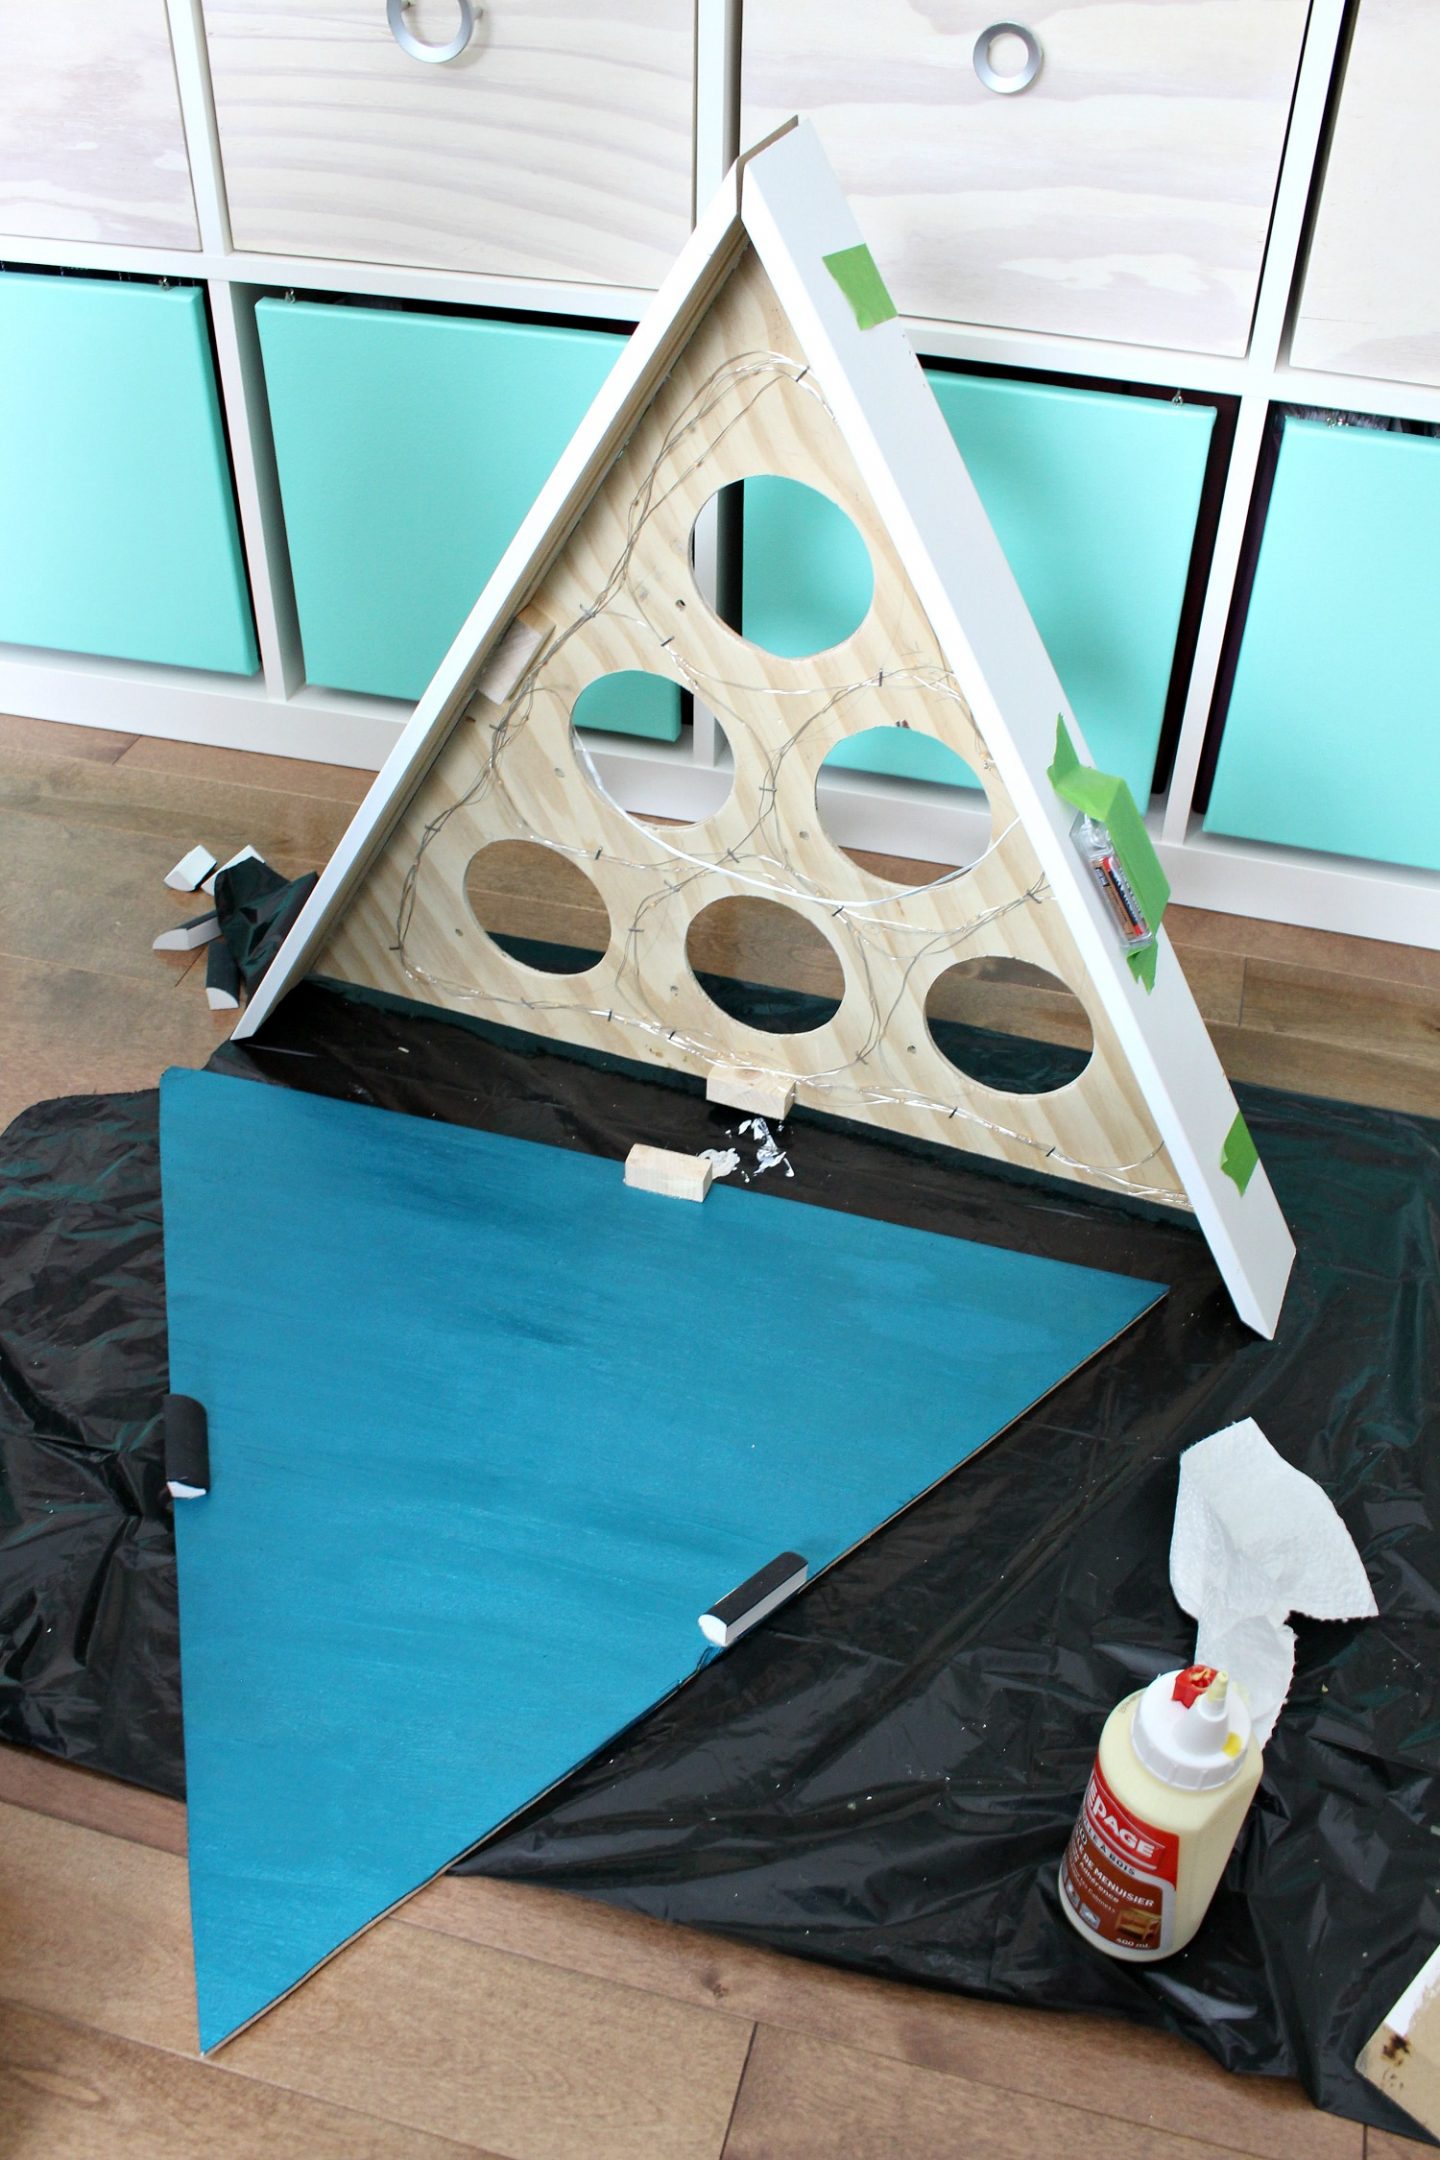
Next we glued the tree together, gluing and nailing support pieces to the front and back plywood and then gluing and following up with an air nailer to affix the sides to the front and back. Then we glued the base rectangle together, which is open on the top and bottom for the battery pack to be tucked inside. Glue the base piece to the tree and hold with tape.
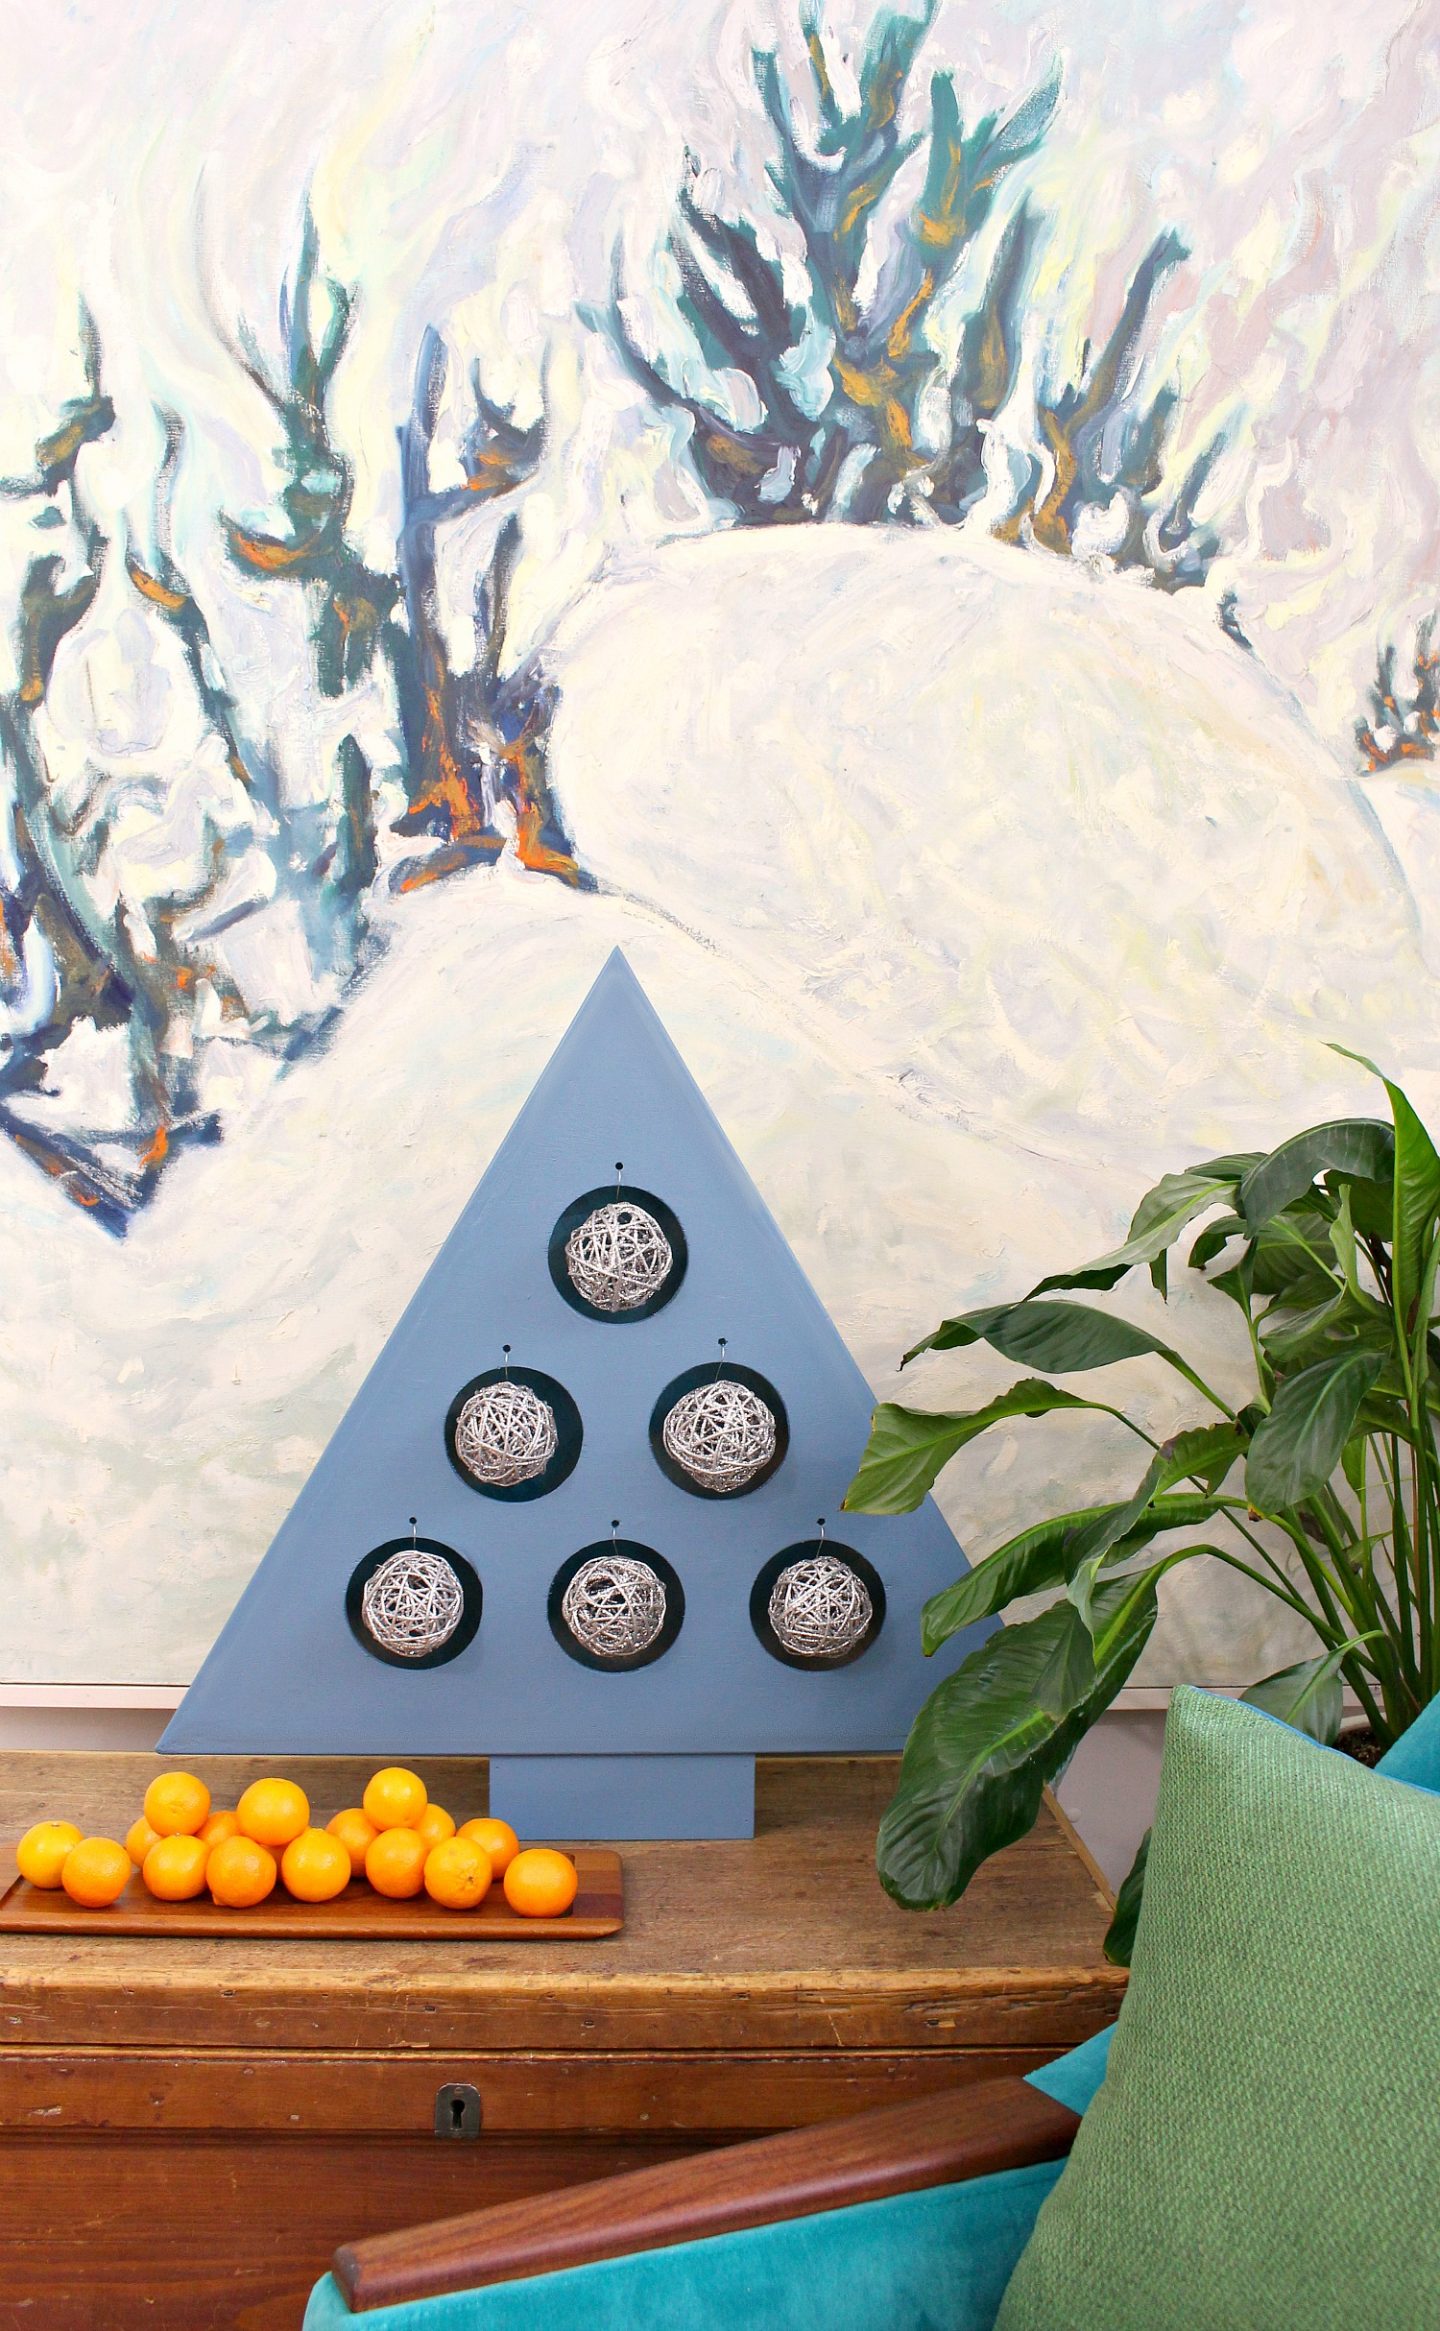
Fill any gaps or flaws with wood filler or putty and then prime/paint – I used Behr’s color of the year, Blueprint. Instead of ornaments, I actually grabbed some glitter coated willow balls from the dollar store because I love the driftwood vibe. Plus they allow the light to pass through and they sparkle.
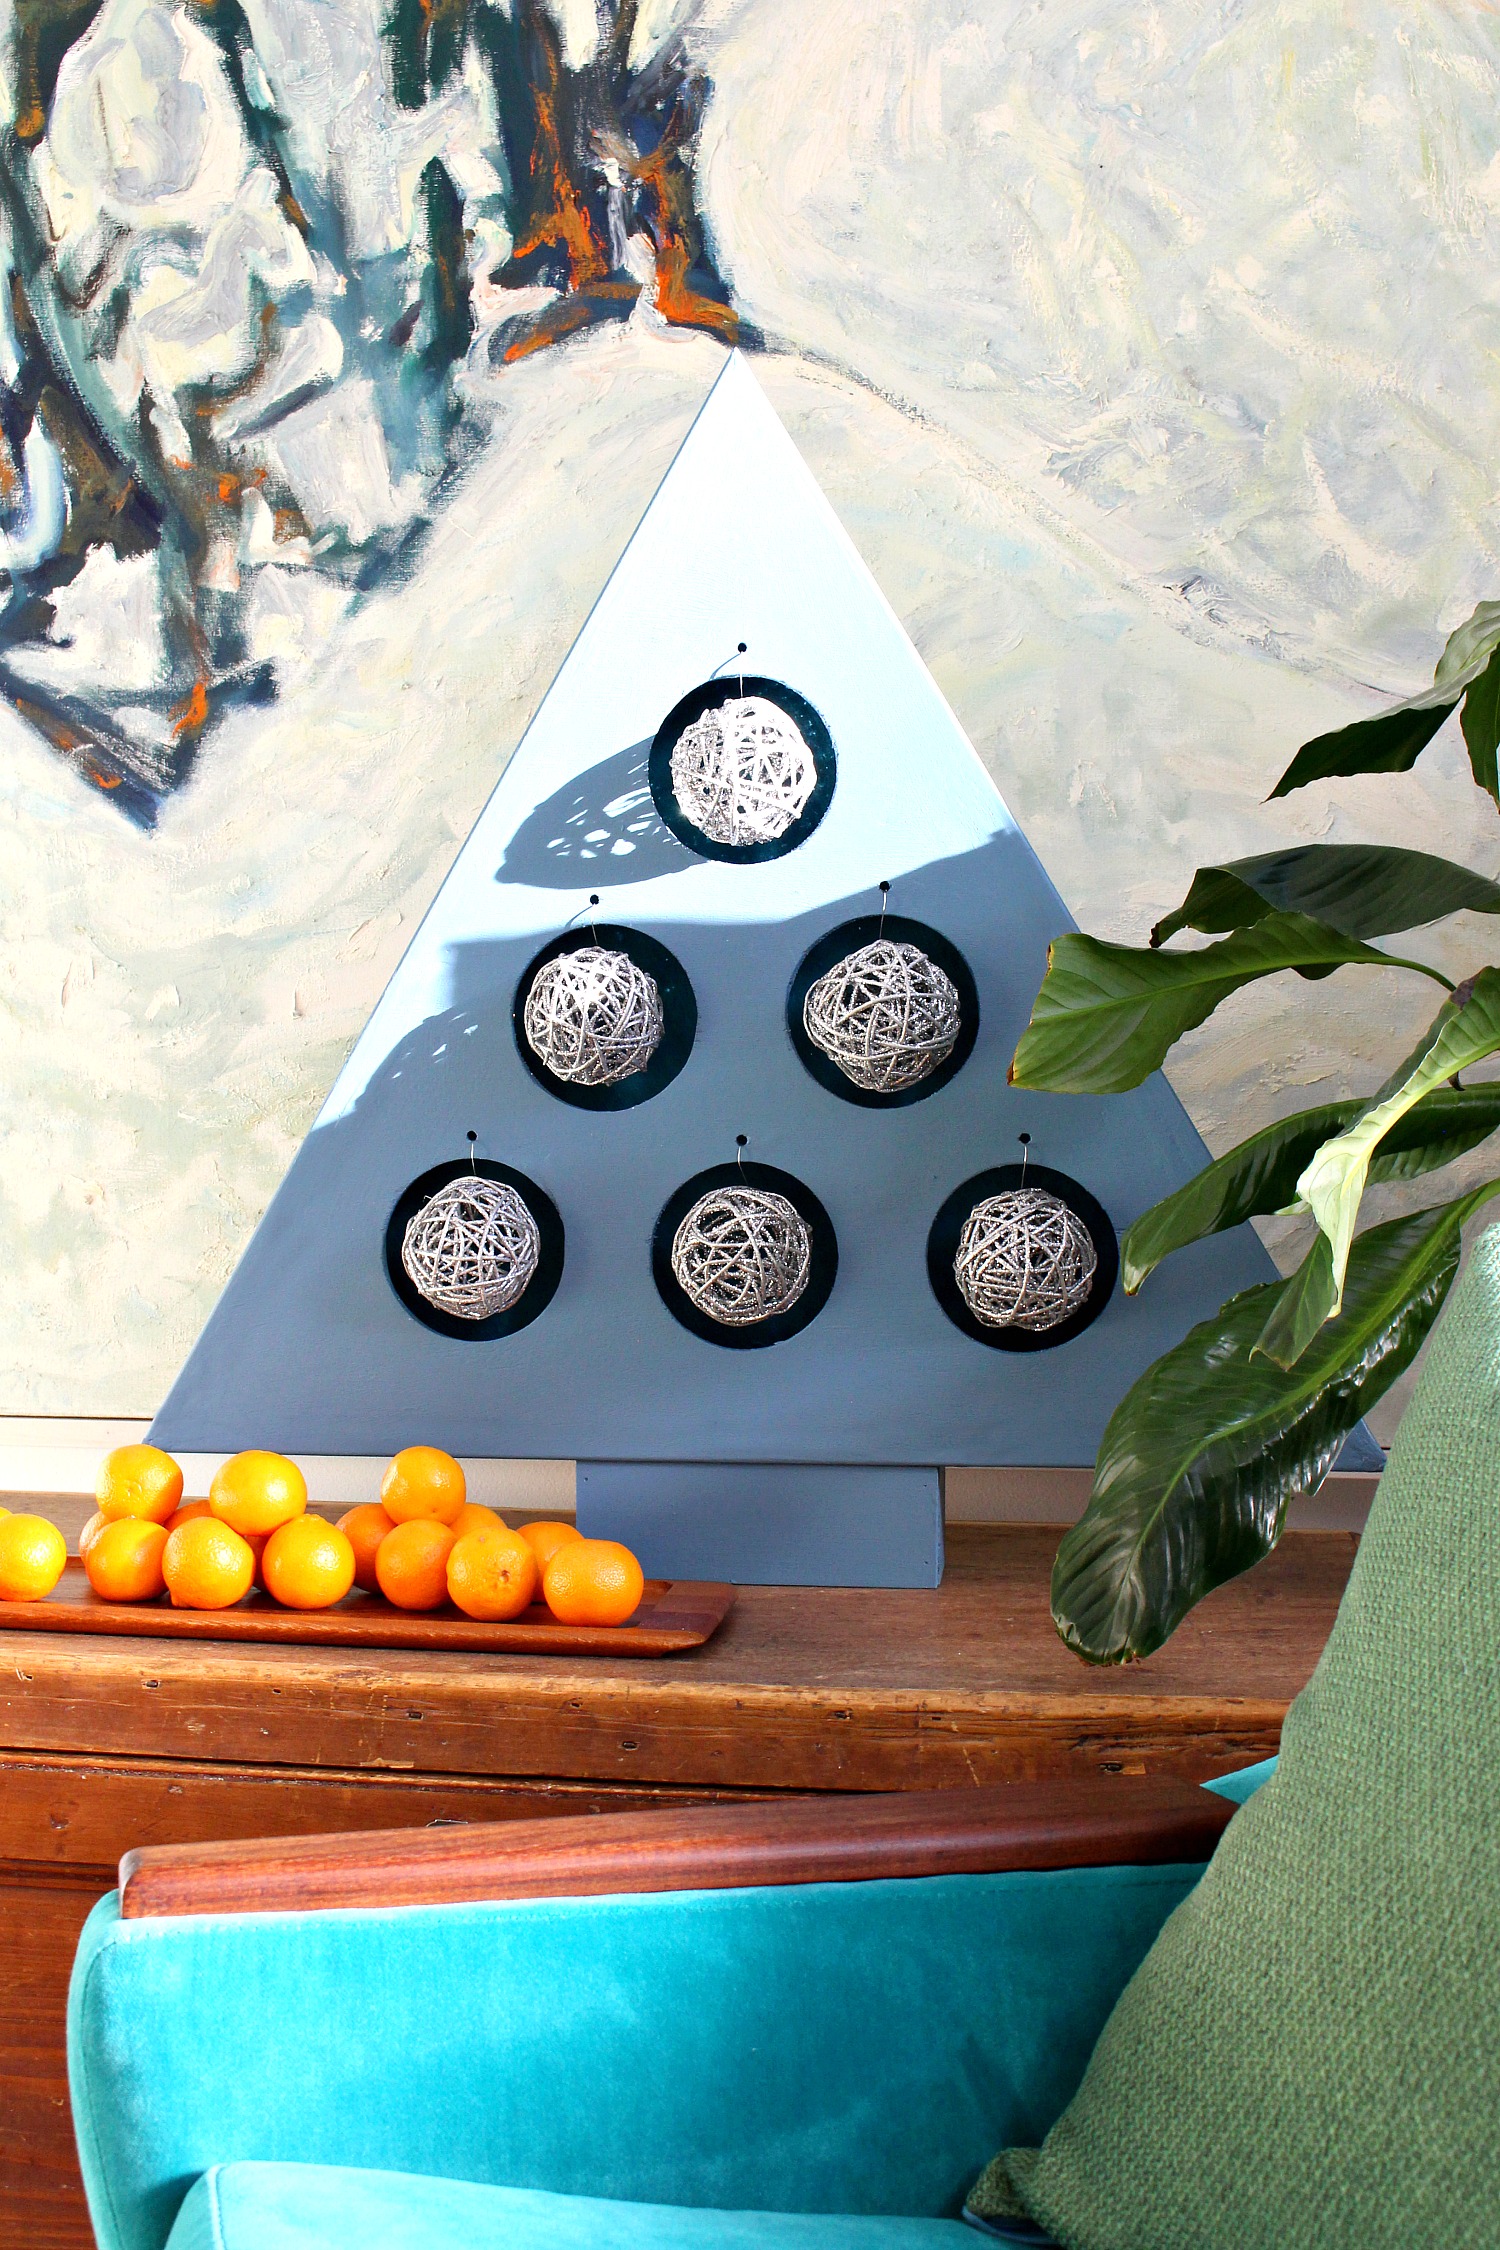

It’s difficult to photograph how nicely this DIY plywood ornament stand glows at night. Even in the day, the teal shimmer paint pops, but at night it’s super pretty.
P.S. Don’t forget to check out my Scandinavian-Inspired Plywood Tree and my DIY Crate & Barrel Knock Off Wood A-frame Ornament Display.