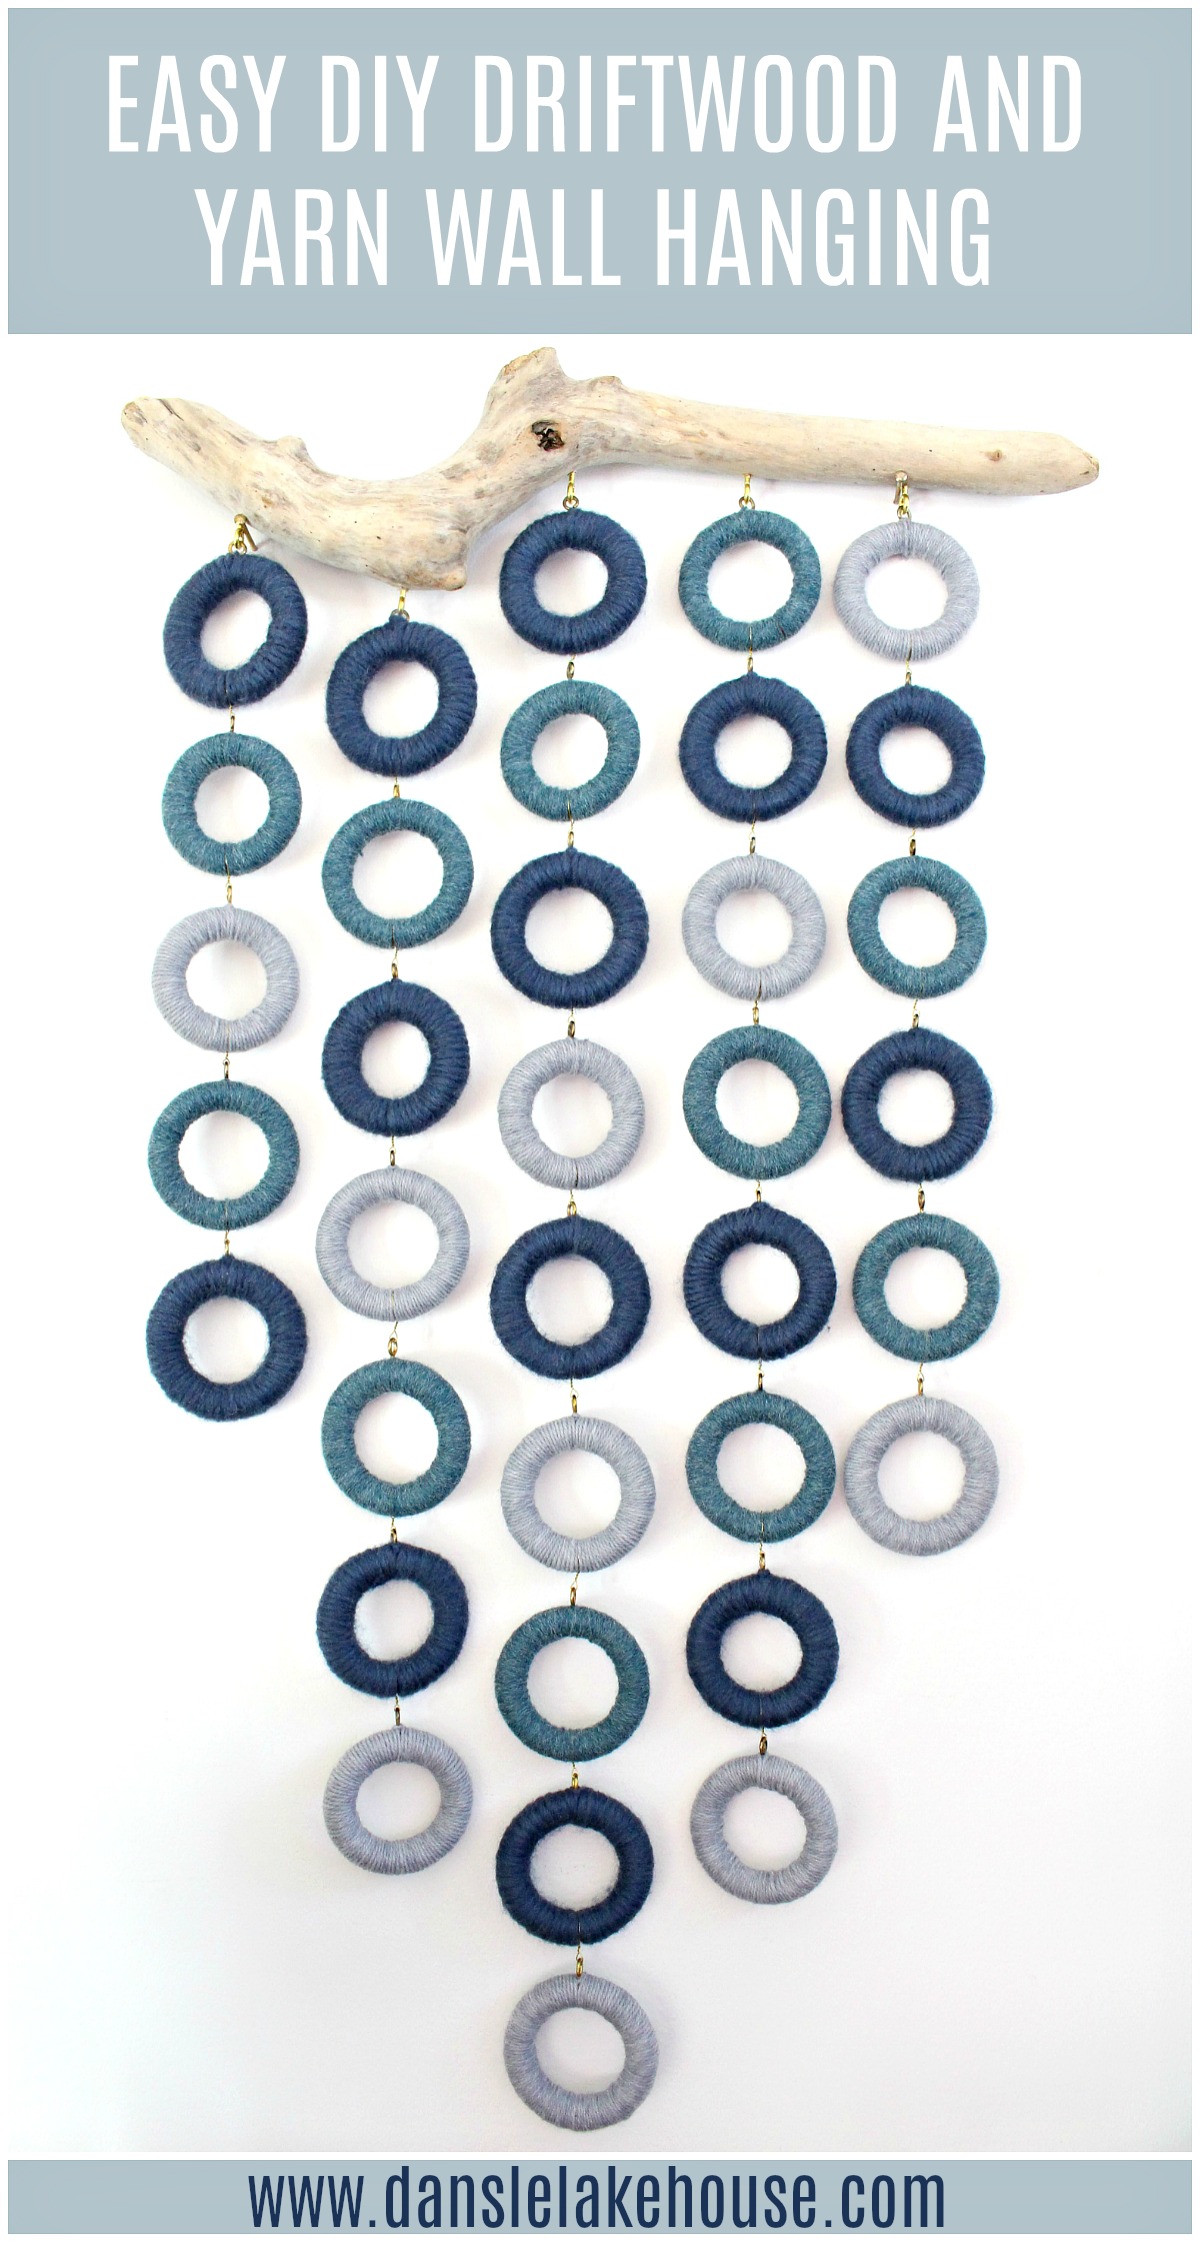
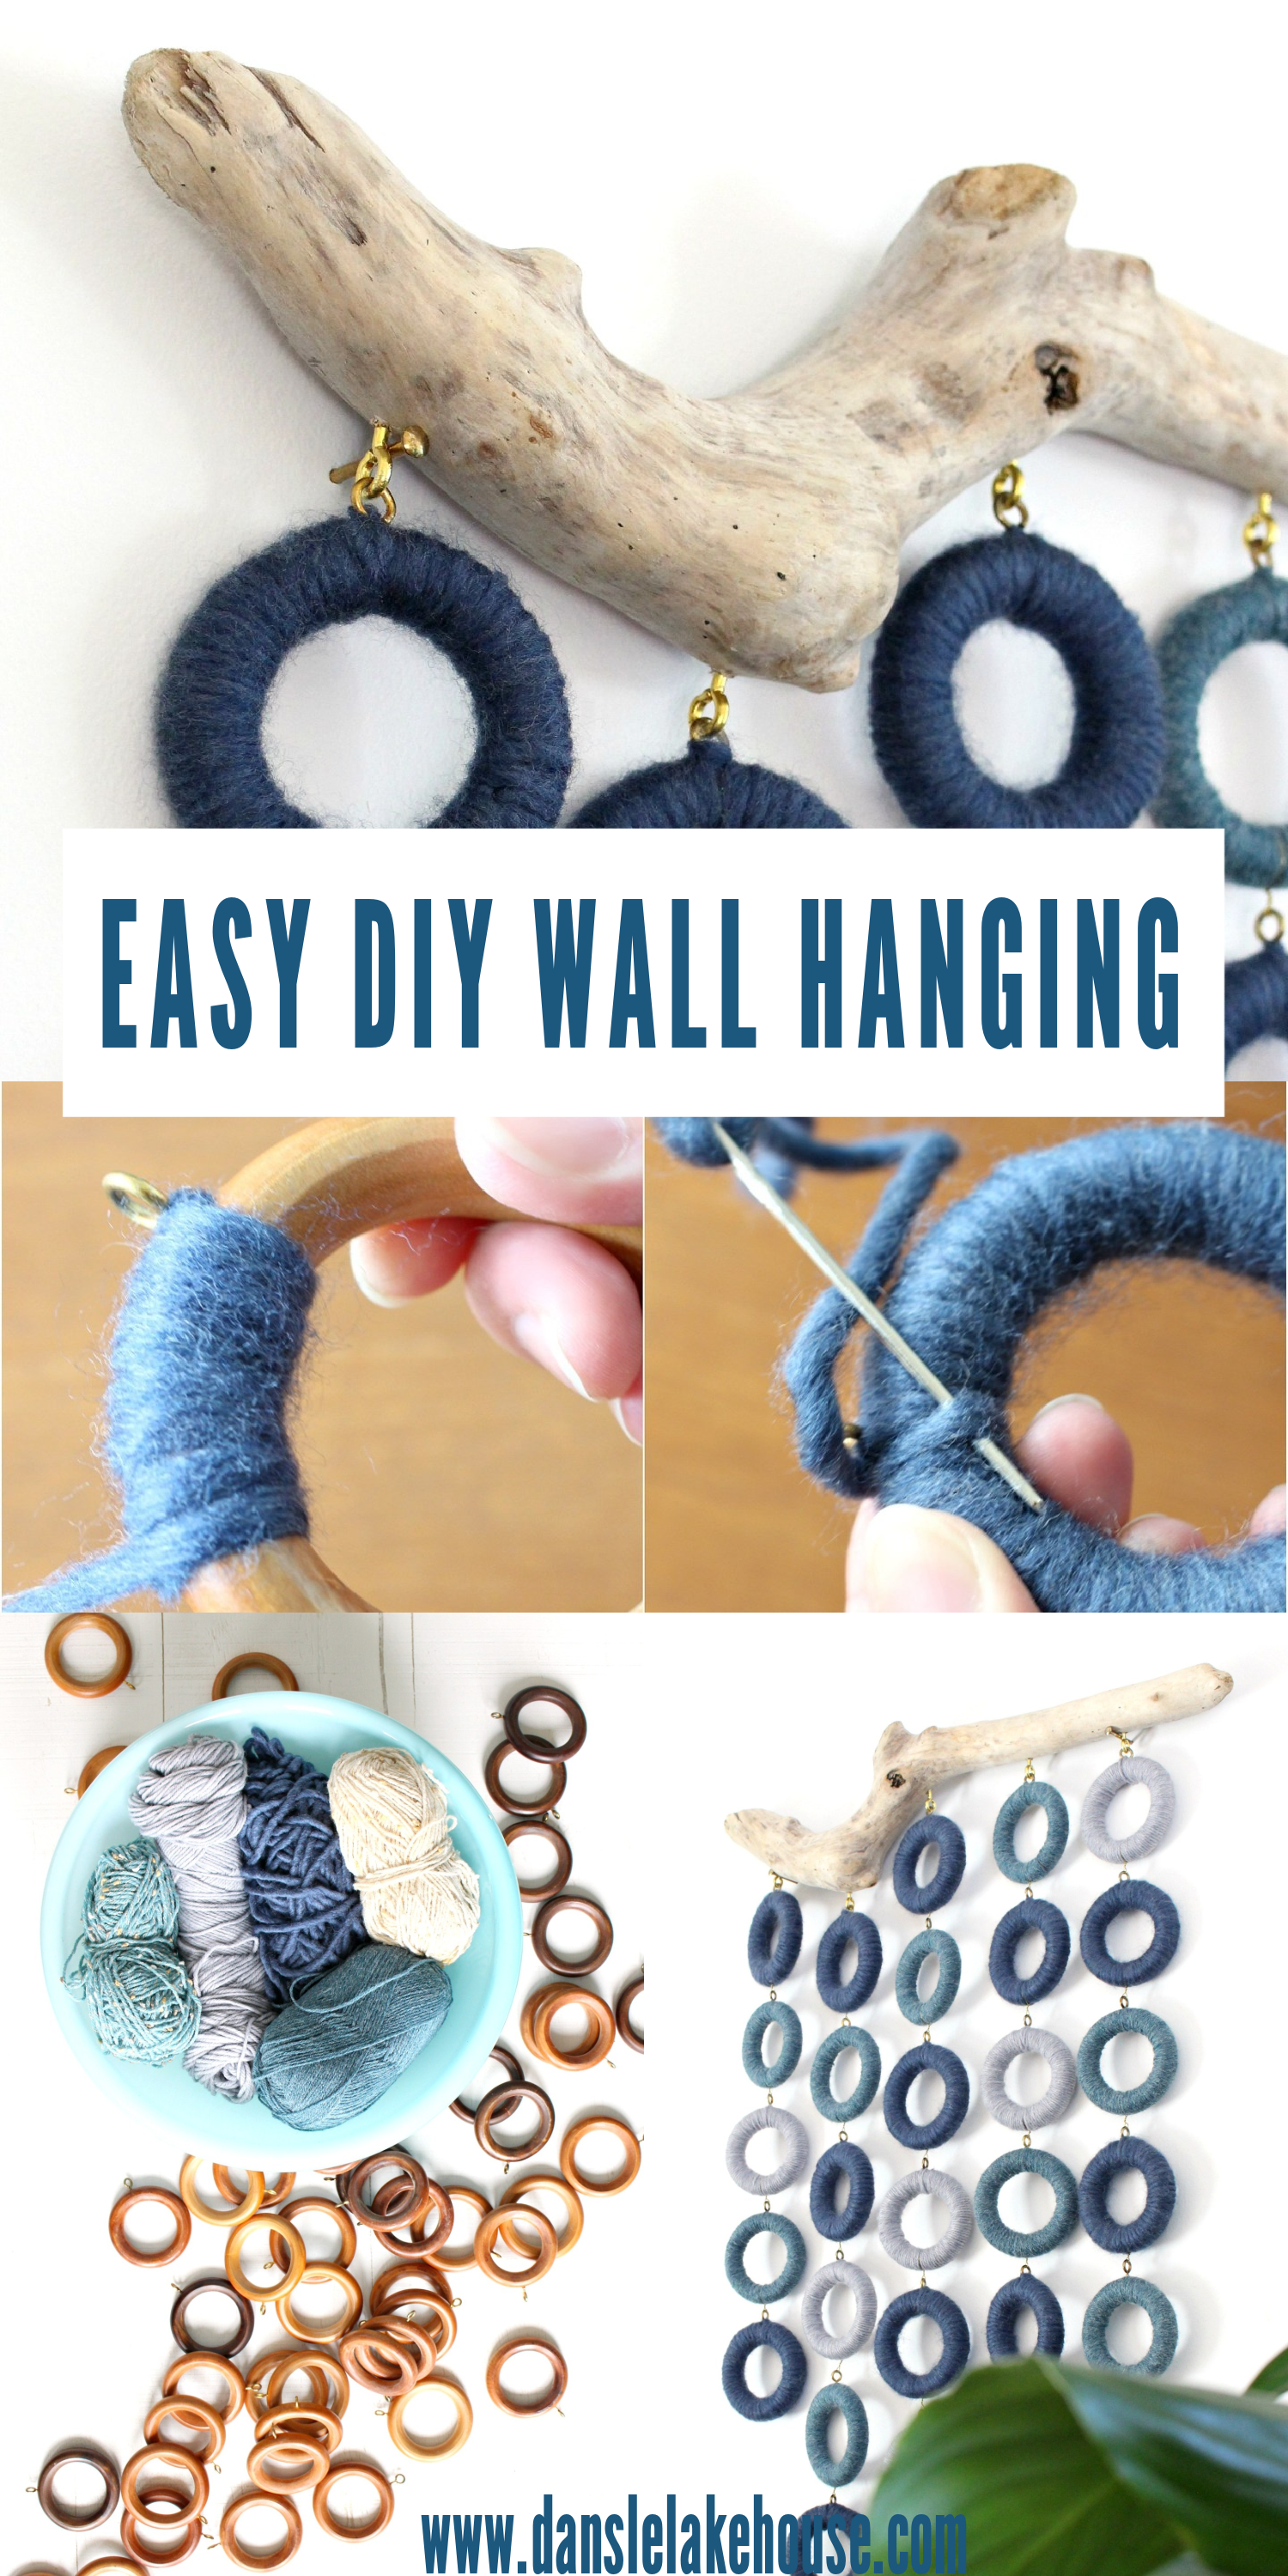
I grabbed a cool piece of driftwood from my pile for this easy, no weave DIY wall hanging. I have a confession to make: I love the look of cozy woven wall hangings, but I am not good at weaving. I remember we did weaving in grade school and it made me so tense that the headband I was weaving got narrower and narrower and narrower. The weird thing is that I had a mini loom for beading which I loved, but I just never took to weaving yarn or, come to think of it, knitting and crocheting.

If you love the yarn fiber art that’s trending right now, but can’t get a handle on weaving (surely I can’t be the only one?), check out this easy tutorial for a no weave DIY wall hanging – can you guess the secret supply I used?


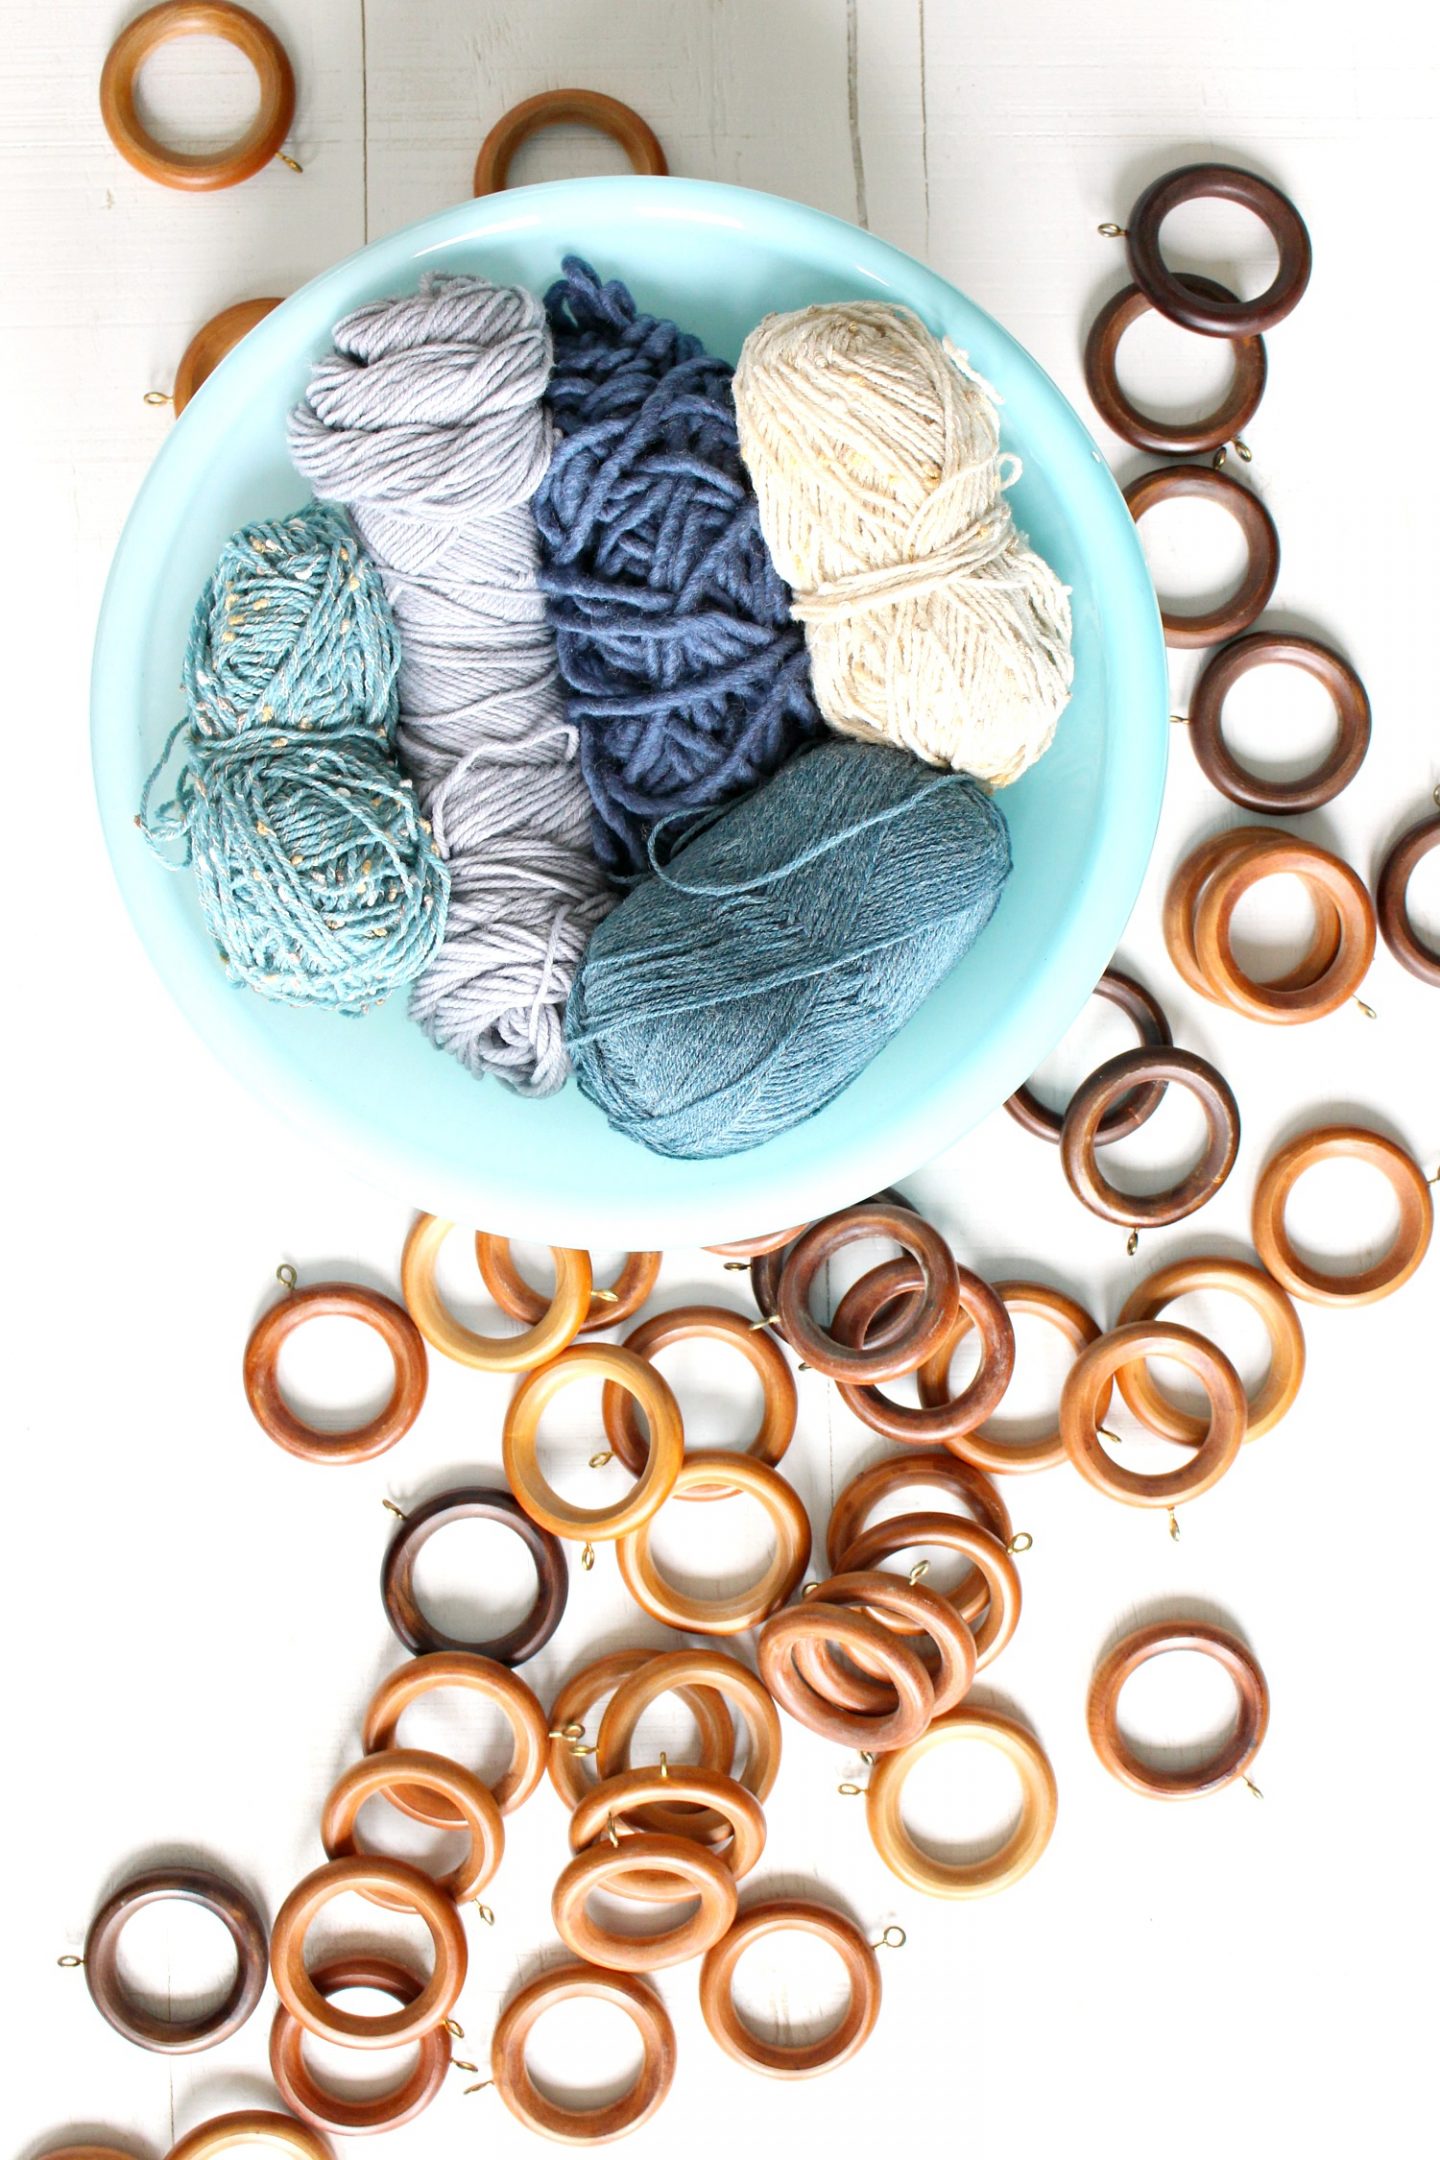
Supplies for DIY Wall Hanging:
- Thick curtain rings (like these or these)
- Small eye pins (I got mine at Lowe’s, but craft stores carry them too)
- Wire (24 gauge works well)
- Driftwood or branch
- Yarn
- Large needle (to thread the yarn)
- Wire cutters
If you’d like to make this DIY wool wall hanging budget-friendly, check out your local thrift store for supplies. You’ll find big bags of yarn (much of it still in the original packaging), plus bags of curtain rings for cheap. I thrifted my yarn and curtain rings!
Plan Your DIY Yarn Wall Hanging Design
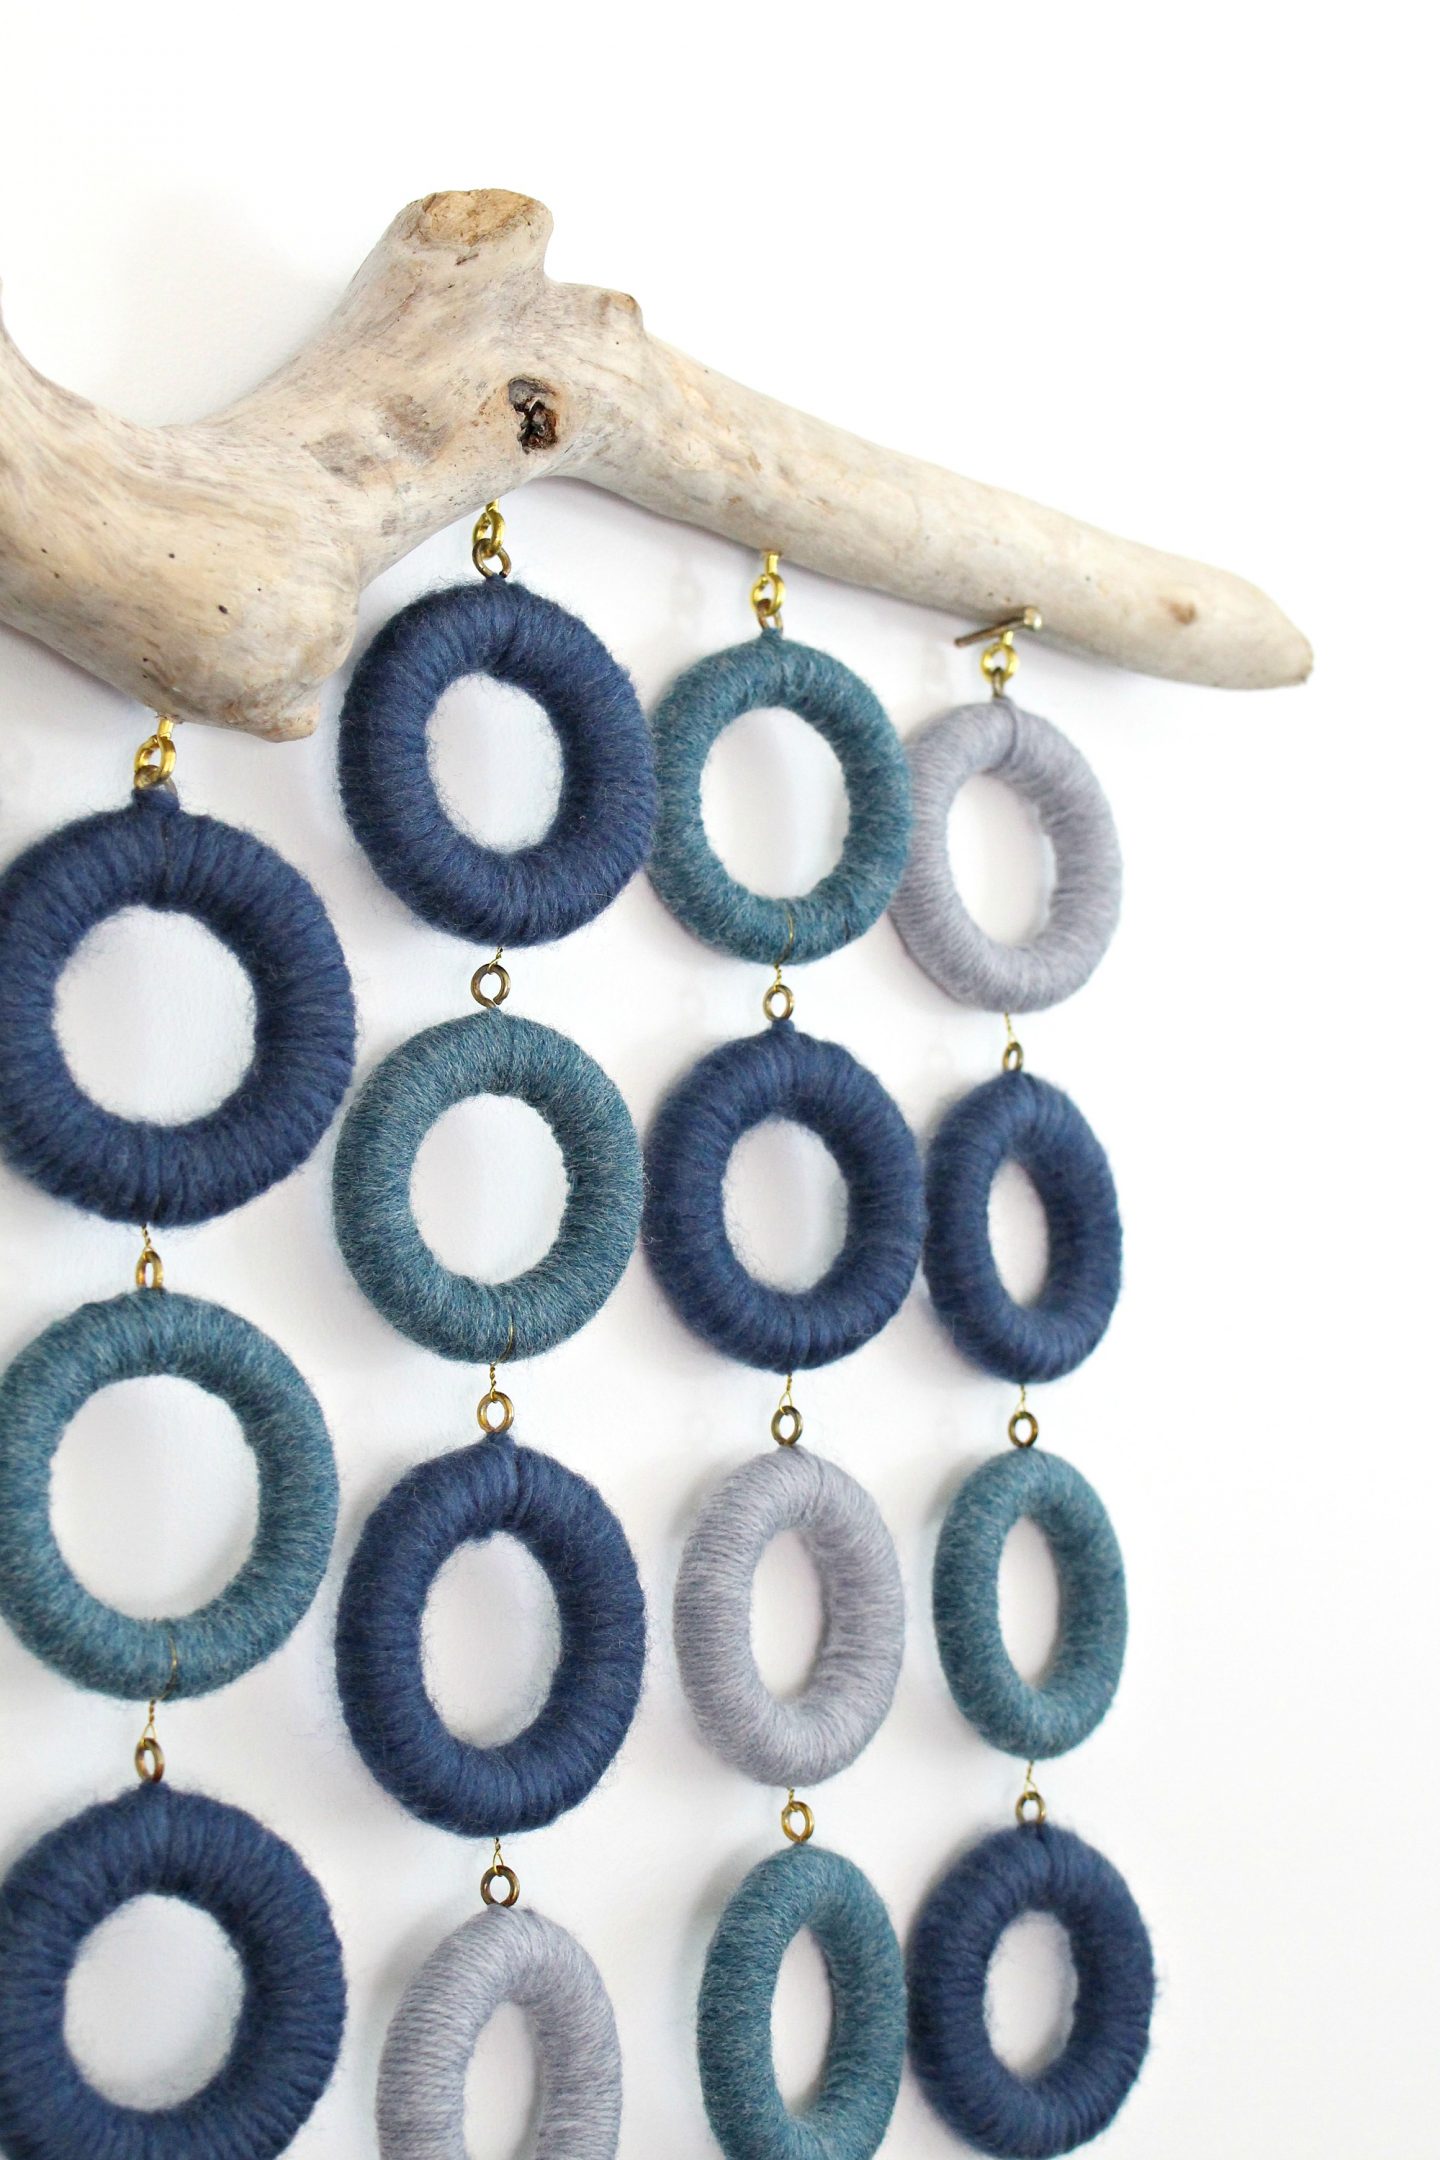
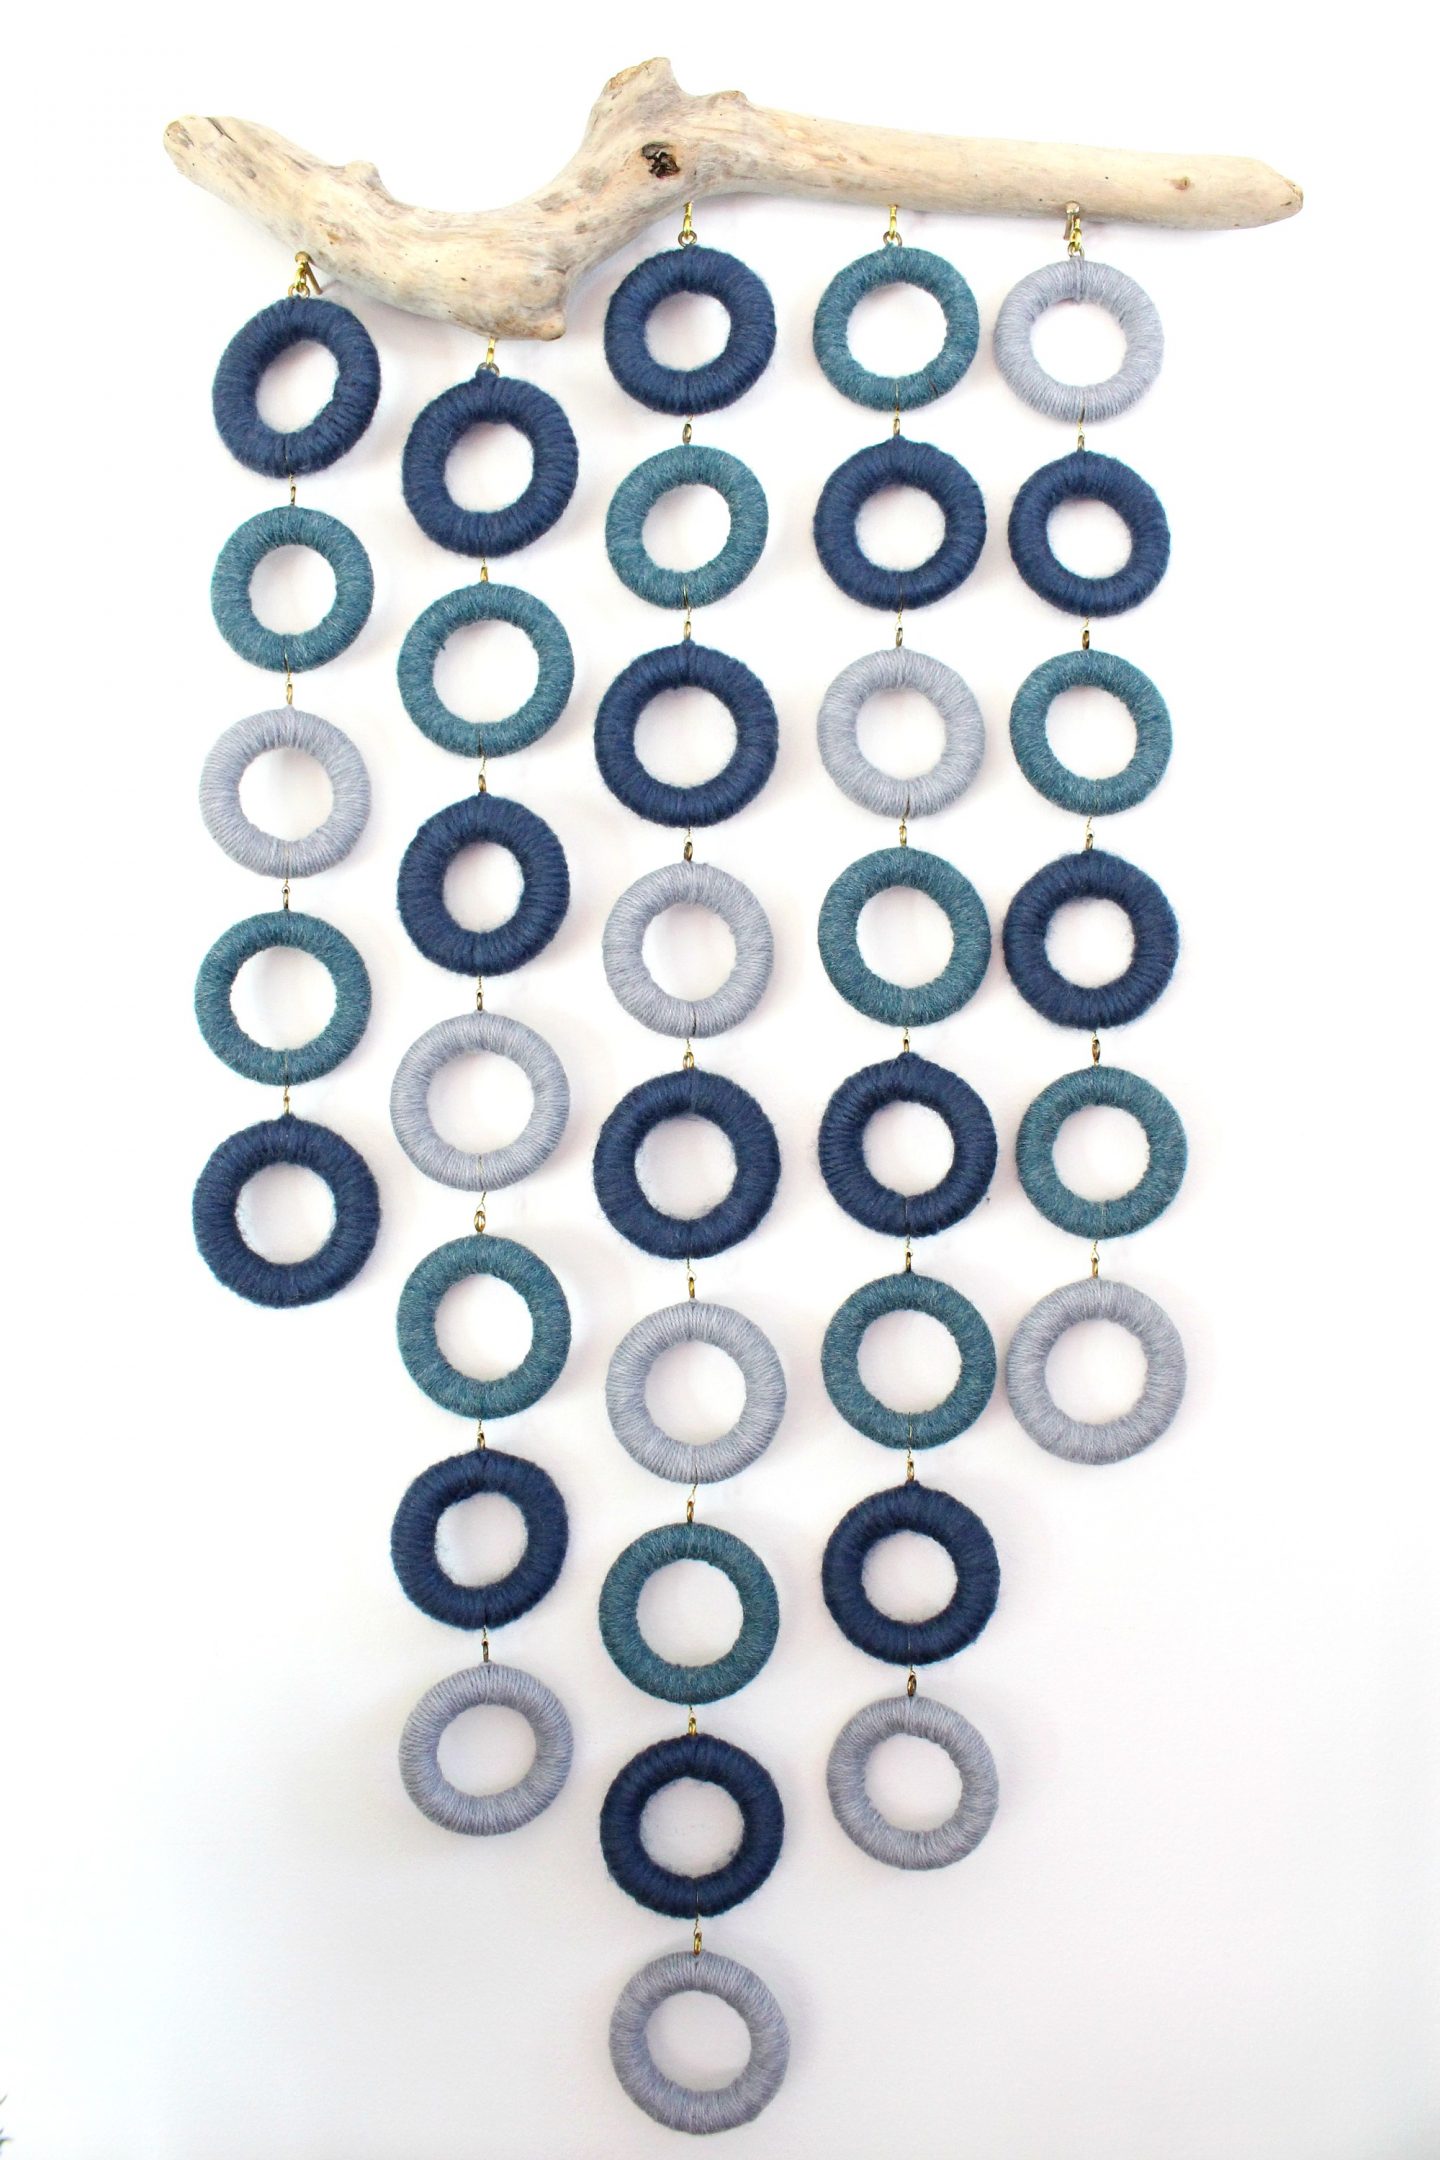
Before you begin, it helps to roughly decide your layout and how many rings you’d like to make in each color – or you can just keep making them and then play with the arrangement after. I chose three colors: blue, teal, and pale grey. At first, I was very relaxed about it but halfway through making the rings, I started to firm up on the random layout and narrow down how many more I wanted to make of each color. Please admire how artfully random my arrangement is, because it’s not random at all and took me hours to arrange:
How to Wrap Wood Rings with Yarn
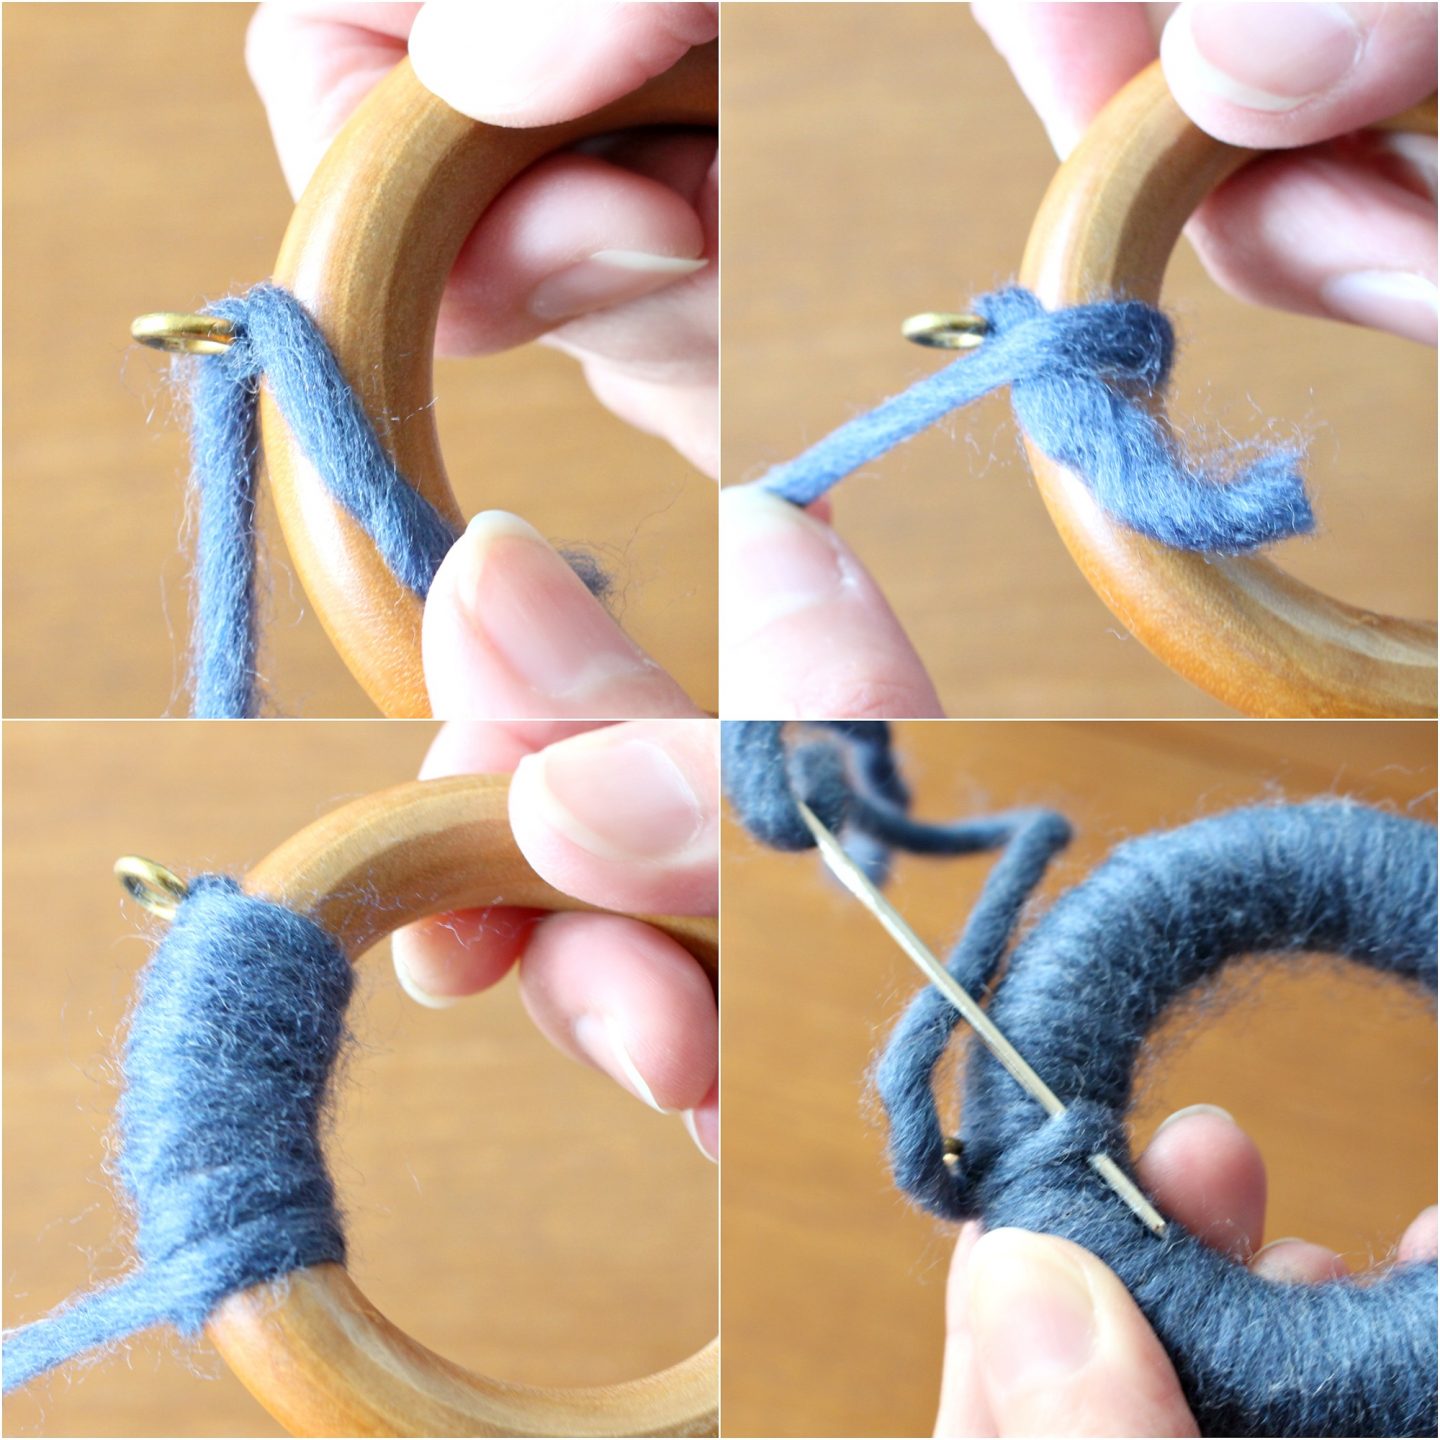
To make the wool wrapped rings for this DIY wool wall hanging, start by wrapping and anchoring the wool around the eye pin. Then wrap it around the ring, burying the end of the yarn in the process. When you reach the end, use a large needle to bury the tail. The yarn is textured enough that it won’t unravel. Repeat, a million times – this is an excellent project to do while you’re watching your favorite show on a lazy Sunday because it’s repetitive and mindless, which is kind of soothing.
How to Connect the Wooden Rings
To connect the rings, I used 24 gauge wire to attach the rings. If you’re super confident in your layout, you can actually do this first because it makes burying the wire way easier, but if you’d like to play around with the arrangement that’s okay too. Take a piece of wire and loop it through the eye pin, twisting a few times, then wrap the wire around the curtain ring above it, twisting a few times. Spread apart the yarn a bit and bury the wire.


How to Attach the Rings to the Driftwood
When all of the yarn wrapped rings were finished and strung together in an order I liked, I twisted some eye pins into the driftwood (make sure to clean it first). Here’s the best way to figure out where to put the eye pins: hold the driftwood up on the wall so it’s lying as flat as possible (a second set of hands helps with this) and then hold up one “strand” of yarn rings to see where it needs to be positioned to hang nicely. Mark with a pencil and repeat for each strand. This takes some extra time but the driftwood is so gnarly and without this step, the strands of rings might not hang flat against the wall. With the placement for the eye pins marked, I just twisted them firmly into place. If you’re making a really massive piece that will be heavy, you could pre-drill the holes and even add a tab of epoxy to the end of the eye pin, but for this size piece it’s really secure as-is.

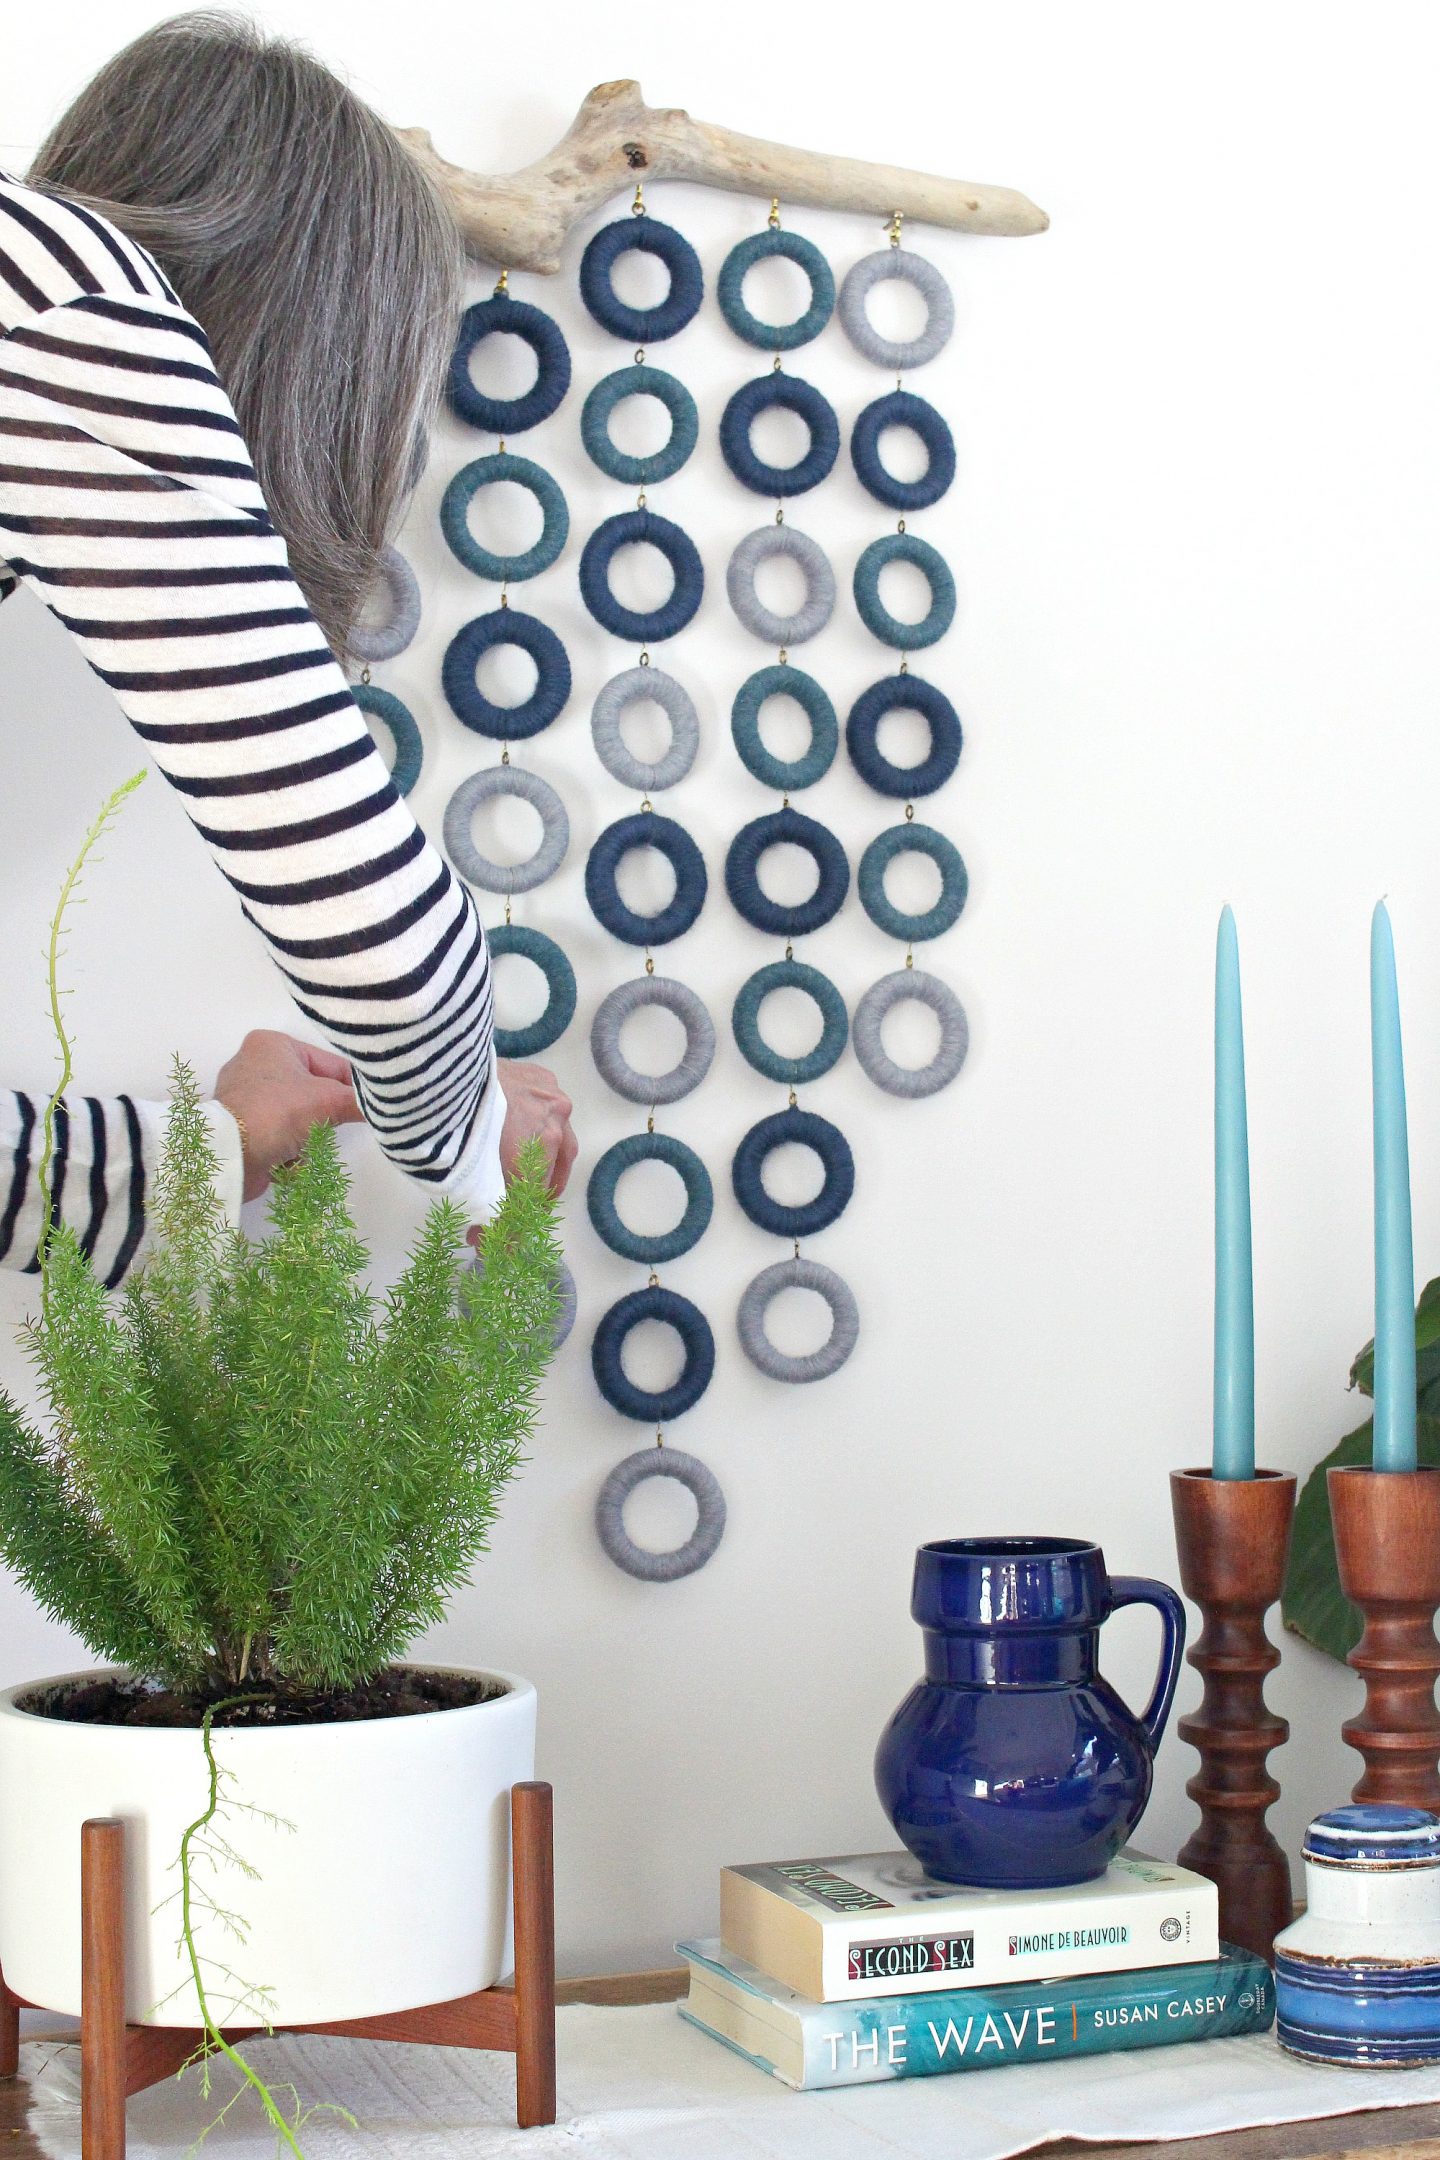
How to Hang the Wall Hanging
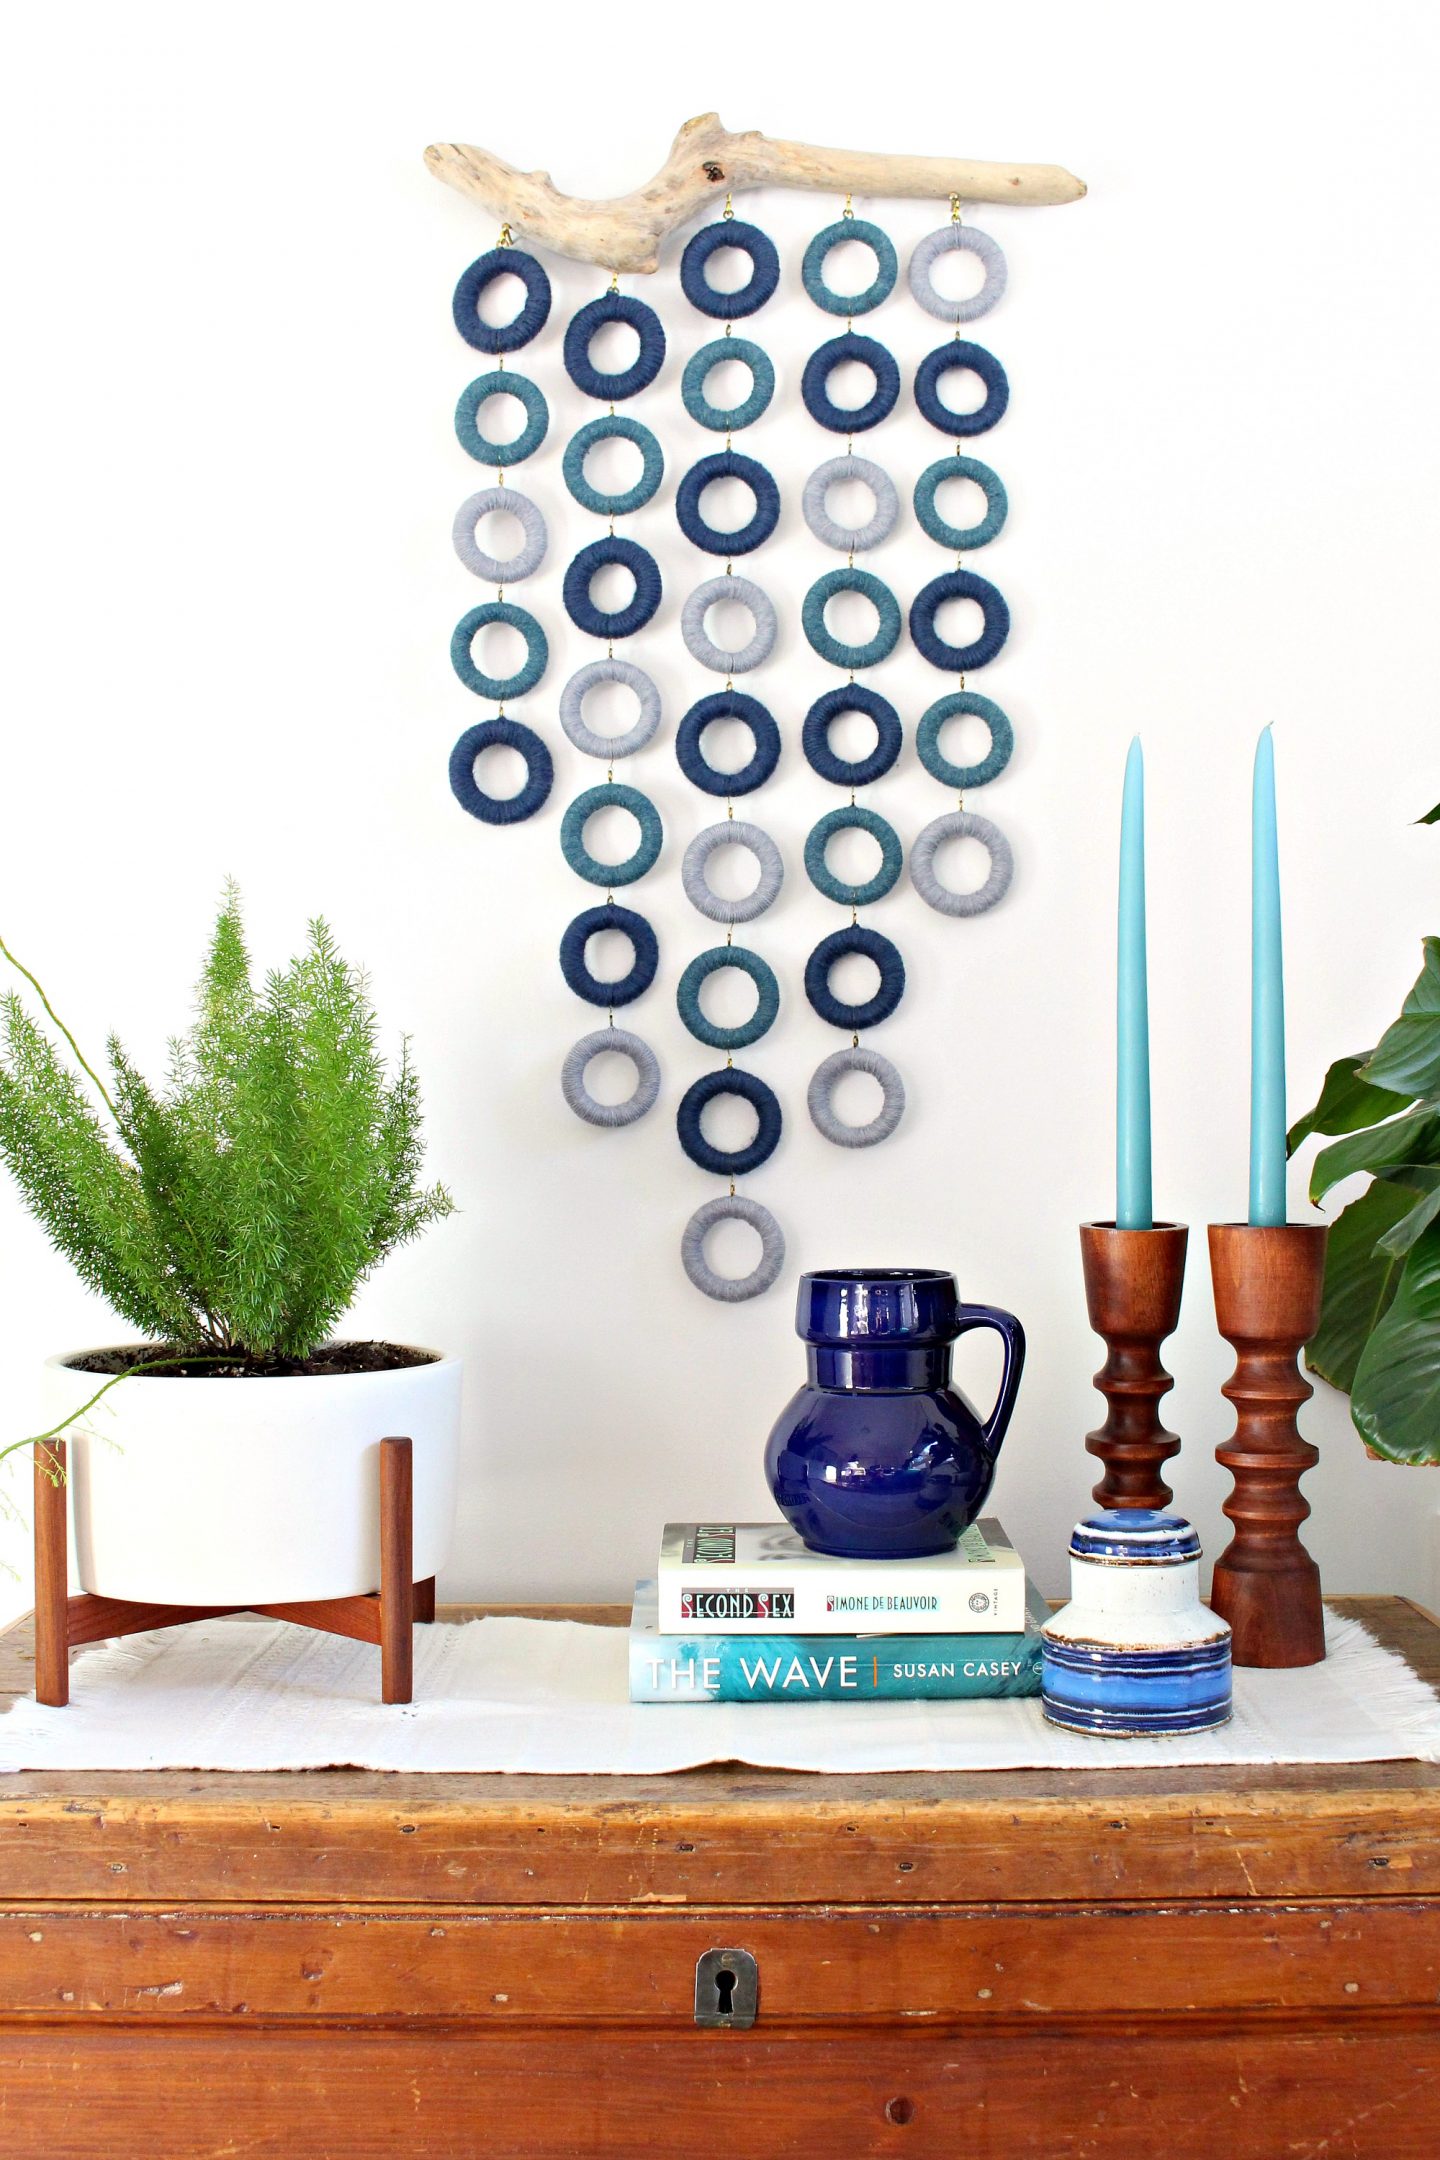
To hang it on the wall, I used two strategically placed nails but you could also affix D-rings to the back. Then you just need an assistant to help you flip them all the right way – and you’re done! I love the modern vibe of this easy DIY fiber art – it has a mid-century modern meets coastal aesthetic that is definitely my favorite decor pairing.


I hope you enjoyed the tutorial for this no weave DIY wall hanging! It’s such a fun way to create your own fiber art without learning how to weave.
P.S. Don’t Forget to Pin for Later!


Very creative and beautiful.
Author
Thank you so much!