This modern DIY vertical slatted deck skirting project is sponsored by The Home Depot Canada, but all thoughts and opinions are my own.
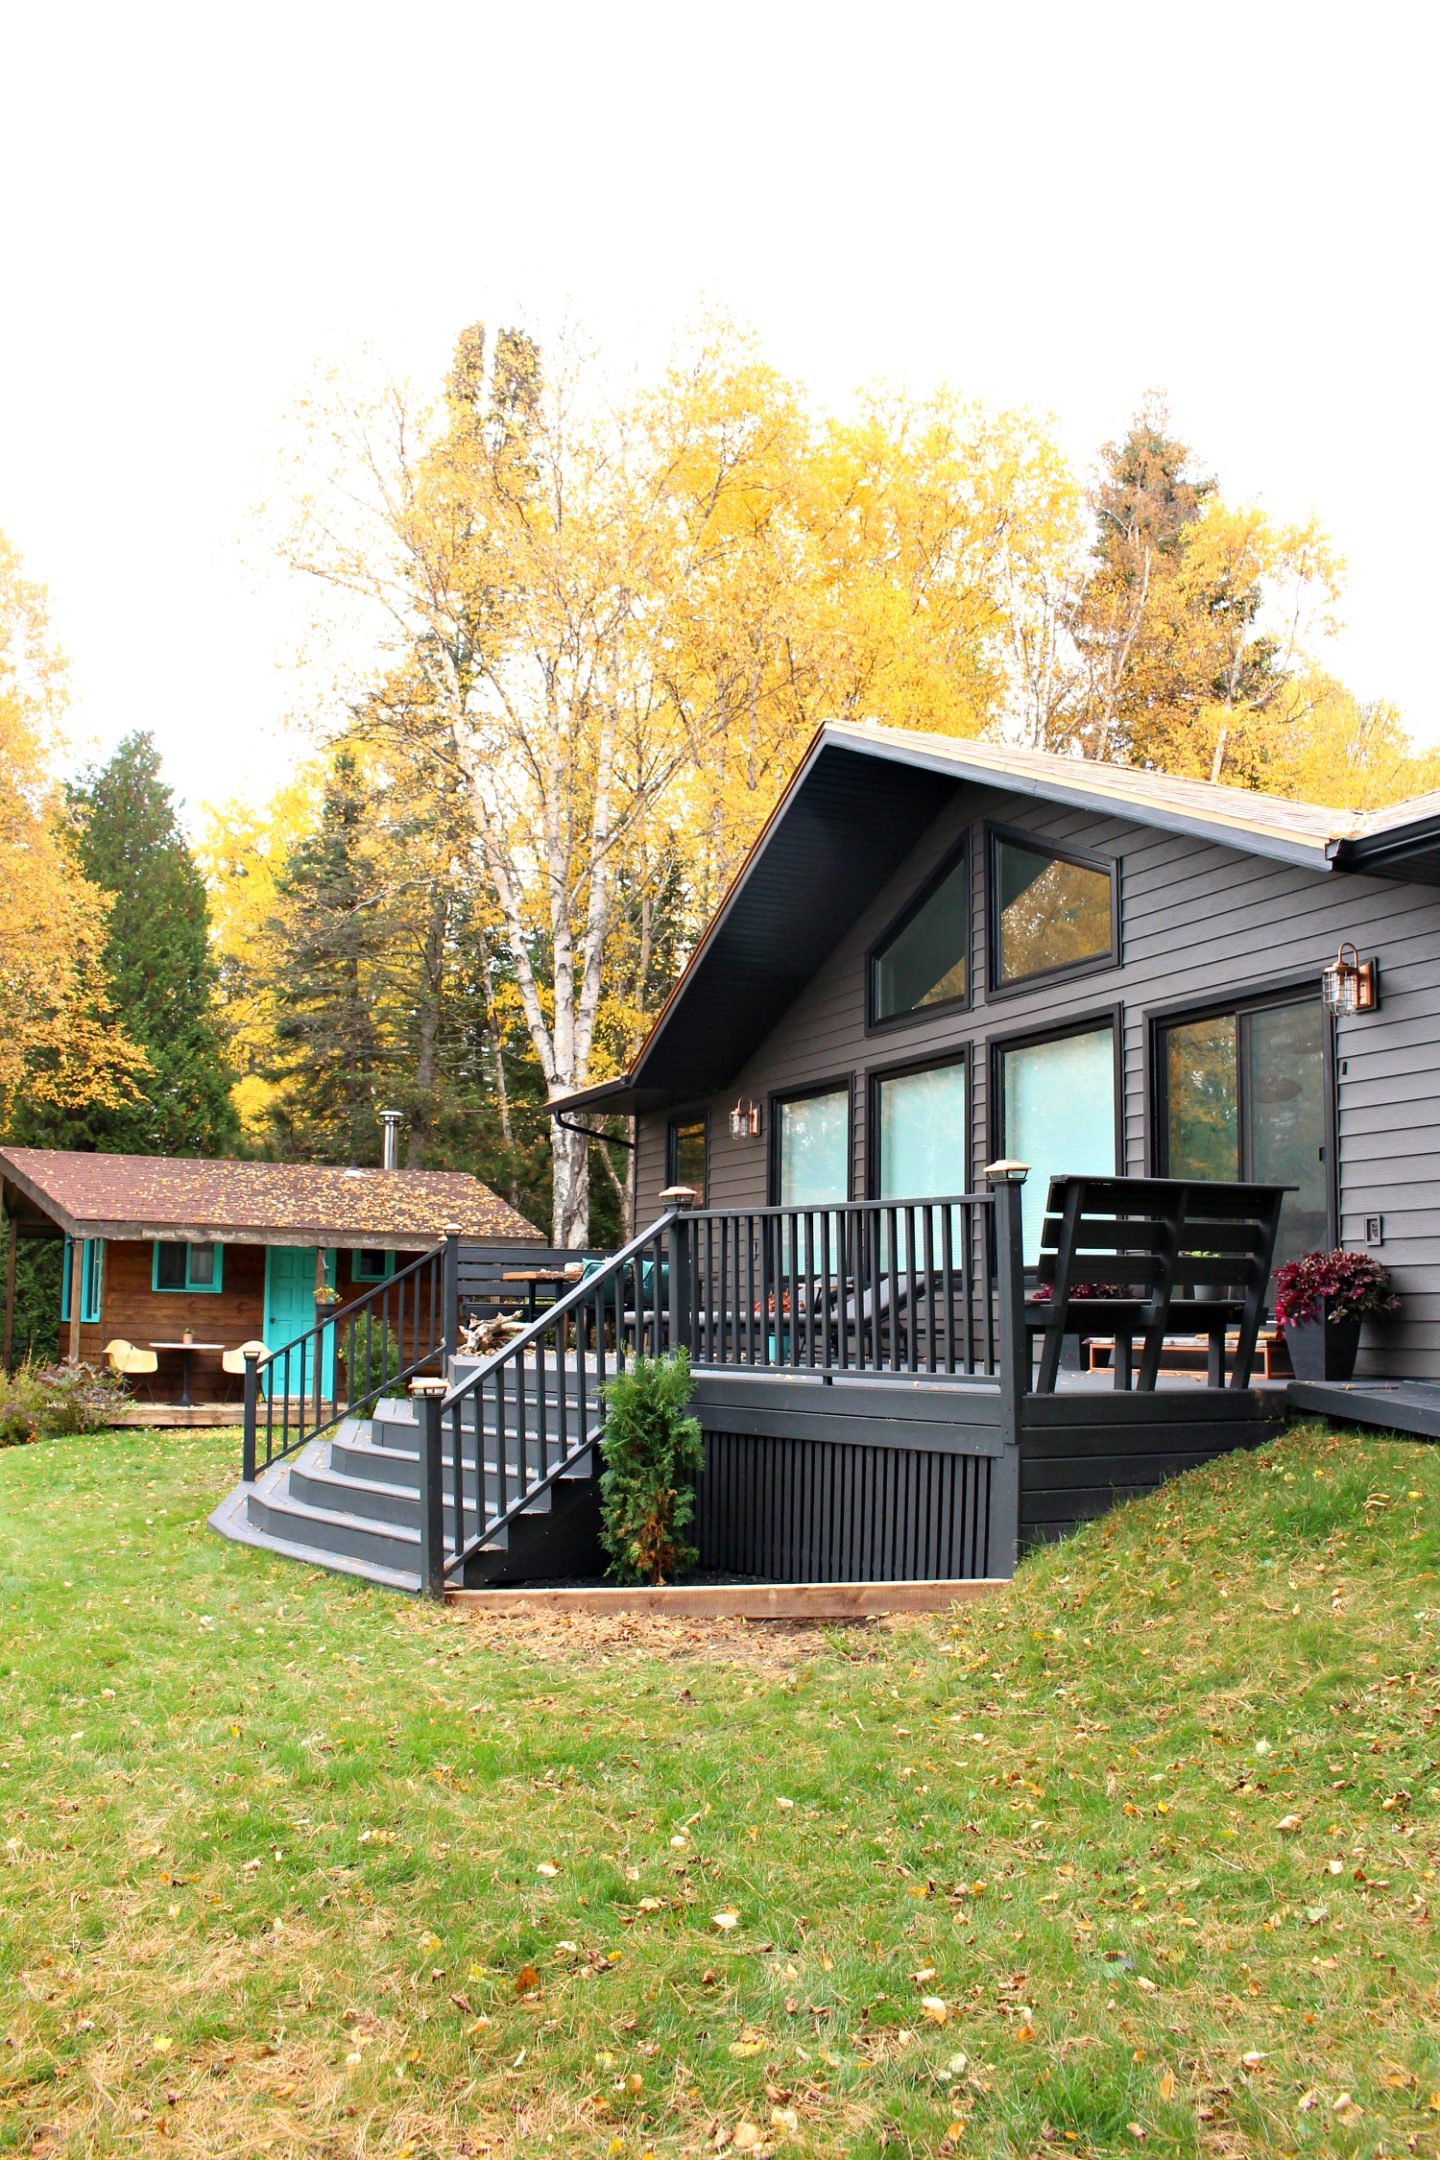
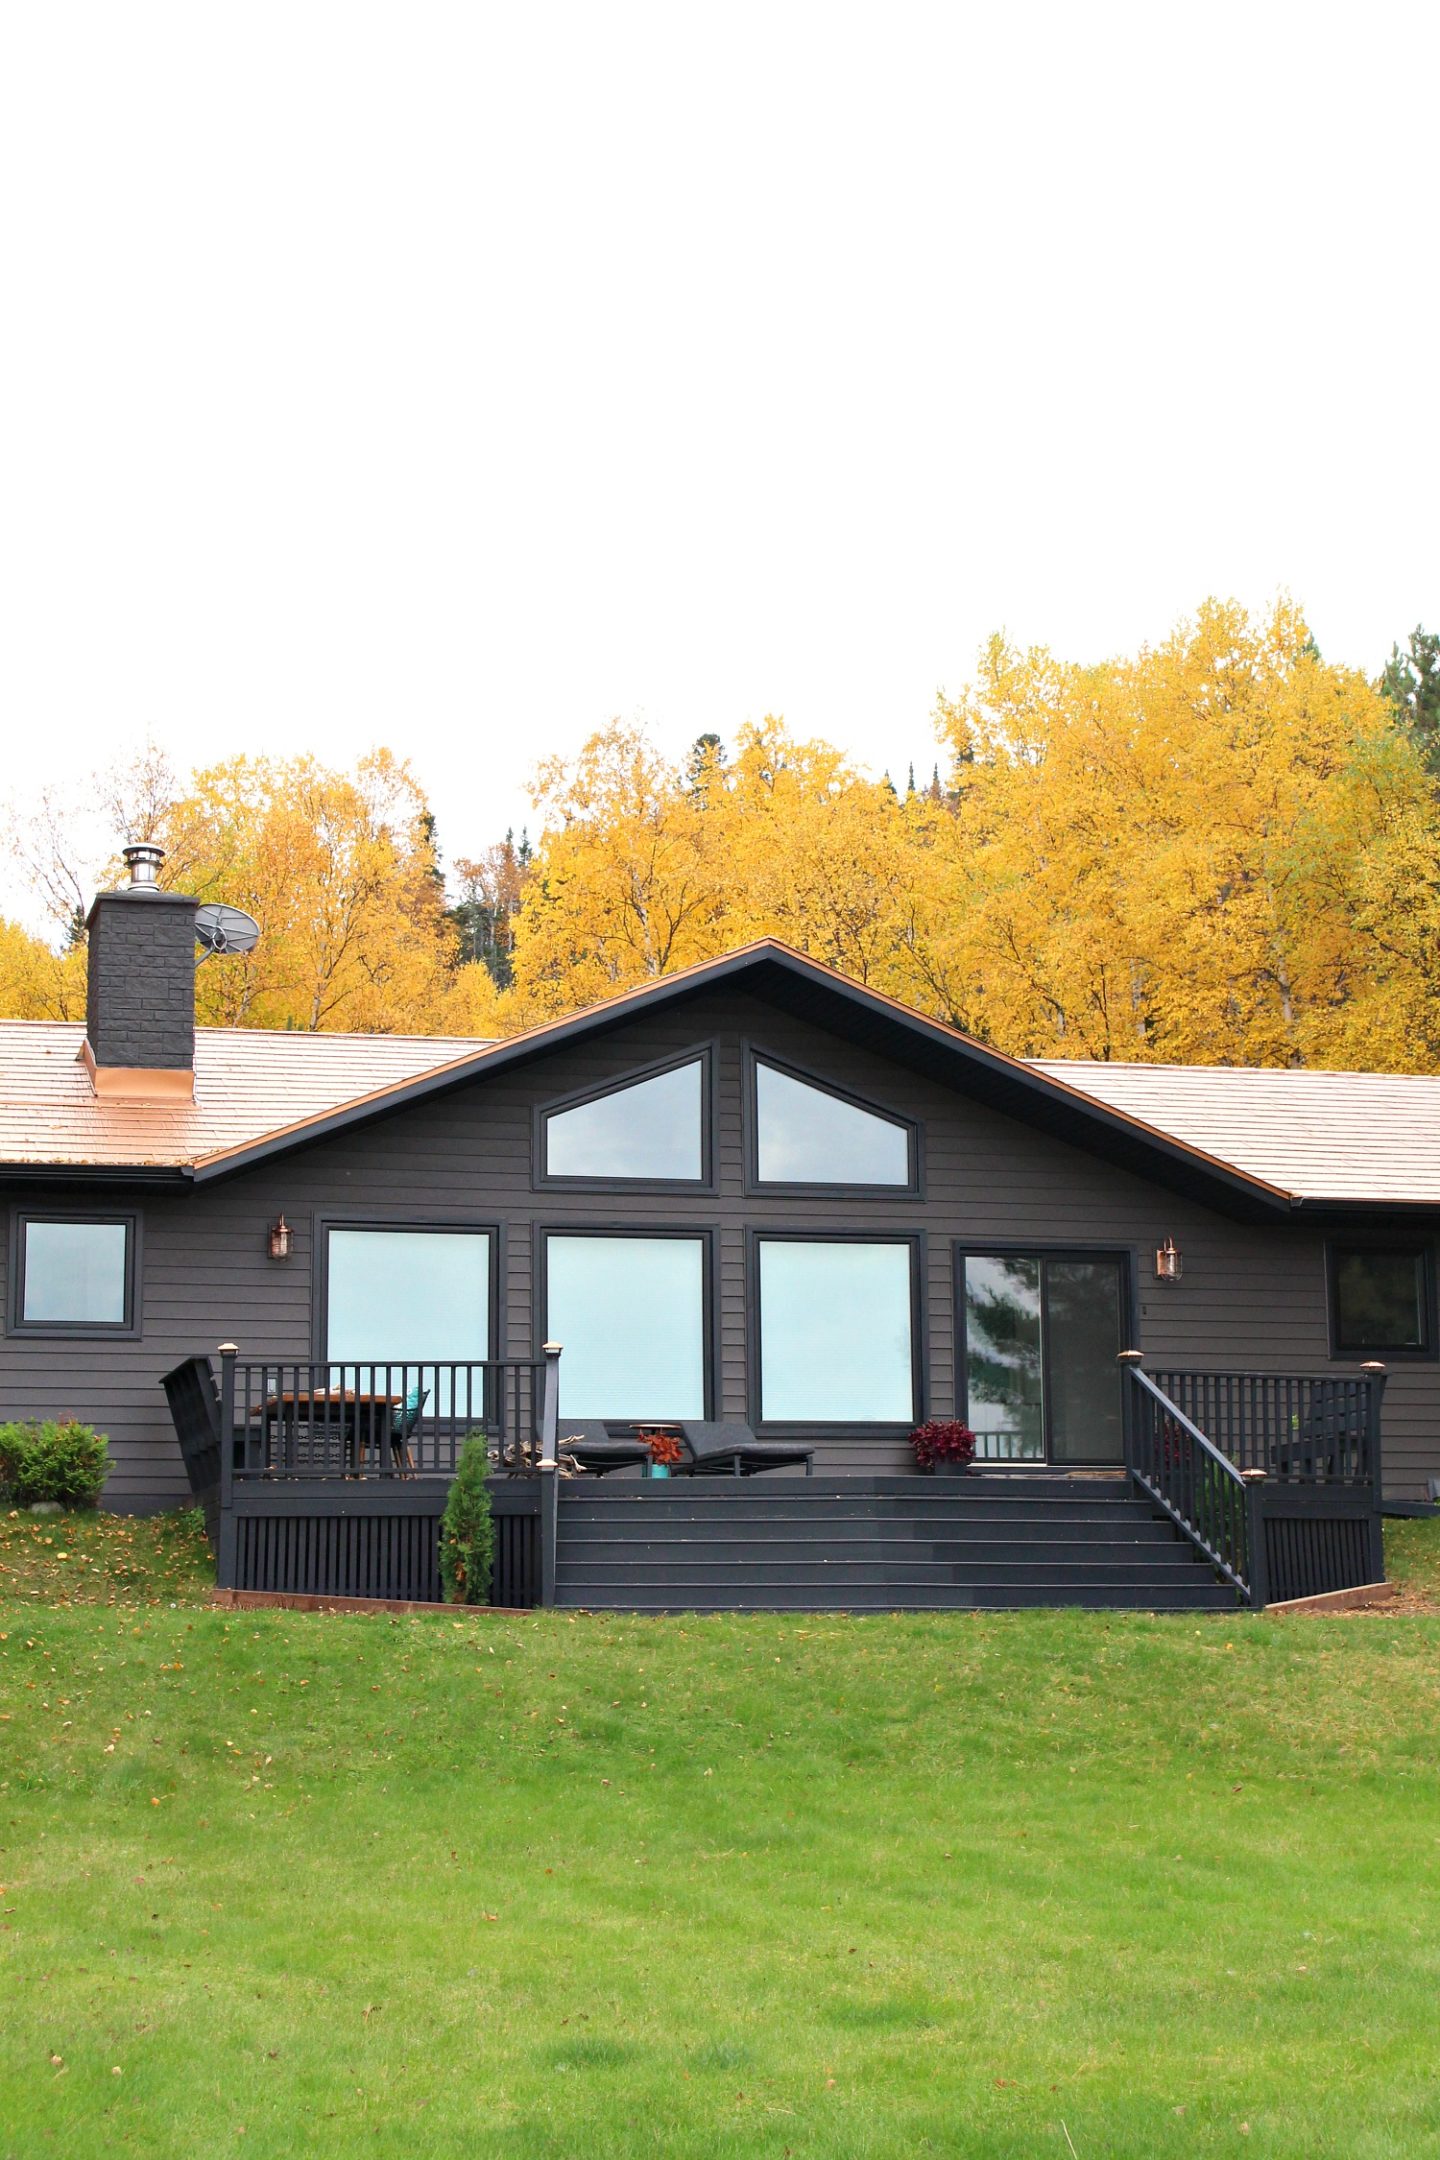
Little by little we are making progress on our landscaping and house exterior. This fall we finally ditched the old, beat up lattice deck skirting and made our own modern DIY vertical slatted deck skirting. We also created a cleaner and simpler flower bed on either side of the deck stairs (although we swapped flowers for cedars). After the exterior reno (mostly) wrapped up last fall, I had stained the deck black and added the copper solar deck caps, so this was the final push to wrap up the deck makeover. Here’s a look at the finished projects – keep scrolling for the before and how-to.


The Deck Skirting and Garden – Before:
When we bought the lakehouse, the flowers on either side of the deck were so pretty! The former owner and his wife were much better gardeners than us, and the flower beds were full of flowers that all bloomed at different times in the summer, which was a delight. But in the spring, fall and winter the flower beds looked totally naked and dead.


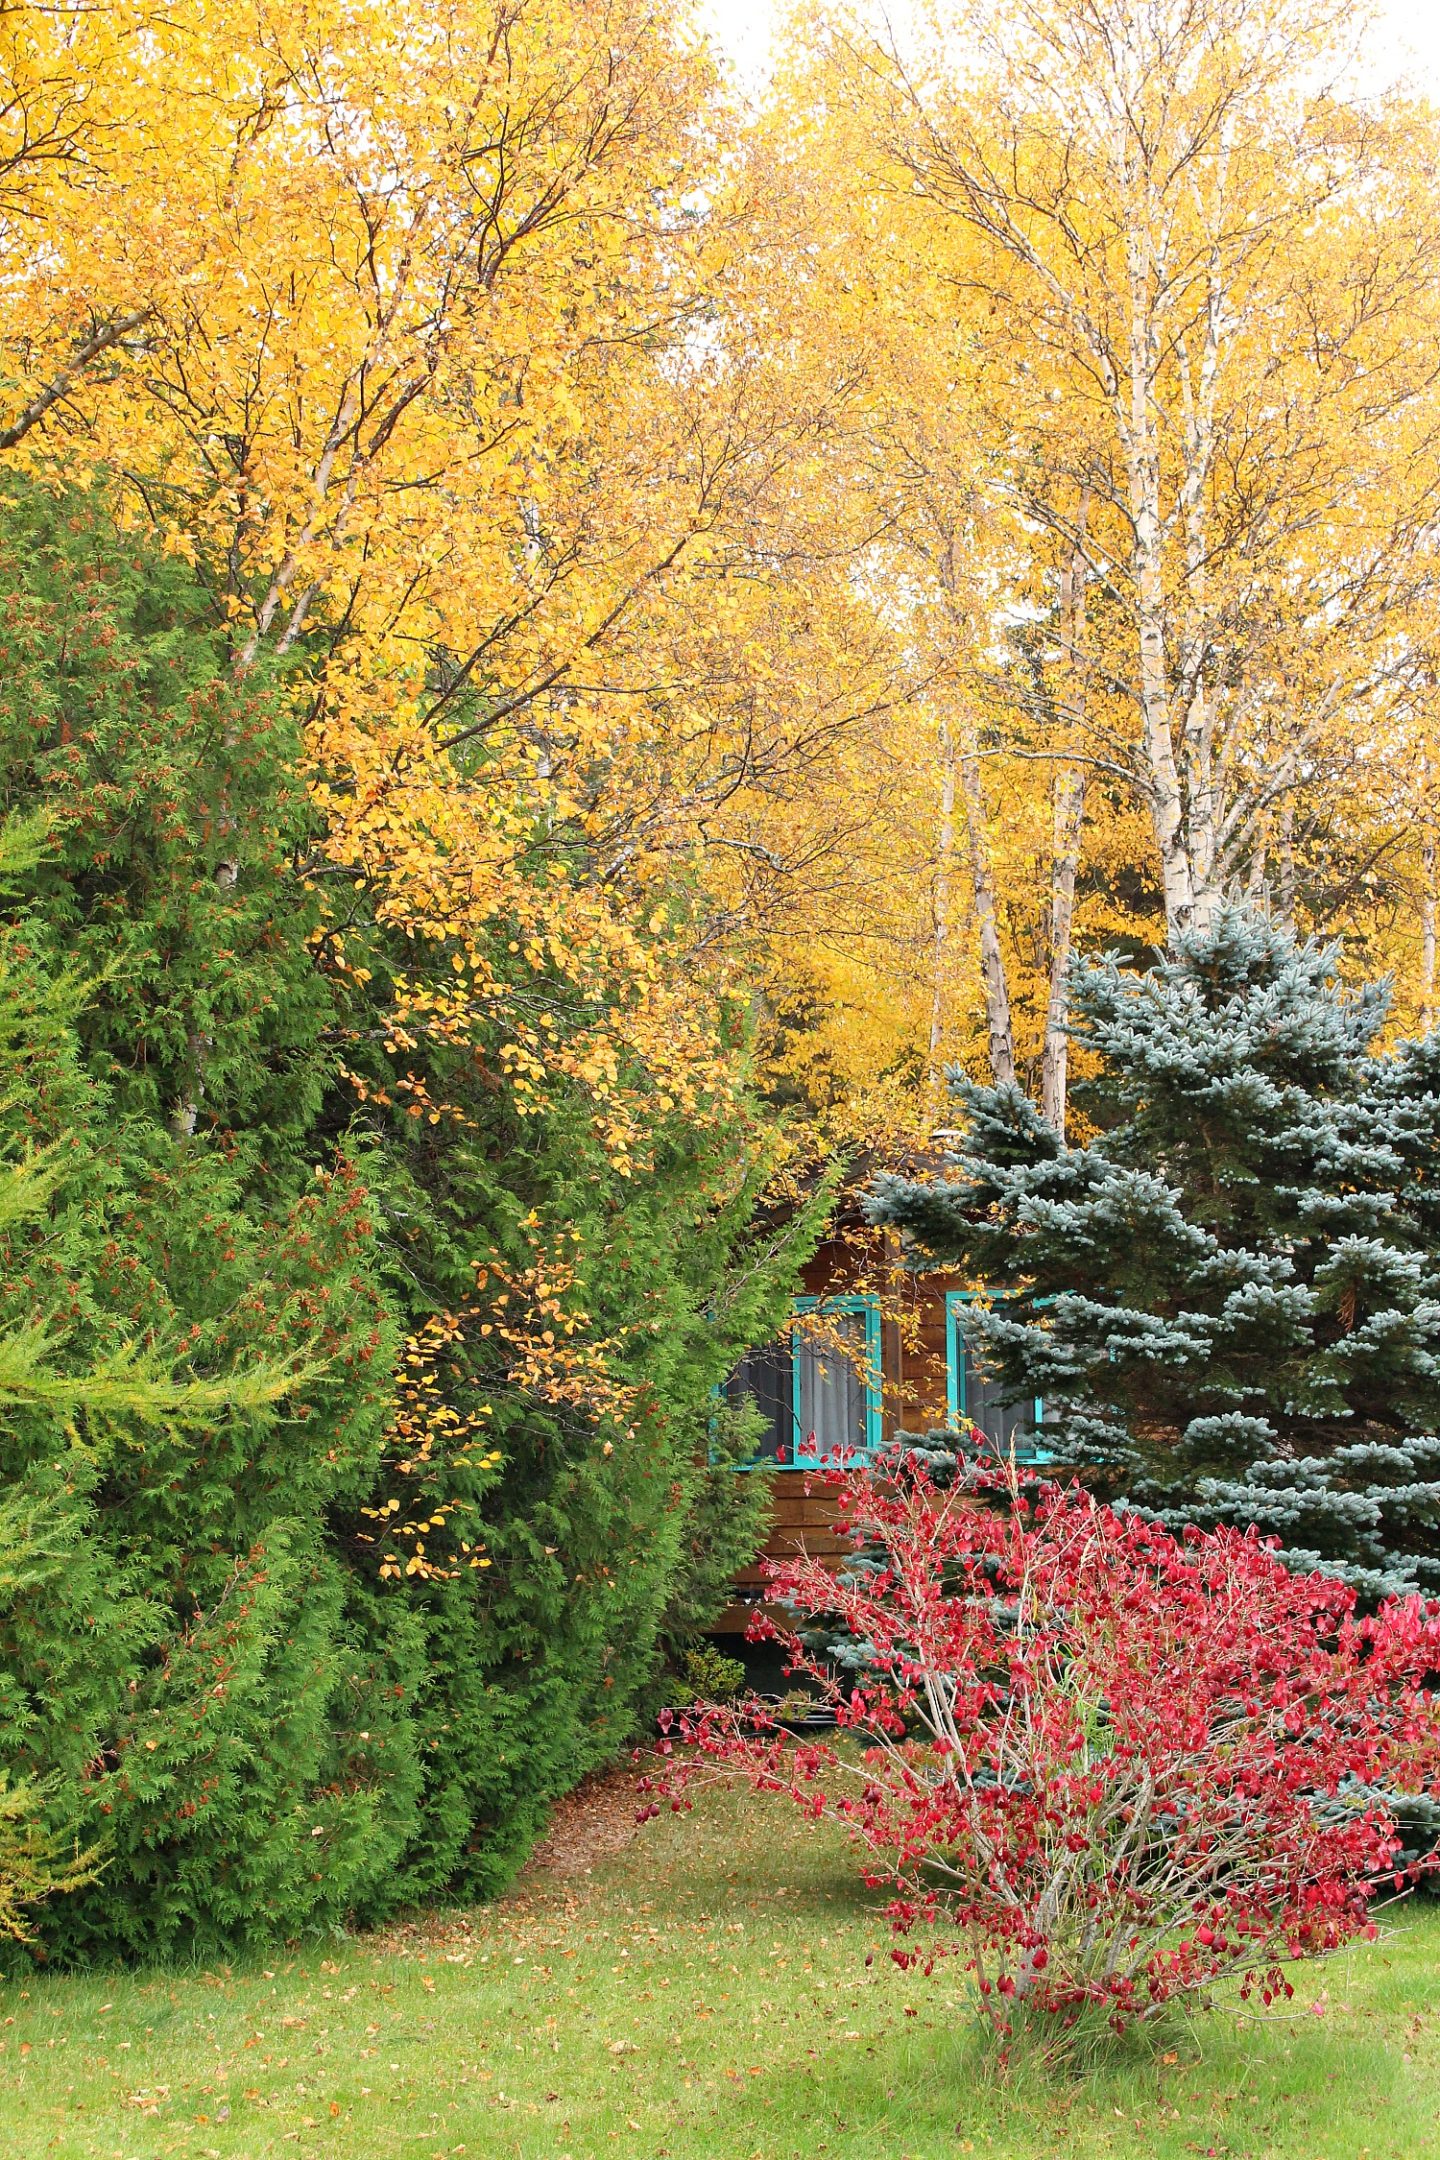
Sometimes I love how it looked – other times I hated it. The fix was simple: weed it and take care of it. But I hate weeding. I don’t know what to pull! When they’re not flowering they all look like weeds to me. I’m not good with plants. And if I am going to spend time gardening, I’d rather grow a vegetable garden because the chickens have expensive produce taste. So we transplanted what we could to the bunkie. I don’t mind if things get a little wild over there – it helps hide the weird construction under the building, haha. Hopefully they take!
![]()

DIY Deck Skirting & “Garden” Makeover – in a Nutshell:
Once the flowers were transplanted, we replaced the Secret Garden with something easy: landscape cloth, one cedar on each side, black mulch. Easy. Any weeds that pop up are easily removed and the look is simple, modern, and clean. We also added a chunky piece of pressure treated wood to keep the mulch contained and make it much easier to mow the lawn and weed whack. Previously the garden bed just bled into the grass and it was a nightmare to cut the lawn around it. We did something similar to this (bush and mulch) in the townhouse, and we loved it for years!

As I mentioned, we also removed the old lattice and also sealed off the steps because the dogs kept running underneath and getting covered in dirt. We just cut little triangles from plywood, screwed them to either side of the deck stairs, and then stained them black to match the deck. The dogs were not pleased! Then we made a new deck skirting with vertical strips of plywood we ripped on the table saw.

The cedars immediately hated it here and turned a little brown – we can always replace them with something more hardy if they don’t make it. But the concept still works: one bush or tree I can take care of. 23 different plants I cannot, lol.

While at The Home Depot Canada, I also bought two blue spruce. We have a big one the former owner planted and I LOVE it – it’s my favorite tree! So when we found these two beauties, I considered them for either side of the deck too but ultimately decided they would grow too big (hopefully!). But I kept them and planted them elsewhere on the property to fill in some gaps in the treeline between us and the new neighbors.

The cedars were super healthy when we bought them and it’s my own inability to grow things that caused them to brown a little. I’m trying to become a better gardener, I swear – it’s just taking a little trial and error. I blame the winds whipping off Lake Superior.

DIY Deck Skirting & “Garden” Makeover – More Detailed Steps:
Here’s a closer look at the progress. We planted the cedars first – to make sure they had as much time to take as possible before winter. Then we cut and fit the triangles to cover the tunnel under the deck stairs. We took a 6×6 pressure treated deck post and cut it with a reciprocating saw to fit diagonally between the deck railing and main deck. I love the color of the pressure treated wood and it will last for years.

After we tore out the old wood lattice, we laid down some fresh landscaping cloth under the deck too, to keep weeds and plants from sprouting up where we can’t reach them.

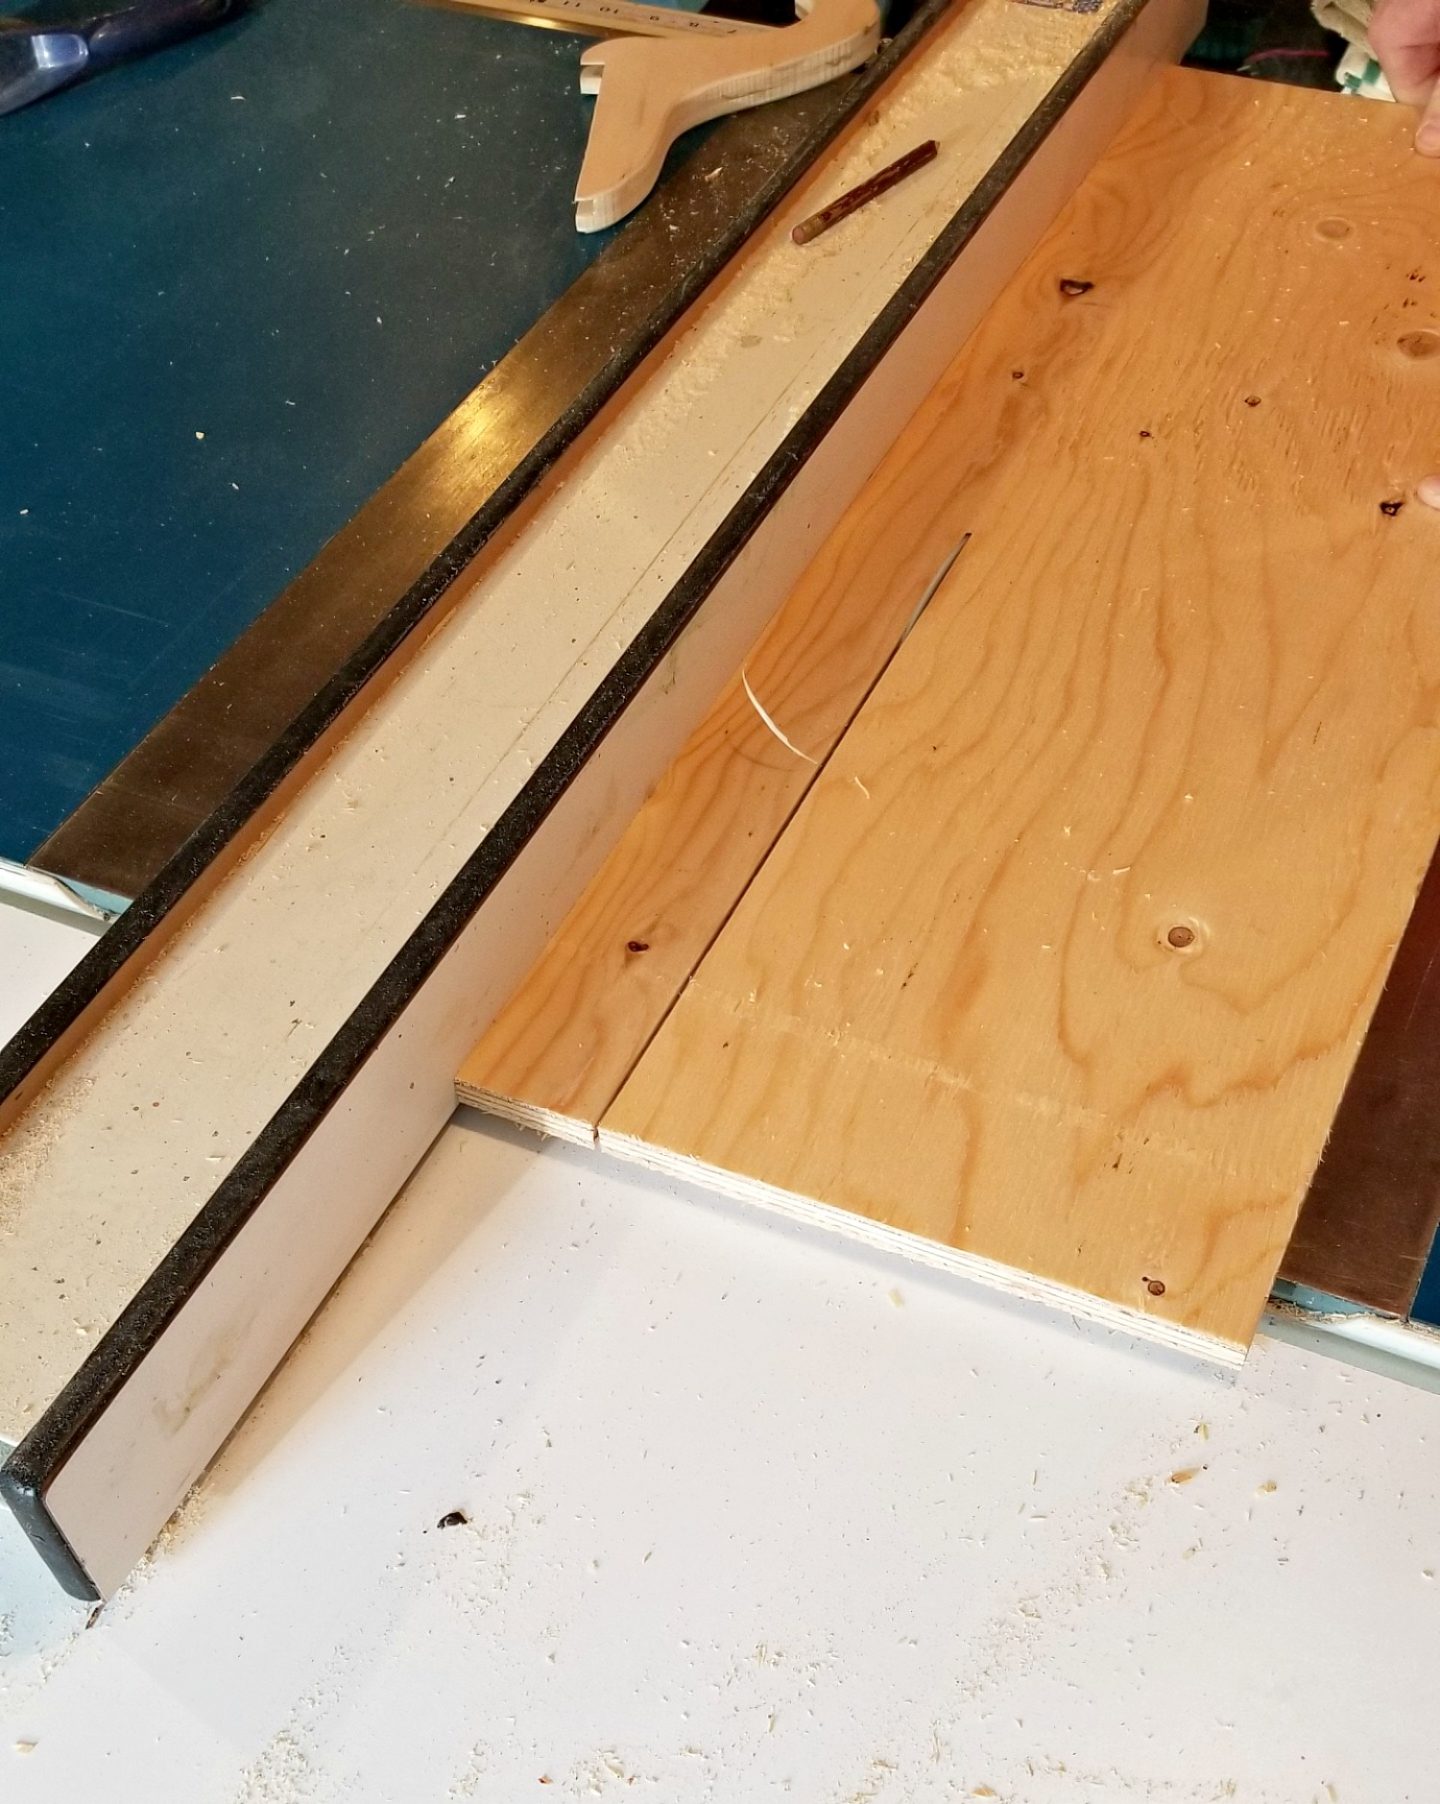
Making the DIY vertical slatted deck skirting was surprisingly easy! We took a sheet of 3/8″ plywood and cut it on the table saw to the height we wanted the strips. Then we ripped them into 2″ wide pieces which, with the two of us working, went SO quickly.
We used a spacer to place them 1″ apart and affixed each end to a 2×2 using an air nailer. You can use wood glue as well, for a stronger hold.
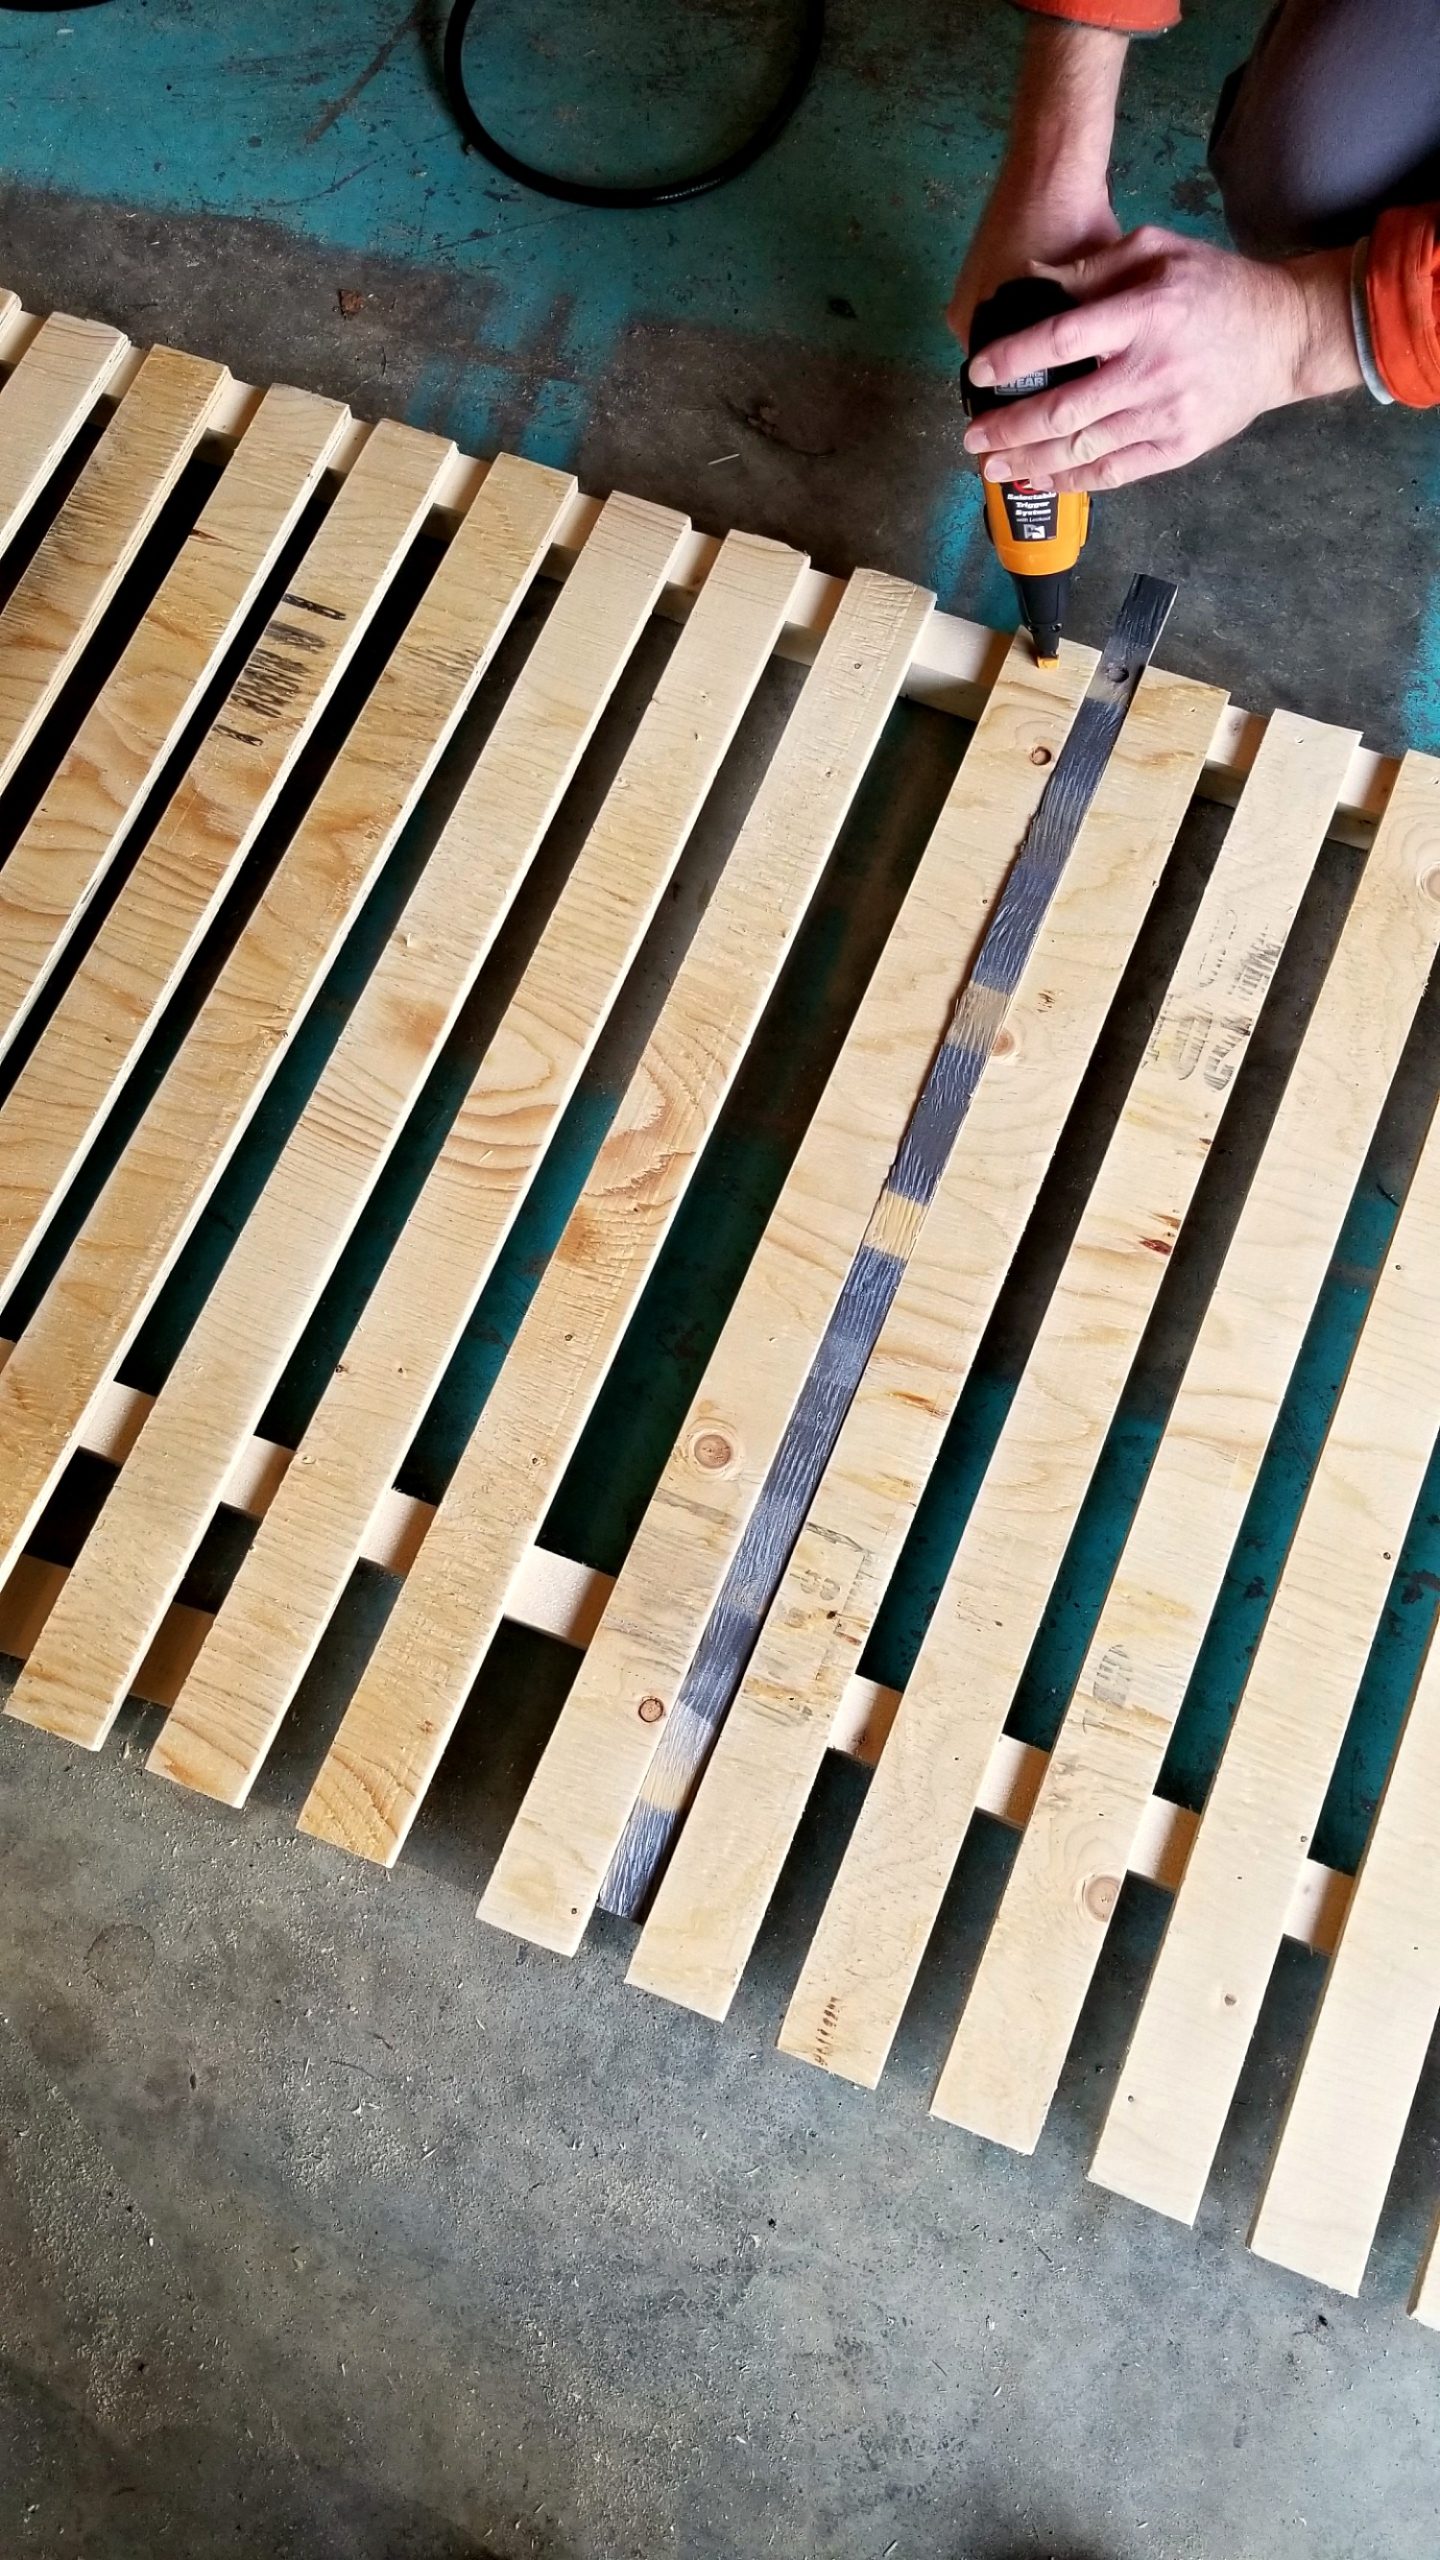
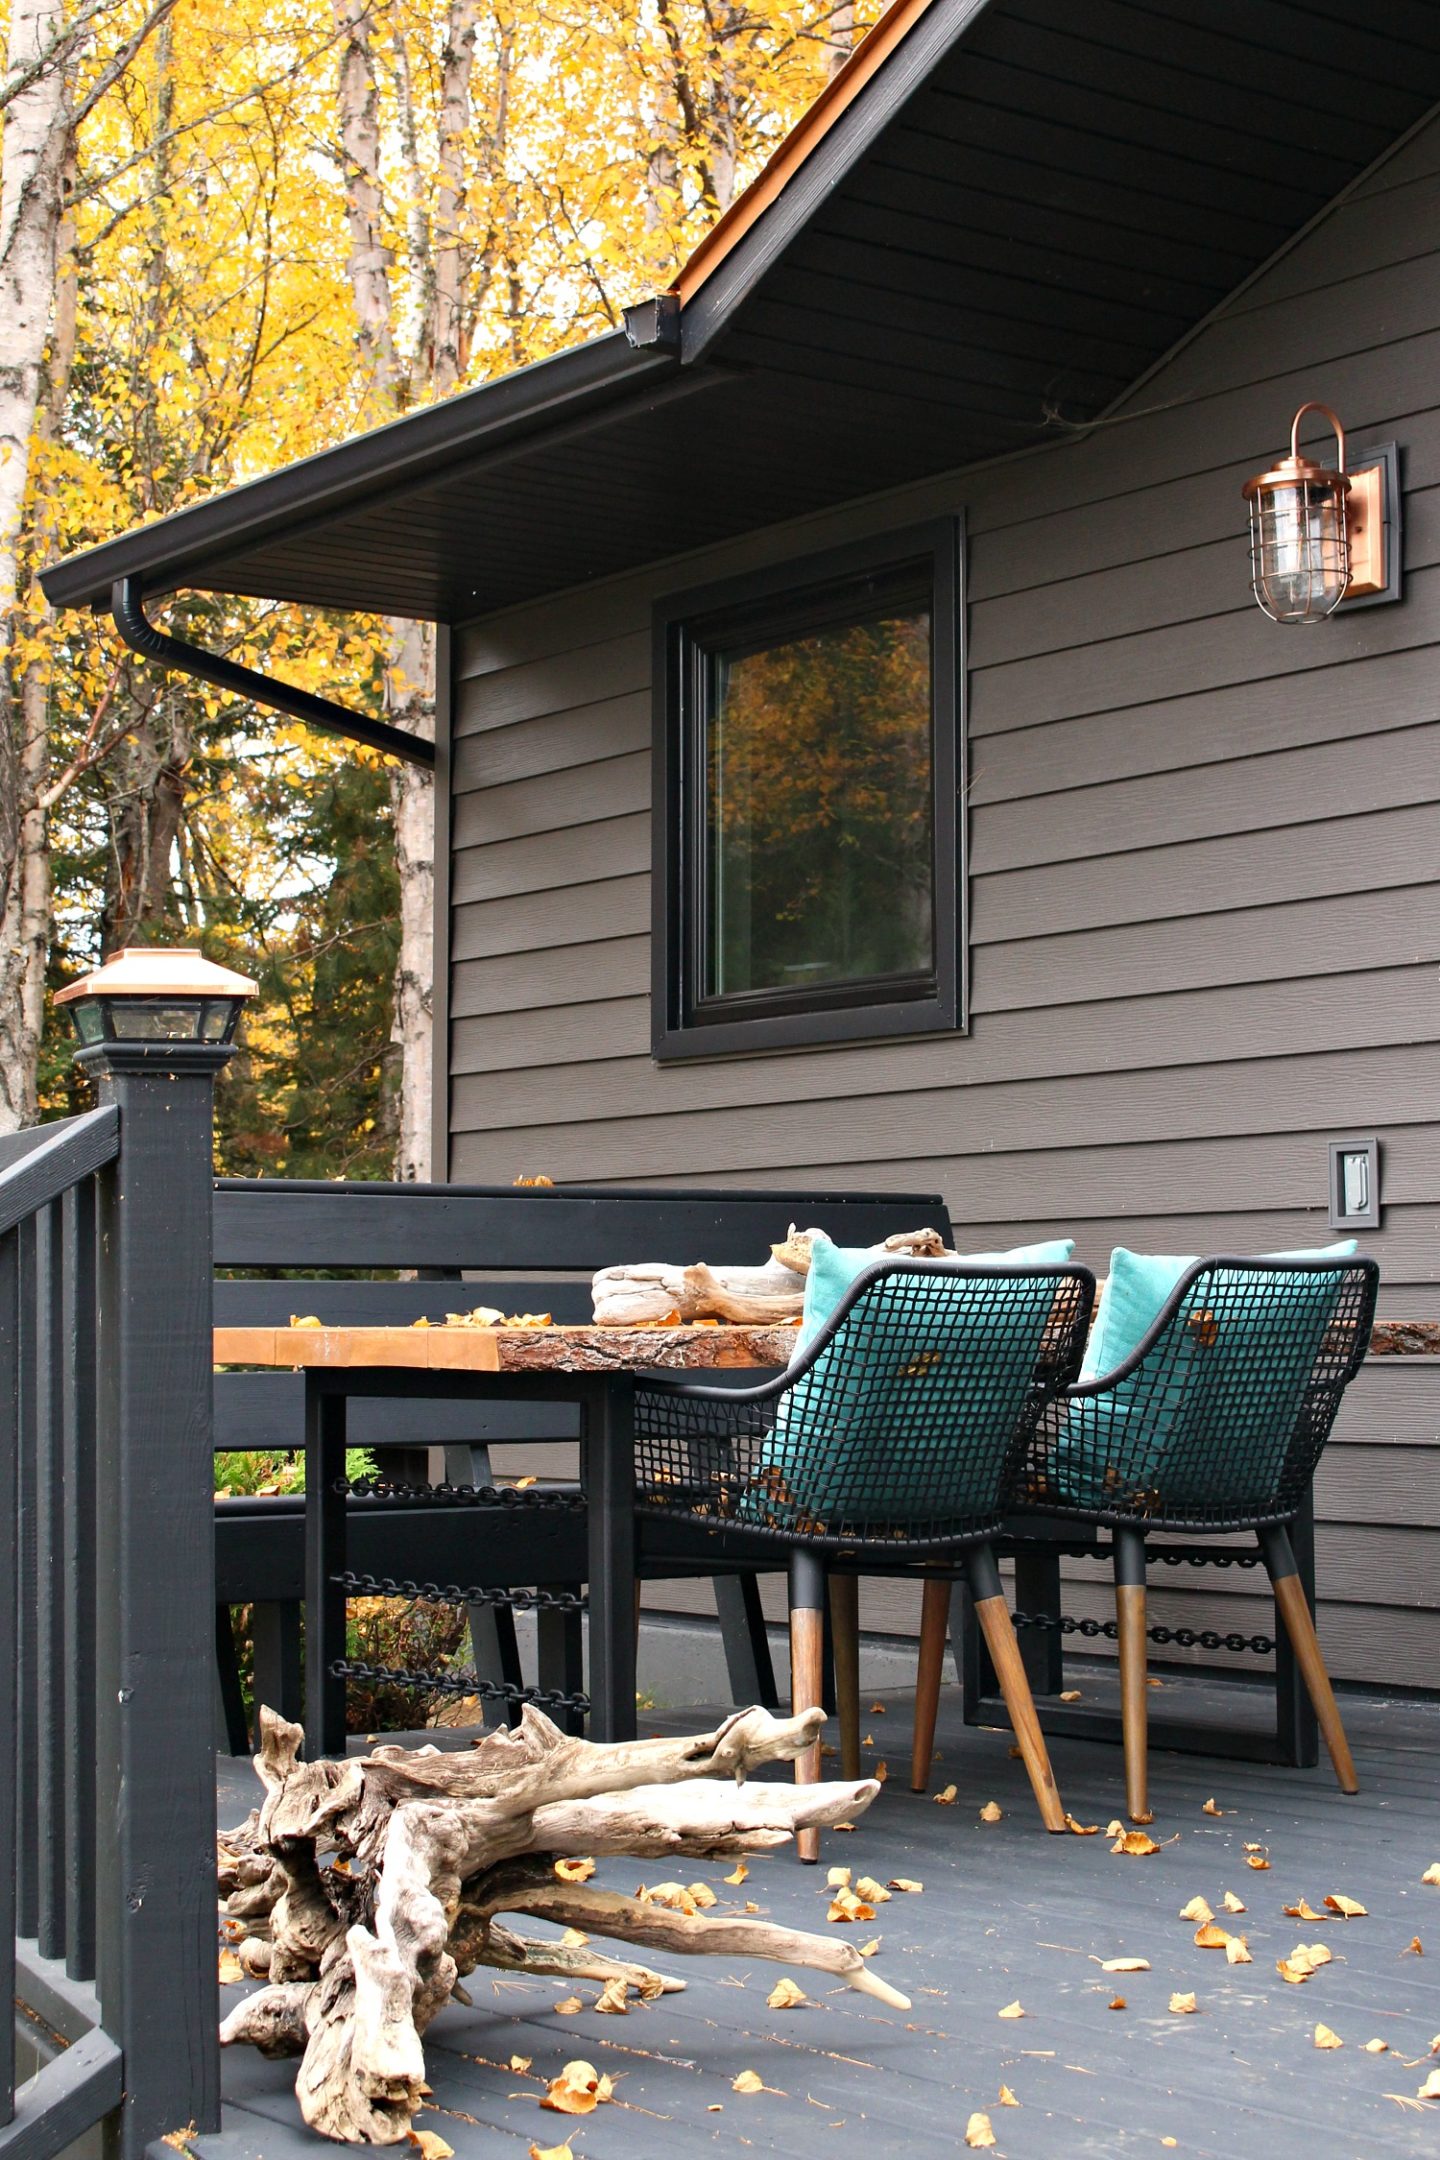
Then we painted it all a matte black with Behr exterior paint to match the black deck stain.

To affix the new deck skirting, we simply screwed it into place (through the fascia into the 2×2):


The black mulch was the finishing touch!

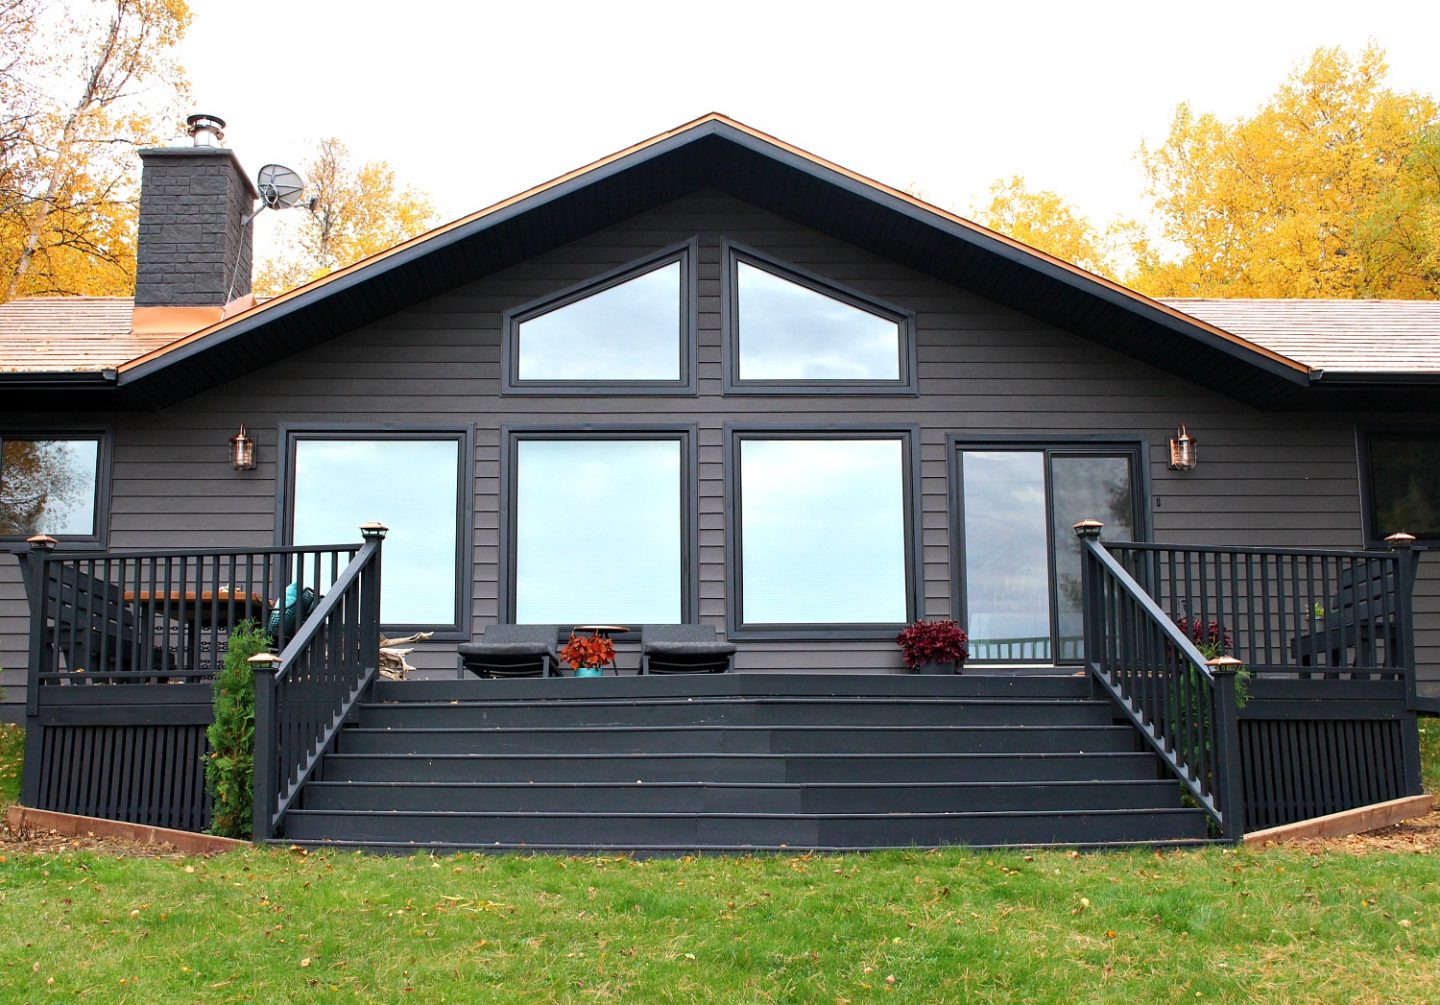

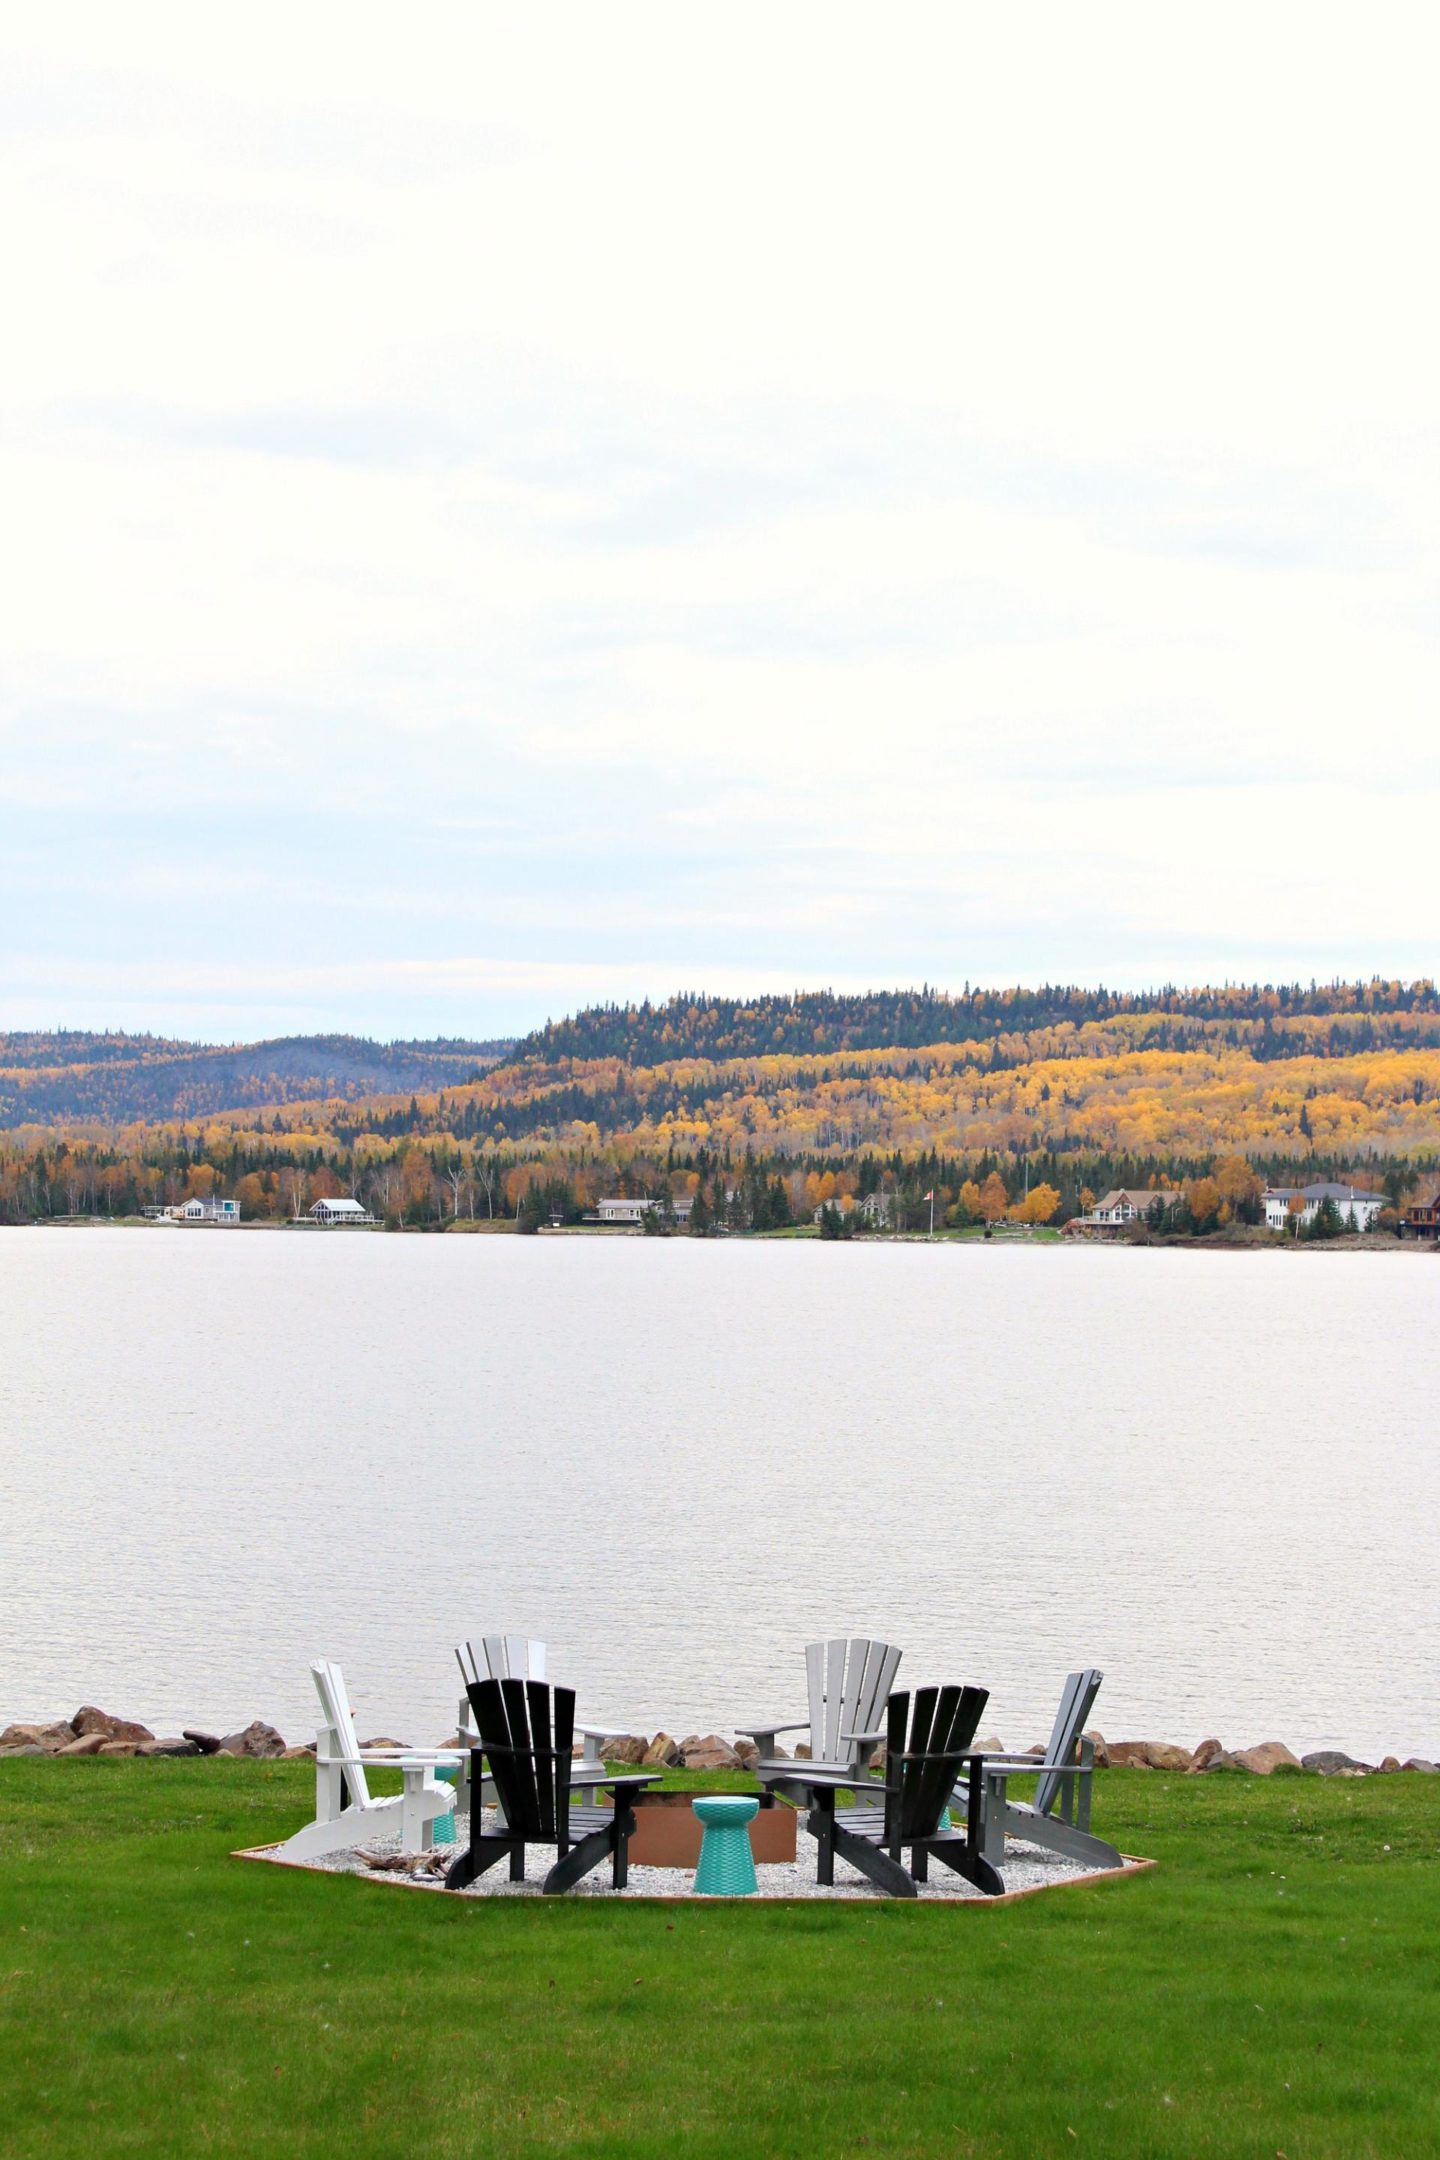
I love how the new modern DIY vertical slatted deck skirting, and the simpler take on garden beds, turned out. It’s been really exciting to see this property transform and become ours. And I really enjoyed fall this year, which I don’t normally because it’s over in the blink of an eye! But even I have to admit that the property was beautiful this fall and I really savored the season. But I have to admit that I’m already waiting for next spring and summer – and I’m getting my new exterior to-do list prepped!


Looks so lovely! I am a huge fan of black mulch and have it in my flower beds. Cedars require a lot of moisture as they have shallow roots and as you noted the winds off the lake can dry things out quickly. Not sure if your dogs keep the deer away but in my area (northern BC) the deer love to feast of the cedars. If you do every decide to add any plantings consider Annabelle hydrangea. Of course, they do die back so they don’t add winter interest (unless you are lazy and leave the large, dry flower heads over winter) but they have a long flower time. They start around July and have flowers right til freeze. The green and white are a nice foil for your dark modern look.
Author
Thank you! It’s curious that cedars haven’t done well here because we have very moist soil. Our lawn is quite squashy at times. But the former owner replanted cedars from down the road and they took well, so neighbors have theorized that they need to be local, but I’m not much for stealing from Crown land haha, so I buy them! But I do think I need to start covering them up for winter because the first few years we lived here, the cedars that came with house did well but last winter they didn’t. Seems our conditions are getting more harsh. Bad news for my skin, too!
We have deer around, but not often on our property. I do think the dogs scare them away. They only pop up on our security cameras from time to time and I see a deer cross our yard once a year – like clockwork, he’s kind of funny.
Thanks for the tip about the hydrangea, I will definitely try them next year. I have found a couple of flowers I can maintain (dahlias did well and begonias too) but they’re annuals so I’m very slowly expanding my abilities 🙂 I always welcome suggestions with anything green…
I love your style of deck skirting soooo much. The color matching is perfect. I can imagine your dogs wondering “what just happened” when you covered the steps, haha. And I see that you decided to winter-over the new outdoor table. Sigh.
Author
Thank you! And yes, the dogs were very confused and annoyed lol. Although Hynda found solace in playing with the mulch. I am putting the patio table away for winter, I just haven’t been able to yet. It’s been a slow migration of moving things into storage because I needed to make space, first. I’ve never had so much outdoor furniture! Since I snapped these photos, I did pack away the patio chairs and side table and loungers – I just need Hubby to help me heave the table into storage because I can’t lift that alone. It is SOLID haha. Oh – and also the Adirondack chairs are still out, because I’m still planning on having a bonfire.
I love that the house is so sleek and sophisticated and the bunkie is woodsy and rustic, yet your color choices tie the two so well. Great job! Quick suggestion re plantings: you might want to check out the Wayside Gardens website. The site enables you to filter for lots of requirements/preferences, including *cold-hardy shrubs*! Even if you don’t decide to buy from them, it’s a great source of ideas for what will actually work in your climate zone.
Author
Thank you for the kind compliment and the advice! I will definitely check that website out because I need all of the help I can get. I am slowly learning what will grow here. There’s a particular type of annual I like, can’t remember the name right now, and I kept trying to make it happen but it hates it here. I have learned dahlias liked it here – and my begonia flowered until after the frost, well after everything else died. It’s a process because our weather can be very harsh here.
I do understand, Tanya! When I lived in NW Minnesota, we were in climate zone 3, which I think is right about the same as yours. It can be so frustrating to plant something you love, only to see it fade before your eyes when winter comes. I just ran across the Gardenia site, even better than Wayside for your purposes, I think. It has hints for specific climate zones — and maps crafted especially for Canada, with filters for hardiness and also coastal climates, which I’m guessing is an issue for your location. It’s http://www.gardenia.net ‘Tis the season for garden dreaming once the snow starts to fly!
Author
Thanks for the additional info! And yes, I do start garden dreaming now, haha. And I’m not even much of a green thumb, but I did put more effort in this year and I’m looking forward to doing a bit more next spring. Ugh, why is winter so loooong????
That looks fantastic! I have a house in town that I’m dreaming of (it’s not for sale, but it shall be mine one day, wahahaha) that has zero anything under the decks and looks terrible, since you can see the concrete house pad/basement wall/whatever it is underneath.
This will be a perfect solution! Now we just need to will the owners into selling… 🙂
Author
The underside of houses is really not attractive, lol! I’m glad I could give you an idea for your future dream house. Have you ever had a real estate agent reach out to them about selling? You never know who might be secretly thinking of moving and waiting for a sign… Good luck! I hope it’s yours one day.
I really love the black color. It really made the deck looks classy. Such a stunning total makeover. Thanks for sharing this.
Author
Thanks so much!
Gorgeous deck-skirt! You miiiiiight even want to paint the 6×6 boards that are edging the beds beside the stairs the same black paint. It will look so sleek, especially with your black mulch. A couple of Little Lime hydrangea shrubs would be gorgeous in those beds. They’re practically no-maintenance. I just give them a little trim in the spring.
Author
Thanks Kady!
I’m just wondering how the plywood slats have held up since then? Looking to do a similar slat deck skirting, although horizontal, and wanted to know how plywood would stand against the elements. Looks great!
Author
Really well! Even though we get torrential rain and it’s buried for most of the year under heaps of snow. I just looked at them today to double check for you and all but one slat is totally, perfectly straight! I think the key is to seal it really well, on all sides. I used exterior paint.