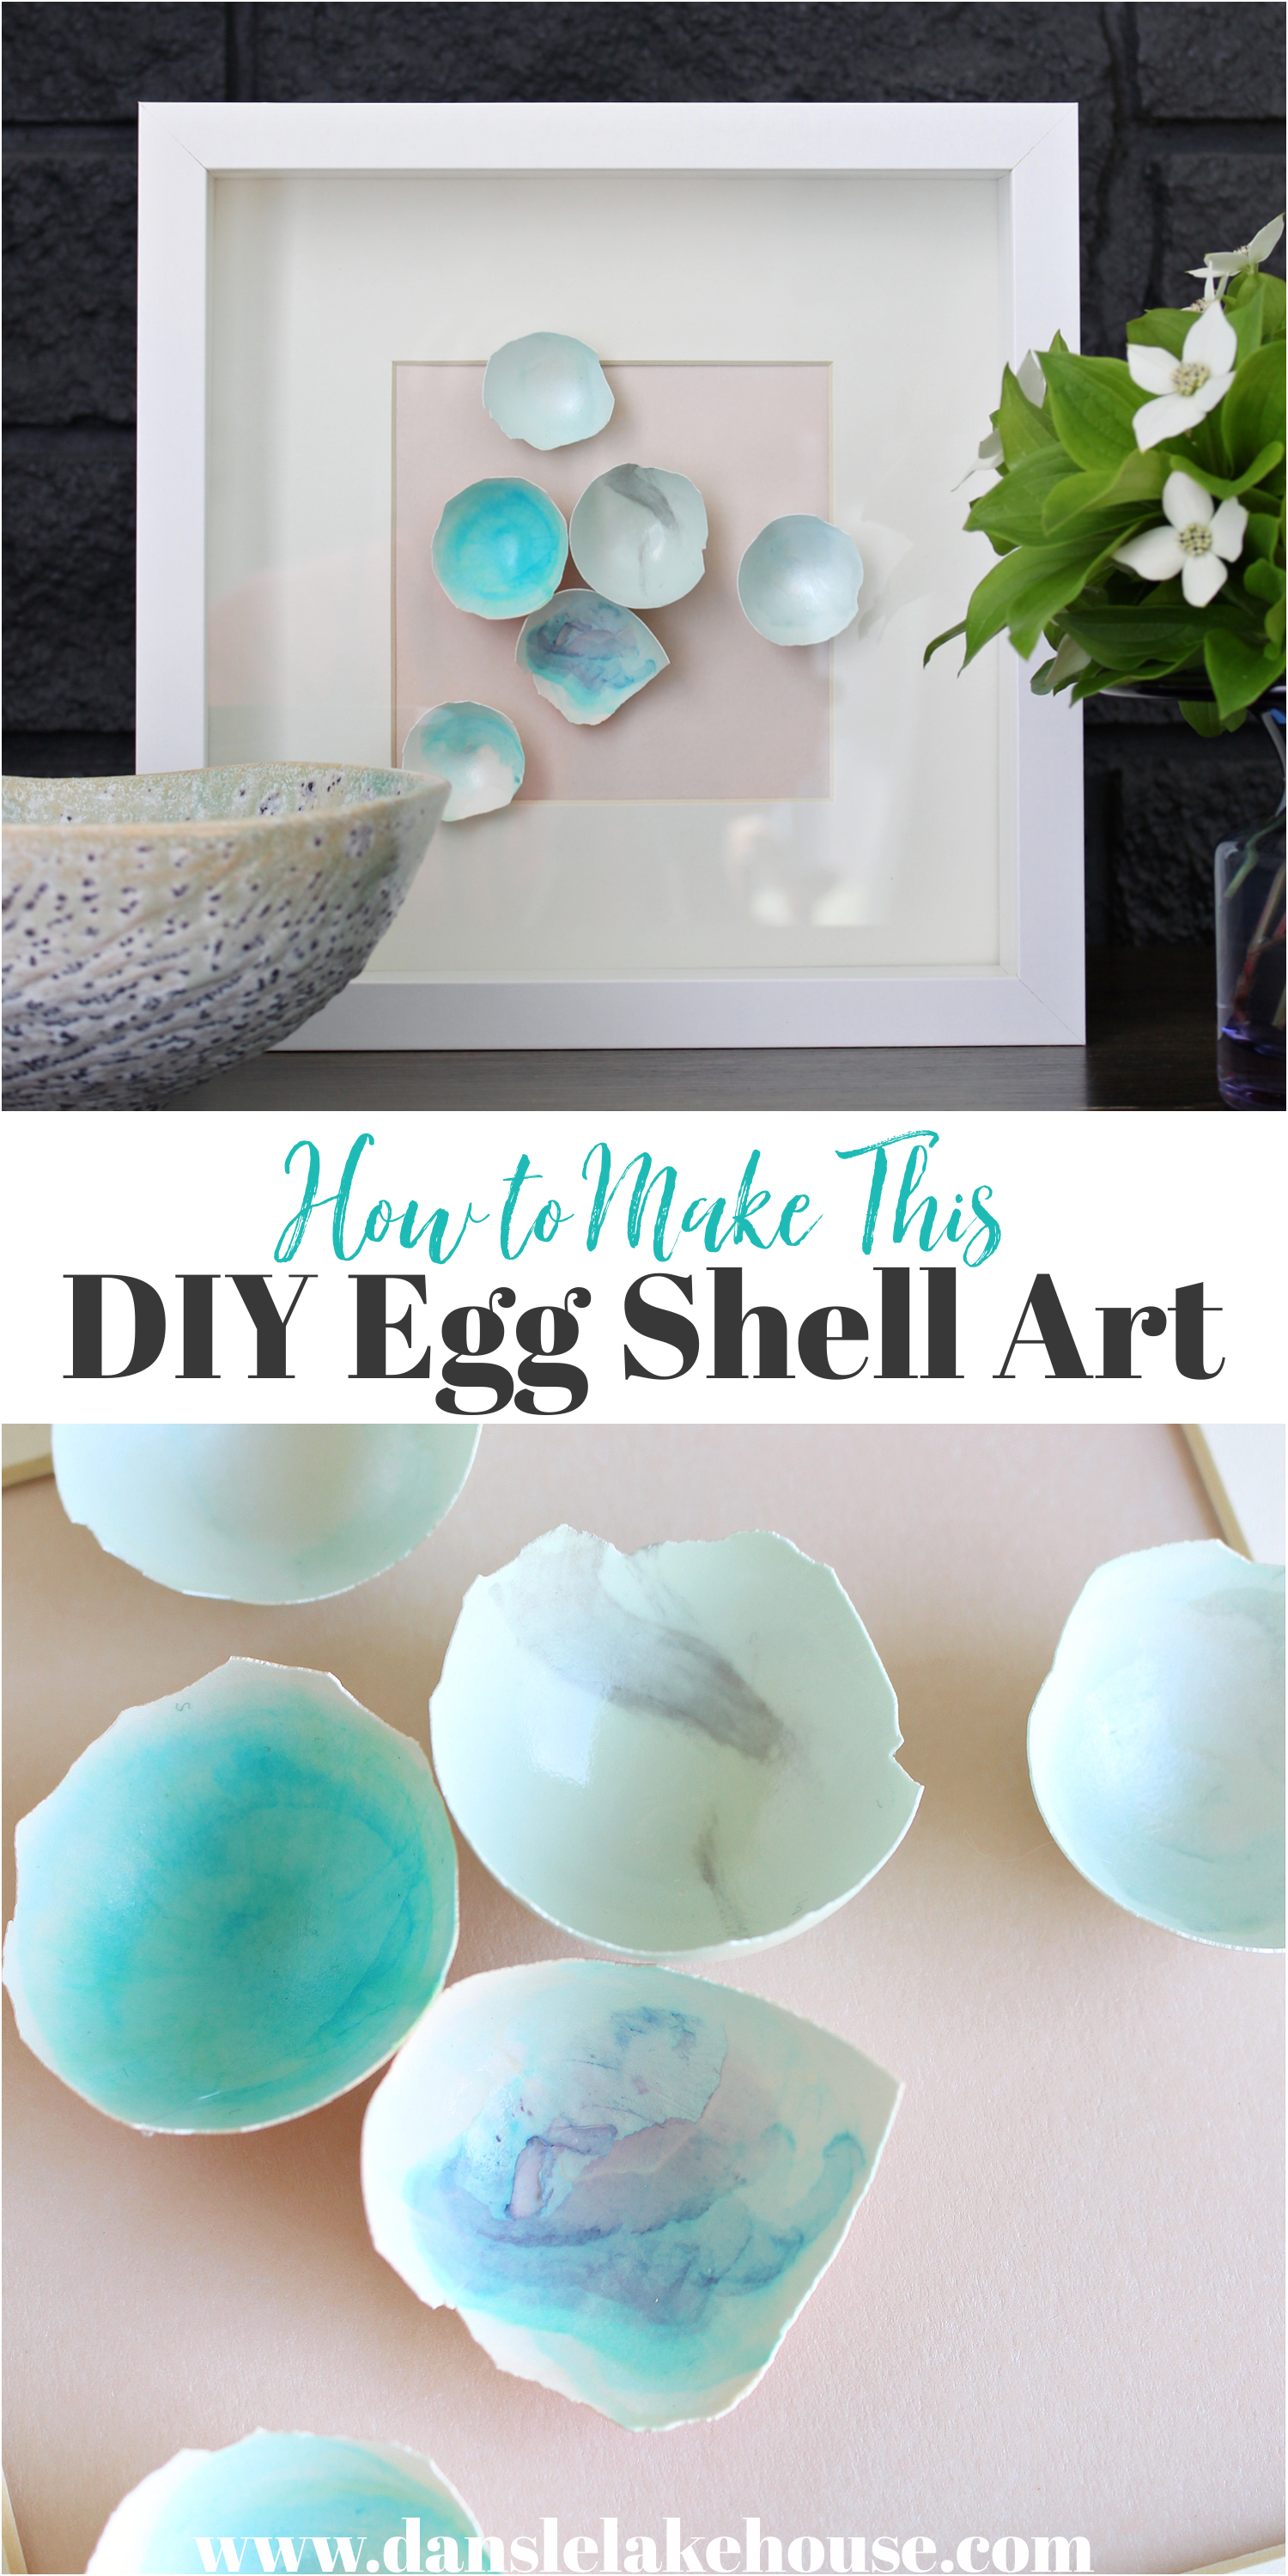
My friend Kara, from Husk Milk Ceramics, introduced me to the concept of egg shell art when she sent me the Instagram account of artist Elisa Sheehan – and I was immediately smitten with the idea of making my own DIY egg shell art. I usually prefer to support artists over borrowing their ideas, but I just really wanted to make art with the egg shells from my own hens. Inspired by Elisa and also Ruby Silvious, another artist who uses egg shells as a canvas, I made my own mini work of eggshell art:


What Paint to Use on Eggshells?
Not knowing how those artists made their egg shell art, I experimented with different mediums for painting eggshells. Acrylic paint or craft paint worked well to paint egg shells (see photo below), but the effect was more pigmented and thick. I didn’t like the texture of the brushstrokes. Watering down the paint helped but to best create the watery and ethereal painted eggshells I had envisioned, alcohol ink and (surprise!) nail polish worked really well to paint on eggshells. Experiment and don’t be afraid to use what you have on hand: inks, watercolors, acrylic paints, leftover house paint or stains, markers. Get messy!

Using Alcohol Ink on Eggshells:
Alcohol ink is one of my favorite mediums to work with. I’ve made DIY alcohol ink art, DIY alcohol ink note cards (plus alcohol ink Valentine’s Day card AND alcohol ink Easter cards), DIY alcohol ink coasters, DIY alcohol ink ornaments, DIY alcohol ink Easter eggs, and DIY alcohol ink upcycled china. Painting the interior of eggshells seemed like the next logical step for my alcohol ink crafts obsession. Alcohol ink works really well on a smooth surface so I was worried the egg shells might be too porous. The alcohol ink swirled beautifully and created the kind of ethereal designs I had in mind. Unlike the painted eggshells which looked, well, painting, the alcohol inks fused with the egg shell and you can’t tell where the natural color of the egg shell (most of mine are aqua, inside and out) end and the ink begins. I highly recommend investing in some metallic inks because the shimmer and sparkle look so good. My favorite is Pearl, which I used on so many of my painted egg shells as a shimmery top coat or to dilute the color. I actually used an entire bottle and had to order more!

How to Seal Painted Eggshell Art:
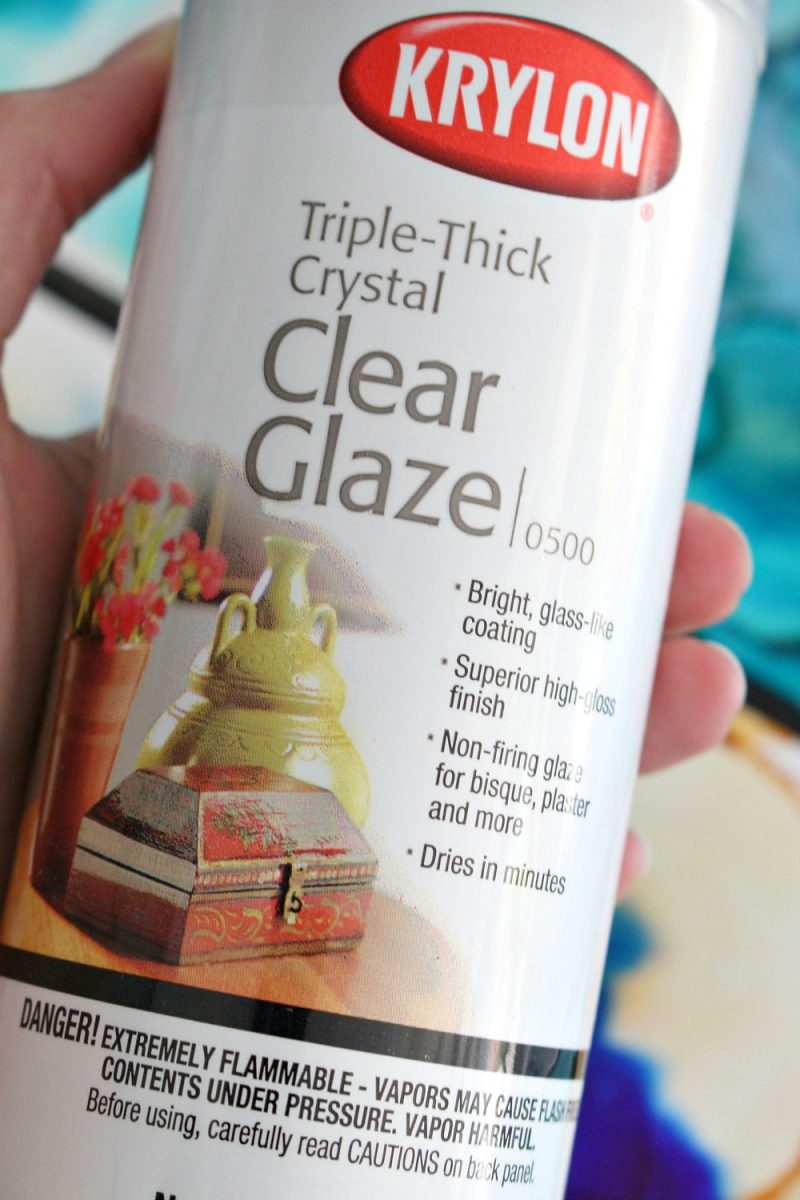
I’m also still experimenting with how to seal them. I considered mod podge and also the sealant I use for my alcohol ink projects (this one). But I happened to have SO many cans of Watco Clesr Lacquer, so I decided to experiment and try that. It worked perfectly to give the egg shells a little extra gloss and durability, but if you need to buy something for this project, I recommend either mod podge or the Krylon. But if you’d an avid DIYer like me, with tons of cans of various varnishes and sealants, don’t be afraid to use what you have on hand. They’re just egg shells, after all! It won’t hurt to experiment a little and use you supplies you have.
Supplies to Make DIY Egg Shell Art:
- Clean/dry egg shells
- Alcohol inks (this set is GREAT & has the pearl metallic I used the most)
- Alcohol ink blending solution (rubbing alcohol works also, but not as well)
- Old nail polishes (optional, shimmery and sheer colors work best)
- Small artist’s brushes
- Old ice cube tray or any small plastic containers
- Sealant (if you don’t have one already, then I recommend this one)
- Cardstock or another firm paper for backing (here’s a blush pink similar to what I used)
- Shadowbox (mine is from IKEA – it’s called the Sannahed now)
- Hot glue gun and glue sticks
- Plastic drop cloths or garbage bags to protect your work surface
- Rubber gloves (optional, alcohol ink can stain skin, but can be cleaned with rubbing alcohol)
- Cardboard box (optional, for spraying the shells)

Eggshell Art Tutorial:
- Clean the shells, peeling off as much of the membrane as possible so the shells are bare.
- Let eggshells dry thoroughly.
- Trim the edges by breaking little pieces off (optional step for aesthetics).
- Drop on alcohol ink and swirl it around, or use a small brush to apply a tiny amount.
- Paint your “canvases” with brushes or gravity – see tips below.
How do You Prepare Eggshells for Art?
To prepared eggshells for art, first clean and dry the egg shells. It’s easiest to clean egg shells when they’ve just been cracked/emptied because they can dry out quickly and then membrane hardens and becomes more difficult to remove. While the egg shells are fresh, rinse them under warm water and use your fingers to peel off the inner membrane as best you can. The membrane will impede the alcohol ink – you want the egg shells are bare as possible. Rinse under warm water and let air dry. I suggest saving them up for awhile because once you get started you’ll want to paint a lot of them! And also some will break by accident, so it’s nice to have lots of extras on hand. After washing the eggshells, I trimmed the edges of some to create a flatter surface or to make them more regular. Basically I just worked around the edge, breaking little pieces off. This step is optional.

How to Paint Egg Shells:
To paint the egg shells, I covered a work surface and put on a pair of rubber gloves (except for when I took photos, lol). Then I added a drop of ink inside an egg shell and swirled it around. I found that using only a couple of colors kept the egg shell canvas from becoming too muddied. To create a lighter look, I added a drop of alcohol/alcohol ink blending solution or Pearl metallic alcohol ink and swirled it around.


Tips for Painting Eggshells:
To get a really airy look, I pour a few drops of alcohol ink into an old ice cube tray and then use a small artist’s paint brush to apply a tiny speck of color. Then I just played! I tried painting on a stripe of glittery nail polish (so pretty!), adding in deeper alcohol ink colors. I also tried letting the color sit more, or moving it around the surface more. I also blew on the inks to move them around, or swirled the egg shell itself. I let some dry and then went over them with shimmery nail polish or metallic alcohol ink.


How to Seal Eggshells for Art:
When I was done painting my egg shells, I set them aside to dry overnight. Then I placed them inside an empty cardboard box, painted side up. I sprayed them lightly with my sealant. Then I flipped them over right away, to prevent the sealant from pooling at the bottom of the egg shells, and then I sprayed the backs. I let them dry overnight. This is what I used, but see the supply list for other suggestions:

How to Frame Eggshell Art:
I grabbed a piece of shell pink cardstock and placed it inside the mat that came with my IKEA shadowbox frame. I wanted the egg shells to look like they were going to spill out onto the matting, so that’s why I placed it inside the mat first. Then I dry fit the placement before gluing the egg shells in place, with my hot glue gun, and putting my frame back together. I played around with different arrangements until I found one I liked! You can also use different backgrounds: I’ve since made more eggshell art wallpaper samples are a fun way to add more texture/color to easy eggshell art.


Easy DIY Eggshell Art:
I love how this DIY egg shell art turned out! And it looks do good against my nearly black fireplace – the soft pastels really pop. I chose summery colors – mostly watery blues – so this is a really cute idea for switching up art to lend some spring or summer vibes to your decor.


Find all my alcohol ink DIY projects here:
- DIY alcohol ink art
- DIY alcohol ink note cards
- DIY alcohol ink Valentine’s Day Cards
- DIY alcohol ink Easter Cards
- DIY alcohol ink coasters
- DIY alcohol ink ornaments
- DIY alcohol ink Easter eggs
- DIY alcohol ink upcycled china
Don’t Forget to Pin For Later!

This week I’m joining some of my talented blogging friends for the Summer Seasonal Simplicity Series: DIY/Craft Project Hop. Be sure to check out all of the creative summer DIY ideas by visiting the links below.
DIY Crate Succulent Planter at The Happy Housie
Poppy and Fern Front Door Planters at Inspiration for Moms
DIY Beaded Garland at She Gave it a Go
DIY Tic Tac Toe Board Game at Modern Glam
Summer Decoupage Concrete Coasters at Tatertots and Jello
Popsicle Stick Picnic Tables at Clean & Scentsible
Summer Basket Wreath from a $3 Thrift Store Find at Confessions of a Serial DIYer
DIY Custom Hoodies for Summer Fun at Rambling Renovators
DIY Pedestal Bowl at Paint Me Pink
Dollar Store Hacks at Hallstrom Home
DIY Velvet Mushroom Cap at Life is a Party
Free 4th of July Printable at My Sweet Savannah
DIY No Sew Outdoor Tablecloth or Picnic Blanket at A Pretty Life
DIY Egg Shell Art at Dans le Lakehouse


These really are a work of art. Absolutely beautiful! XOXO
Author
Thank you so much Christy!
So pretty! Well done.
Author
Thank you so much!!
Oh this is SO unique and fun and pretty Tanya! And it’s so you. Love it!
Author
Thank you so much Jo-Anna!!
This is so beautiful Tanya! So pretty and I love the organic feel of it!
Author
Thank you so much Krista! This was such a fun hop!!
What an amazing DIY! Who would have thought egg shell would make such a stunning art display!
Author
Thank you!!!
Great work!
Author
Thank you so much!!
This is such a beautiful idea!!
Author
Thank you so much!
Beautiful DIY project. Is a brilliant idea for recycling eggshells and only someone with a creative mind like yours could come up with such an amazing idea.
Author
Thank you, you’re so sweet!