After sharing the progress in real time in Instagram stories, I’m so excited to blog about our DIY luxury vinyl tile installation – specifically, I’m showing you how to install luxury vinyl tile that requires a glue down installation method. This post is a collaboration with End of the Roll, but all thoughts and opinions are my own.

Supplies for Installing Glue Down Luxury Vinyl Tile:
- Luxury Vinyl Tiles (Shaw Quarry Infusion SA399 18″ by 18″ Tile in Coal)
- Adhesive (Mapei Ultrabond Eco 373)
- Chalk Line or Pencil
- Framing Square
- Level or Other Long, Straight Edge
- Utility Knife
- 1/16″ x 1/32″ x 1/32″ U-notch Trowel
- Floor Roller
- Damp Cloths/Paper Towels
- Mineral Spirits
- Measuring Tape
- Shop Vac

Is It Better to Glue or Float Vinyl Tile Flooring?
Although both great installation methods, from my research, a glue down vinyl floor tile (LVT) offers a bit more durability than a floating or loose lay vinyl floor tile. I was advised by the experts at my local End of the Roll that, although unlikely, a floating floor can sometimes gap, or even pop up in a high traffic area if it’s somehow caught (like by an appliance!) – and it’s more difficult to replace a damaged tile or plank with that installation method. A glue down tile, on the other hand, won’t budge but – in the event of a catastrophe – the glue can be loosened with a heat gun and individual tiles replaced. This is highly unlikely to be required, as luxury vinyl tile is very durable, but I really liked that option in my high traffic kitchen.

Does Glue Down Luxury Vinyl Tile Require a Plywood Underlayment?
When shopping for flooring, we confirmed that the glue down luxury vinyl tile we chose could be installed right over a subfloor. But when we peeled back the old vinyl sheet flooring, we discovered a nicer plywood underlayment underneath. We learned that while the subfloor could have been okay, investing in a thin plywood underlayment is a better foundation because it doesn’t have the holes and lumps that subfloor can have. We didn’t want to risk these imperfections impacting the installation, so we installed a thin plywood underlayment – click the link to find my tutorial for how to install a plywood underlayment.

Luxury Vinyl Tile Uneven Floor Problems?
If you have uneven floor problems and want to install luxury vinyl tile, look into buying a pre-mixed floor leveller and patch compound. It can help level uneven floor areas, on wood and concrete, to help ensure a perfect foundation for the tile. After installing the plywood underlayment, we followed up by applying the levelling compound along the seams with a drywall knife. Find more details on that process here.

Once we were satisfied with the evenness of the plywood underlayment, we cleaned the dust with a shop vac and followed up with a scrap of old t-shirt wrapped around a swiffer. A dark colored cloth helped to see the light dust and we could be sure that it was thoroughly cleaned.

Laying Down a Chalk Line
Before dry fitting the tiles, we laid down two intersecting chalk lines so the tiles would remain square. Well, technically one chalk line:

We found this antique chalk line with the house, and I don’t know why we still use it because it’s absolutely terrible! It spits out SO much chalk. For the second line we just used a pencil, our framing square, and a longer straight edge (we used a level). I recommend buying a functioning chalk line.

Dry Fitting the LVT Floor Tiles
The instructions for the flooring suggested we mark chalk lines on the floor, marking off the center point of the room and installing the flooring outward from there. That was a little bit of an issue for this space, for three reasons:
- We’d end up backed into corners
- The flooring wouldn’t line up nicely in some areas.
- This kitchen isn’t square shaped, so the tiles would have lined up in odd places

Instead, I focused on three main priorities:
- I didn’t want a skinny strip anywhere – especially where the new flooring met the hardwood floor
- I wanted a tile centered on the cabinet and sink, located under the kitchen window
- I wanted a full tile where the panel to the right of the fridge touched the floor

We dry fit the floor and played with a few layouts. This took a few hours, but it was worth it because I’m 100% happy with the layout of the tile. When dry fitting, pay particular attention to how the tiles will be located at the edges – you don’t want tiny little slivers anywhere, if possible. I really recommend dry fitting, as opposed to just measuring it out, because sometimes you’ll see things you didn’t visualize when mapping it out in your mind. It’s the best way to get a perfect installation.
How to Install Glue Down Luxury Vinyl Tile
Installing glue down luxury vinyl tile was really easy! In a nutshell, here is the process (but refer to adhesive manufacturer’s instructions, which can vary depending on the substrate or flooring):
- Working in small sections, apply a dollop of adhesive
- Spread it thin with the U-notch trowel (held at a 45 degree angle)
- Drop down the tile – do not slide – lining up to a chalk line or other tiles
- Apply firm, even pressure with a floor roller
- Pay careful attention to roll along the seams especially
- Remove any fresh glue residue with a damp cloth
- Allow the glue to dry (24 for light use, 72 hours for heavy use)
- Remove any dried glue with mineral spirits, cleaning with warm soapy water to remove mineral spirits

Detailed Instructions for Installing LVT
To glue down these tiles, we worked in small sections and applied a dollop of glue to the plywood underlayment, using a small putty knife to just scoop it out of the bucket.

We scraped the glue down to a thin layer using the U-notch trowel, held at a 45 degree angle.
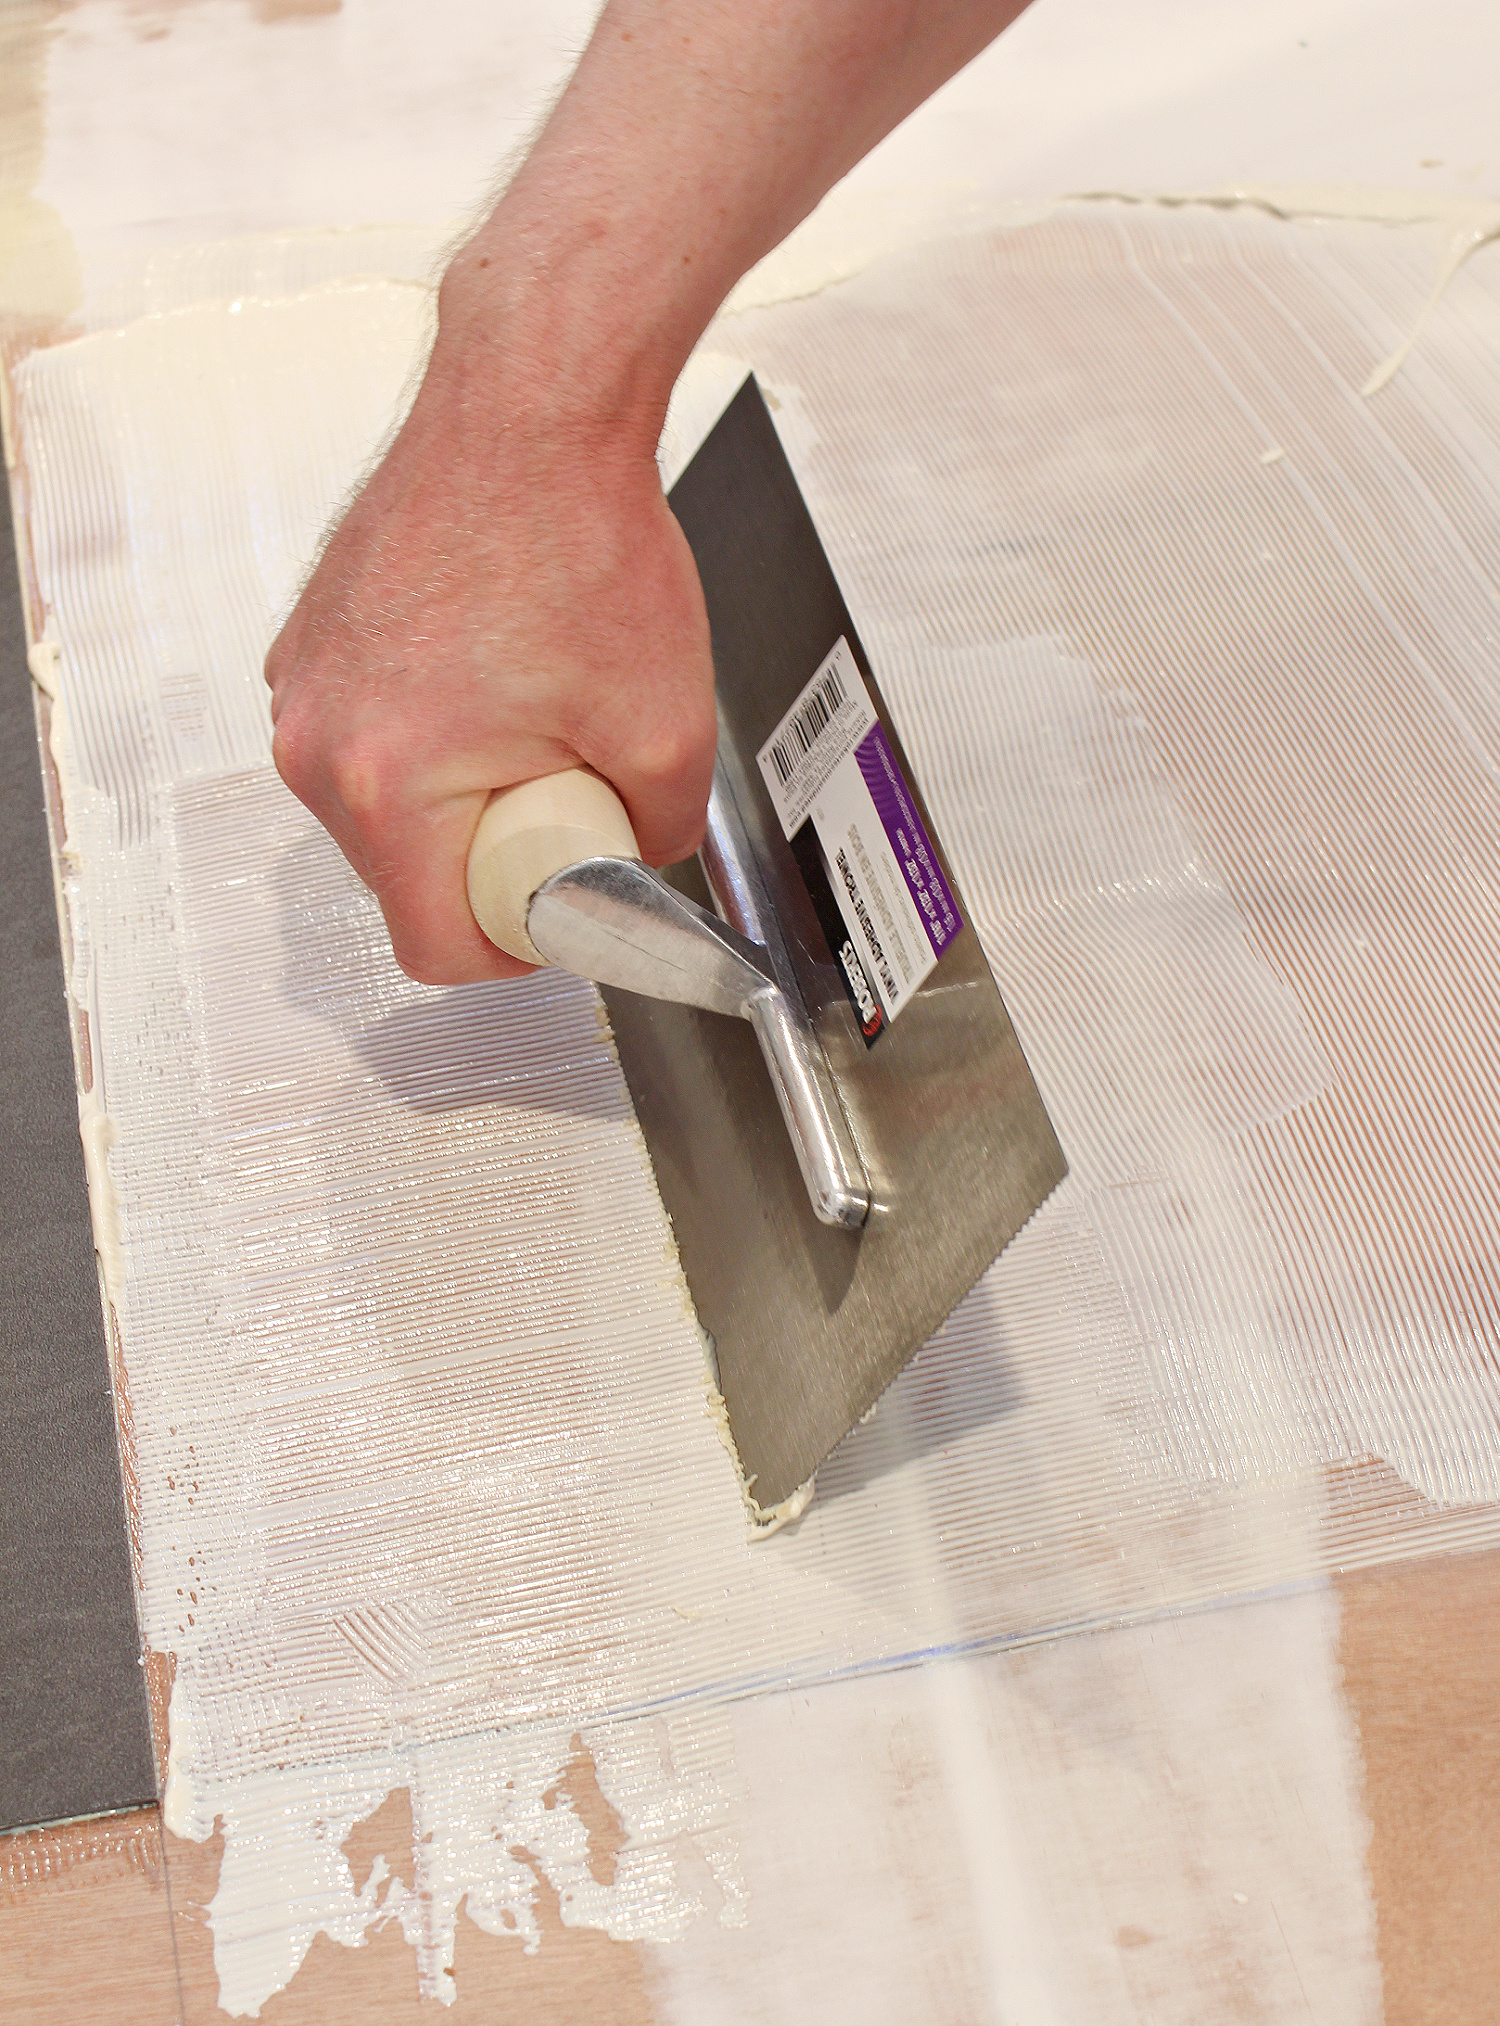
Then we applied each tile, one by one, setting it directly down (not sliding into place), so it lined up perfectly with the chalk line or other tiles, and then rolled it with the floor roller because this glue is pressure sensitive. We tried to roll in the direction of adjacent tiles to avoid pulling the tile away from other tiles as we rolled. We did this to reduce the chance of creating gaps inadvertently. We kept a bucket of warm water and paper towels/rags close at hand, so we could quickly wipe away any glue residue that squished up. This glue dries clear, but with a subtle sheen.


The glue was very forgiving and we didn’t have to rush or panic.

How to Cut Luxury Vinyl Tile
My favorite thing about this tile was how easy it was to cut! We just measured where we wanted to cut, marked a line with a pencil and framing square, and then used a utility knife to score the tile. We bent it gently along that line, then flipped it over and cut from the other side. It was really simple to make really straight and perfect cuts. We made sure to butt factory cut edges along factory cut edges – hiding any cuts we made under toe kicks, baseboard, transitions, etc.


The Luxury Vinyl Tile Adhesive We Used
The owner of my local End of the Roll recommended the Mapei Ultrabond Eco 373 Pressure-Sensitive Adhesive, which we really liked! It was easy and forgiving to use, with 12 hours working time. The trade off for this long working time was that we had to protect the flooring from light traffic for 24 hours, and then from heavy traffic for 72 hours. There are different applications depending on, for example, if the substrate is porous or non-porous, so if you use this adhesive be sure to read the instructions carefully.

How to Remove Dried Pressure Sensitive Adhesive
For this particular adhesive, we could remove excess glue with a damp cloth while we were installing the flooring. After the flooring was installed, I noticed some residue we had missed. That was easily removed with Mineral Spirits, applied with a rag (I tested it first on a scrap piece of flooring). I removed the Mineral Spirits by wiping with a soapy cloth and then following up with a dry towel. The residue was removed so easily, which was a relief!
Is Luxury Vinyl Tile Easy to Install?
Yes! This floor was so easy to install. Not including the prep work of installing the underlayment and time spent dry fitting, installing the luxury vinyl tile kitchen flooring took us approximately 8 hours. What makes it so easy is that there are no fancy tools requires to cut the tile.
Does Luxury Vinyl Tile Need Grout?
This particular luxury vinyl tile can be grouted, but we chose not to. I find grout can be difficult to keep clean, and my well water seems to discolor dark grout, so I wanted a grout-less flooring option for the kitchen. Having installed the floor, I can say it would look absolutely gorgeous with grout – especially a dark grey/black grout. Aesthetically, I almost wish I had grouted it, but from a cleaning perspective I will definitely prefer un-grouted vinyl tile.

Why Did I Choose Luxury Vinyl Tile Flooring?
Although I kept an open mind and considered other flooring, I knew right away when we started planning this kitchen renovation that I wanted luxury vinyl tile. From my experience renovating the bathroom, although I love the flooring in there, I didn’t want to have to clean more grout! We also wanted something really durable. And in terms of installation, this DIY luxury vinyl tile installation was SO much easier than installing ceramic or stone tile. I was also told by a salesperson at End of the Roll that this tile can be heated up with a heat gun, to loosen the glue, and removed – in the event of damage, etc. I liked the flexibility of a floor we could selectively replace, just in case.
Why Did I Choose End of the Roll?
When choosing flooring for the kitchen, I visited every flooring store in my city. Before I reached out to End of the Roll for a collab, I was really impressed with the selection, quality, and competitive pricing – as well as the outstanding customer service I experienced as a customer. End of the Roll locations are locally owned, and the location local to me has really knowledgeable staff, who tirelessly went through the pros and cons of different flooring options I was considering. End of the Roll carries everything, including hardwood, laminate, vinyl, stone core products, etc., but the salesperson confirmed that my choice of LVT would be a great fit for my needs and space. My End of the Roll store had an amazing selection with really modern options for hard surfaces – something other stores in my small city lacked. I genuinely had the best experience – plus End of the Roll was the only place that carried my absolute favorite flooring choice. The vinyl tile I chose reminds me of the black beach sand at my favorite nearby beach, and fit in so perfectly with my mid-century modern meets beachy kitchen design. Once I had settled on my flooring choice, I reached out to End of the Roll and was thrilled that the company agreed to collaborate with me. It’s been an absolute joy to work with them! If you’re struggling with supply chain issues right now, definitely check out your local End of the Roll to see their impressive inventory of beautiful, brand name flooring options in stock. You can walk in and walk out with the flooring you need the same day!
Stay tuned for more kitchen updates (get caught up here) – I can’t wait to show you new photos of the flooring once the toe kick and counters have been installed.
P.S. Don’t Forget to Pin for Later!


Did you have to seal the tile w clear coat or any type of water resistant sealer after the install. Jus very nervous of water getting under and causing damage to the structure I jus replaced
Author
I did not need to seal this tile. Both glue down and click vinyl flooring are supposed to be waterproof. If you go with this kind of flooring and choose to grout, then I would recommend a grout sealer. I do not believe you would have any issues with water other than in severe cases, like flooding. If you’re really concerned, you’ll probably sleep easier with something that is more like a solid sheet with fewer seams (like marmoleum or similar) or a flooring that is designed to be installed with a moisture barrier or waterproof membrane, etc.
Thank you for this clear and easy-to-follow guide. The step-by-step instructions were concise and accompanied by helpful photos. I feel like I can do this!
Author
I’m so glad that this was helpful – good luck with your flooring project 🙂
It looks really good, thanks for sharing.