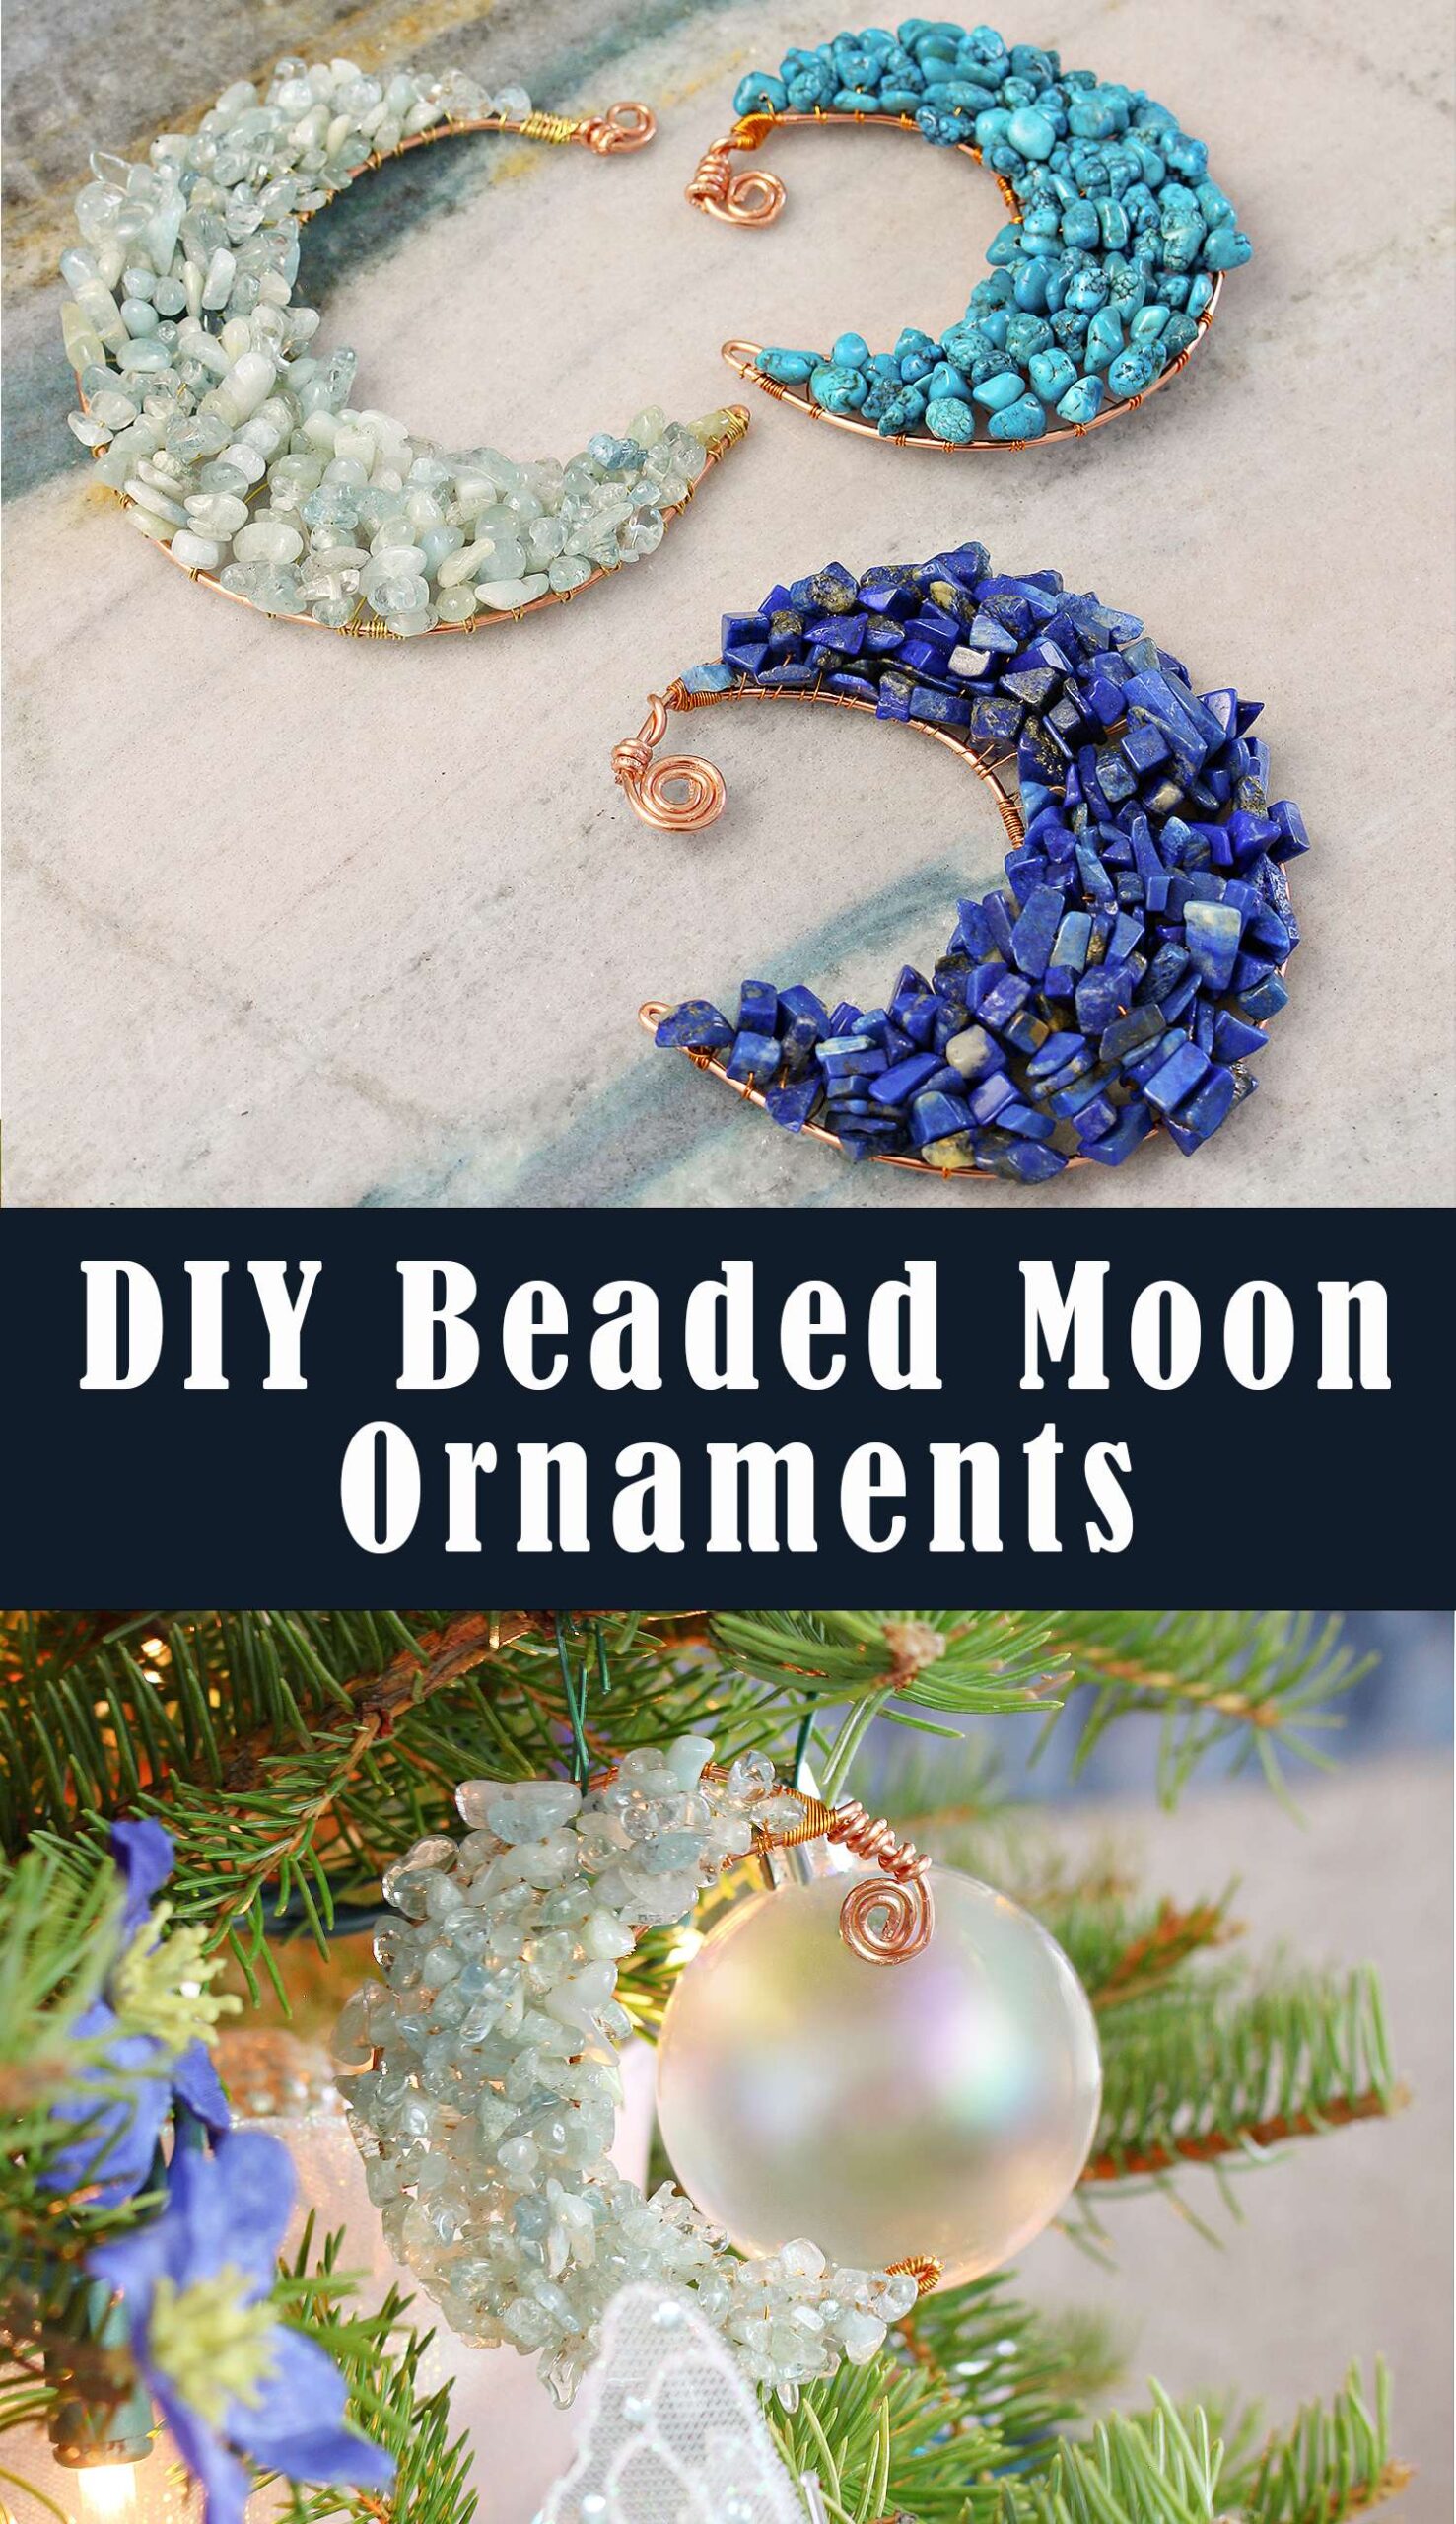
I shared a sneak peek in my Instagram stories, but couldn’t wait to show you how to make this beaded crescent moon ornament DIY. These beaded Christmas tree ornaments can really be made in any shape, but I wanted to make moons for my Mom’s a Midsummer Night’s Dream Christmas Tree Theme.

If you’re thinking this looks a bit tricky, I promise it’s pretty easy – and I even have a trick that will help you skip a step, if you prefer!

Crescent Moon Ornament DIY Supplies:
- 16 gauge wire (it comes in all different colors OR you can buy pre-made moon shapes)
- 24 gauge wire
- beads (I already had leftover gemstone chips, which work well)
- Needle nosed pliers
- Round nosed pliers (if you have them – I don’t, but the needle nosed pliers can nick the metal)
- Round jar or can to help shape the moon (optional)

How to Make a Wire Crescent Moon:
The first step is to make the “frame” of this ornament and shape the 16 gauge wire into a crescent moon shape. You can skip this step, and order pre-made metal shapes like these. If you’d like to make your own wire crescent moons, keep reading to learn how I made mine. I’ll share condensed instructions below, but then pair up the steps with photos as well. You can re-order these steps two different ways, and I’ll describe each. Basically, you just want to create a shape something like this:

First Method:
- Cut a length of 16 gauge wire, approximately 16″ long
- Take one end, and use the plier to make a little curly cue shape
- Form the wire into a circle, and wrap the remaining ending around the curly cue end
- Gentle shape the wire into a crescent moon shape
- Once the crescent moon shape looks nicely balanced, pinch the end with pliers for a pointer moon
Second Method:
- Cut a length of 16 gauge wire, approximately 16″ long
- Start to shape the circle into a crescent moon shape – using a can or jar if it helps.
- Once the crescent moon shape looks nicely balanced, pinch the end with pliers for a pointer moon
- Take one end, and use the wires to make a little curly cue shape
- Form the wire into a circle, and wrap the remaining ending around the curly cue end
Basically, with the first method you close the ends of the wire and then make the moon shape afterwards. With the second method, you make the moon shape and then deal with the ends. Either way works!
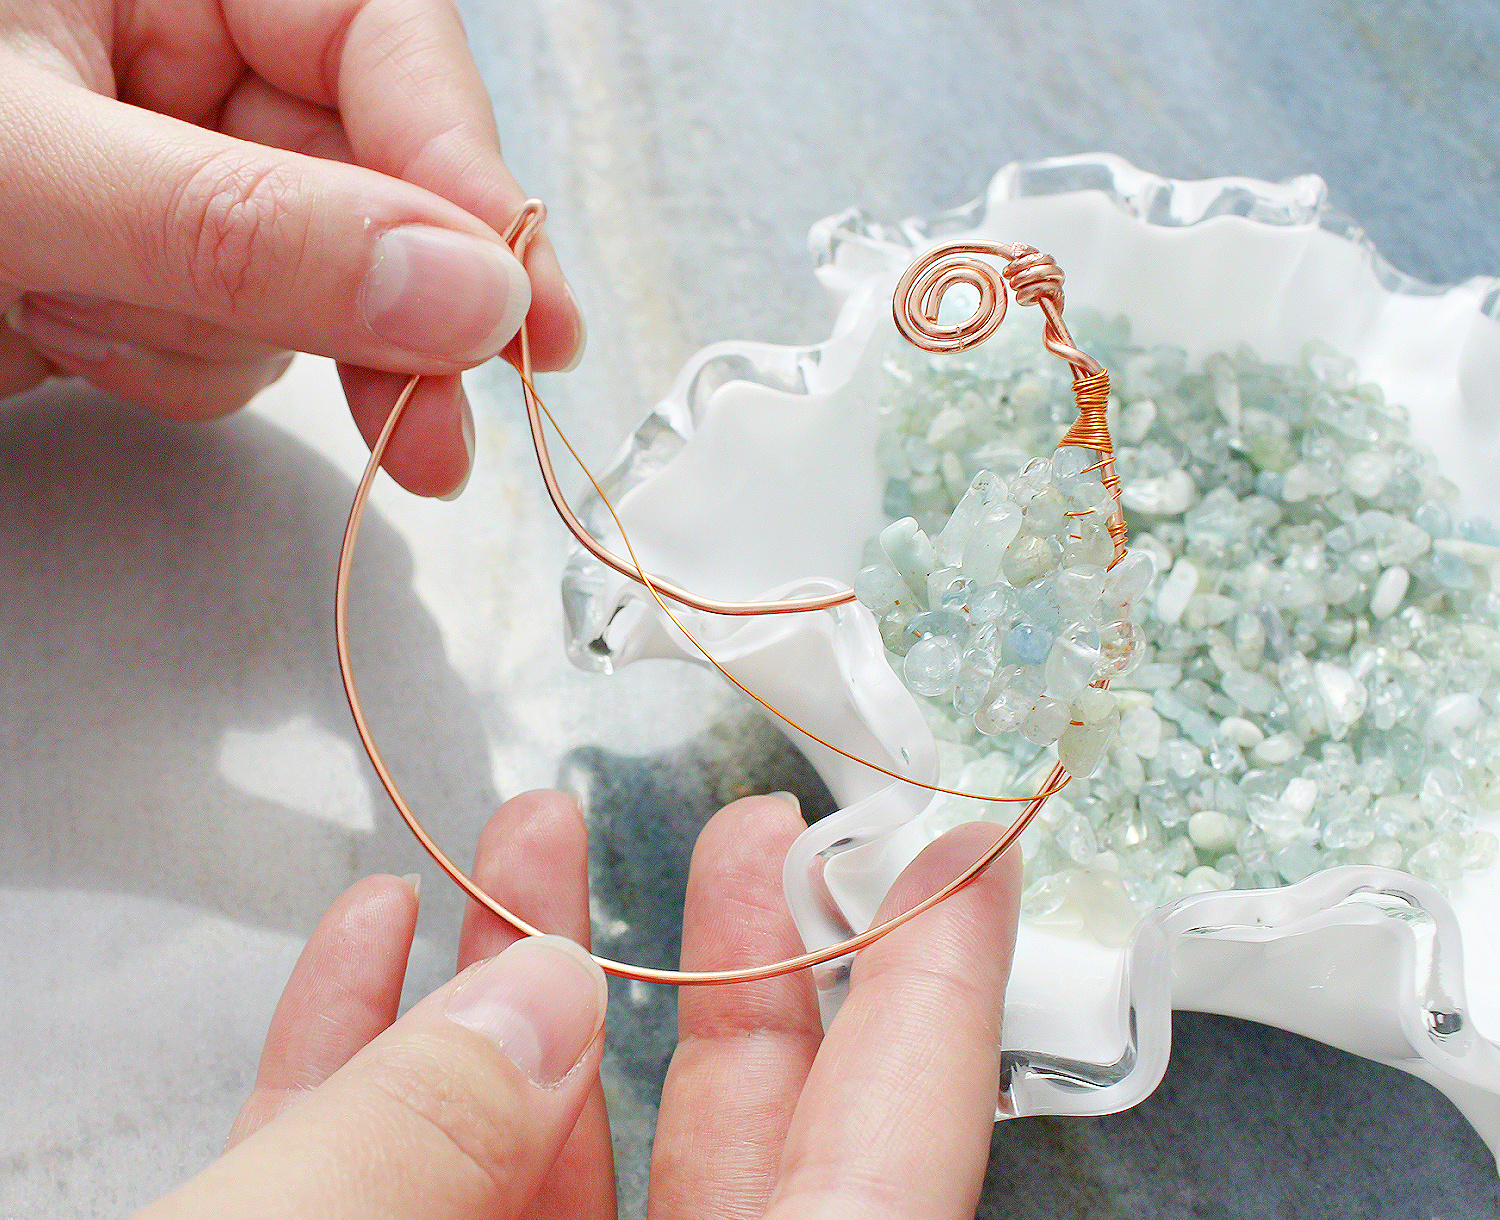
Detailed Instructions (with Photos) for How to Make a Crescent Wire Shape:
Cut a length of 16 gauge wire, approximately 16″ long. Use the pliers to finish off one end with a little curly cue – it’s not necessary, I just liked this particular way to deal with the ends. You can play with the wire and experiment, and try something else! Or even dangle a little charm or bead from the curly cue.


Form the wire into a circle, and wrap the remaining ending around the curly cue end, using the pliers:


Now start to shape the circle into a crescent moon shape – using a can or jar if it helps. Alternatively, you can START here and begin forming the crescent shape before dealing with the wire ends.

Once the wire is shaped into a crescent shape, you can detail with the ends (if you haven’t already):


Once the crescent moon shape looks nicely balanced, pinch the end with pliers for a pointer moon:

Adjust the shape again, making sure it looks like a moon and not a pierogi, lol. The finished shape should look like this(ish):

How to Wire Wrap Beads Around the Moon Shape:
With the crescent moon made (or bought), now comes the very relaxing part: wrapping the beads! I used a 24 gauge wire for this and started by anchoring the wire at one end (basically, I just wrapped it a few times so it’s secure). Then I continued wrapping the wire for a bit, until I reach a point in the crescent shape where I could fit a bead:

Then I strung on as many beads as would fit inside the frame (starting with 1, but the number increased as I went) and then wrapped the wire twice on the other side of the moon shape to anchor the strand of beads. Then I stretched the wire across the back, anchored it again by wrapping it around the wire, and strung on beads again, repeating the process.

Here are some close up photos, so you can see what the back looks like and where I’m wrapping the wire:


I just kept adding rows of beads until my crescent moon ornament DIY was complete! Then I wrapped the wire around a few times to anchor it and keeps the last row of beads from falling off. I trimmed any excess wire. I can’t wait to see what these look like on my Mom’s tree. I plan to just add a hook to the top to hang them.

P.S. Don’t Forget to Pin for Later!